
The Perfect Homemade Krispy Kremes Recipe for Sweet Tooth Joy
Crafting delectable homemade Krispy Kremes can turn an ordinary afternoon into a sweet adventure of pure delight.
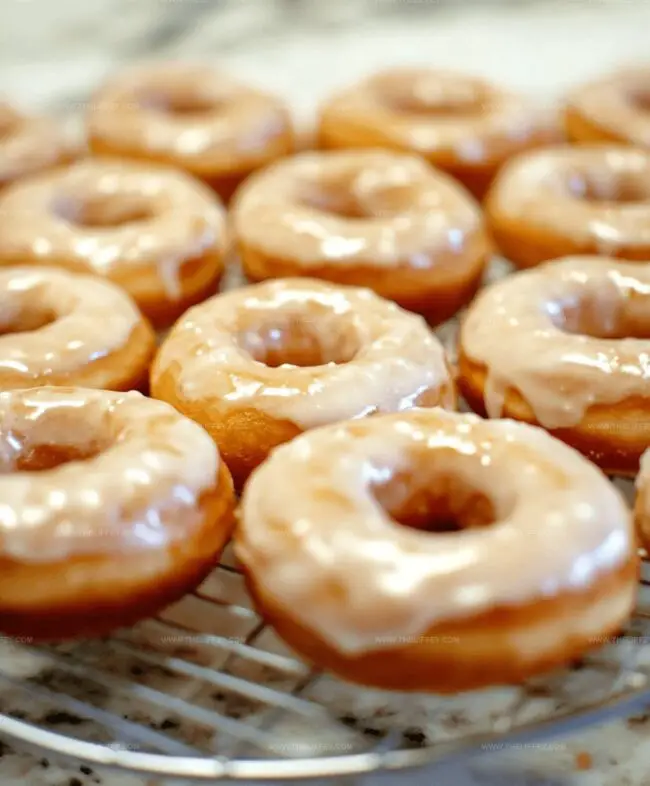
Sugar-coated memories dance through kitchens when warm donuts emerge fresh and golden.
Soft, pillowy circles tempt everyone with their irresistible charm.
Professional bakers might spend years perfecting such remarkable treats, but anyone can master this delightful recipe.
Culinary magic happens when simple ingredients combine with passion and precision.
Whisking together flour, yeast, and love creates something truly extraordinary.
You’ll want to gather your mixing bowls and embark on this delicious journey right now.
Homemade Krispy Kremes Recipe Overview
Ingredients for Homemade Krispy Kremes
Yeast Ingredients:Wet Ingredients:Dry Ingredients:Glaze Ingredients:Frying Ingredient:How to Prepare Homemade Krispy Kremes
Step 1: Activate the Yeast
Combine warm water with yeast in a spacious mixing bowl. Let the mixture sit and become frothy, watching it bubble and come to life for about 5 minutes.
Step 2: Create the Dough Base
Gather your ingredients:Blend all ingredients together until a soft, sticky dough forms. Mix thoroughly to ensure everything is well incorporated.
Step 3: Knead and Let Rise
Work the dough on a lightly floured surface, kneading vigorously for 5-7 minutes until it becomes smooth and elastic. Transfer to a greased bowl, cover with a clean kitchen towel, and let it rise in a warm spot for about an hour or until the dough doubles in size.
Step 4: Shape the Doughnuts
Roll out the puffy dough to about 1/2 inch thickness. Use a doughnut cutter or two different-sized circular cutters to create classic doughnut shapes.
Place the cut doughnuts on a baking sheet and let them rise again for 30 minutes.
Step 5: Fry to Golden Perfection
Heat oil in a deep fryer or heavy-bottomed pot to 350°F.
Carefully lower the doughnuts into the hot oil, frying each side for 1-2 minutes until they turn a beautiful golden brown.
Step 6: Drain and Prep
Remove doughnuts with a slotted spoon and place on paper towels to drain excess oil.
Allow them to cool slightly.
Step 7: Glaze with Glory
Whip up a smooth, shiny glaze and dip each warm doughnut, ensuring complete coverage.
Let the glaze set for a few minutes.
Step 8: Serve and Devour
Plate your freshly glazed doughnuts and enjoy the warm, sweet results of your baking adventure!
Helpful Notes for Homemade Krispy Kremes
Variations on Homemade Krispy Kremes
Suggested Complements for Homemade Krispy Kremes
Storage Advice for Homemade Krispy Kremes
FAQs
Test your yeast by mixing it with warm water. If it becomes foamy and bubbly within 5-10 minutes, it’s active and ready to use. If no bubbles form, the yeast might be old or expired.
Kneading develops gluten, which gives the doughnuts a soft, tender texture. Proper kneading ensures your doughnuts will be light and fluffy instead of dense and heavy.
Yes, you can prepare the dough the night before. After the first rise, cover and refrigerate overnight. Let the dough come to room temperature before rolling and cutting the next day.
Print
Ultimate Homemade Krispy Kremes Recipe
- Total Time: 1 hour 49 minutes
- Yield: 12 1x
Description
Krispy Kreme donuts bring sweet nostalgia straight to kitchens with this copycat recipe. Pillowy dough meets glazed perfection, inviting home bakers to recreate iconic bakery magic that delights you with each delectable bite.
Ingredients
Main Ingredients:
- 2 1/4 teaspoons (1 packet) active dry yeast
- 1/2 cup warm water (110°F / 43°C)
- 2 1/2 cups all-purpose flour
- 1 egg
Dairy Ingredients:
- 1/2 cup whole milk, warmed
- 1/4 cup unsalted butter, melted
- 1/4 cup granulated sugar
Frying and Seasoning:
- 1/2 teaspoon salt
- Oil for frying
Instructions
- Activate yeast in lukewarm liquid, allowing it to become frothy and aromatic for approximately 5 minutes.
- Combine dairy, lipids, protein, seasoning, and flour in a mixing vessel, creating a cohesive dough with smooth consistency.
- Manipulate dough through rhythmic kneading, developing elasticity for 5-7 minutes until texture becomes silky and uniform.
- Shield dough with cloth, permitting fermentation in warm environment for 60 minutes until volume substantially increases.
- Gently elongate dough to precise 12-inch thickness, utilizing precise cutting techniques to craft circular pastry shapes.
- Allow shaped pastries secondary proofing period, resting for half an hour to enhance volume and texture.
- Prepare deep frying station, maintaining precise petroleum temperature at 350°F (175°C) for optimal golden transformation.
- Submerge pastry shapes into heated petroleum, cooking approximately 1-2 minutes per surface until achieving rich, amber coloration.
- Transfer freshly fried delicacies onto absorbent surface to eliminate excess petroleum.
- Craft glossy coating by whisking complementary ingredients into smooth, lustrous glaze.
- Immerse warm pastries into prepared glaze, ensuring comprehensive coverage for maximum flavor and visual appeal.
- Allow glazed pastries brief resting period, permitting coating to solidify before indulgence.
Notes
- Keep yeast water precisely warm (105-110°F) to activate without killing it, ensuring perfect rising.
- Use fresh, high-quality active dry yeast for maximum doughnut fluffiness and consistent texture.
- Allow sufficient rising time in a draft-free, warm environment to develop rich, tender dough structure.
- Test oil temperature with a thermometer to prevent burning or undercooked centers during frying.
- Drain excess oil thoroughly on paper towels to maintain crispy exterior and prevent greasiness.
- Glaze doughnuts while slightly warm for optimal absorption and glossy, smooth coating.
- For gluten-free version, substitute all-purpose flour with a 1:1 gluten-free blend and add xanthan gum.
- Refrigerate dough overnight for deeper flavor development and more manageable rolling process.
- Prep Time: 1 hour 45 minutes
- Cook Time: 4 minutes
- Category: Snacks, Desserts
- Method: Frying
- Cuisine: American
Nutrition
- Serving Size: 12
- Calories: 190 kcal
- Sugar: 7 g
- Sodium: 120 mg
- Fat: 8 g
- Saturated Fat: 4.5 g
- Unsaturated Fat: 3 g
- Trans Fat: 0.1 g
- Carbohydrates: 25 g
- Fiber: 1 g
- Protein: 4 g
- Cholesterol: 30 mg
John Conley
Founder & Culinary Storyteller
Expertise
Recipe Development, Culinary Writing, Home Cooking Techniques, Seasonal Ingredient Utilization
Education
Lane Community College, Eugene, OR
Certificate in Culinary Arts
Focused on foundational cooking techniques, kitchen safety, and menu planning.
Gotham Writers Workshop, New York, NY
Course in Food Writing
Explored the art of crafting engaging culinary narratives and recipe development.
John grew up where food meant connection: big bowls, warm kitchens, and meals that told a story. After earning his Certificate in Culinary Arts from Lane Community College and diving deep into food writing at Gotham Writers Workshop, he found his calling: turning everyday recipes into something worth savoring.
At The Liffey, John’s focus is all about crafting dishes that feel easy, honest, and full of heart.