
Decadently Fudgy Chocolate Brownie Cookies Recipe
Baking these delightful chocolate brownie cookies takes just twenty mesmerizing minutes from start to delicious finish.
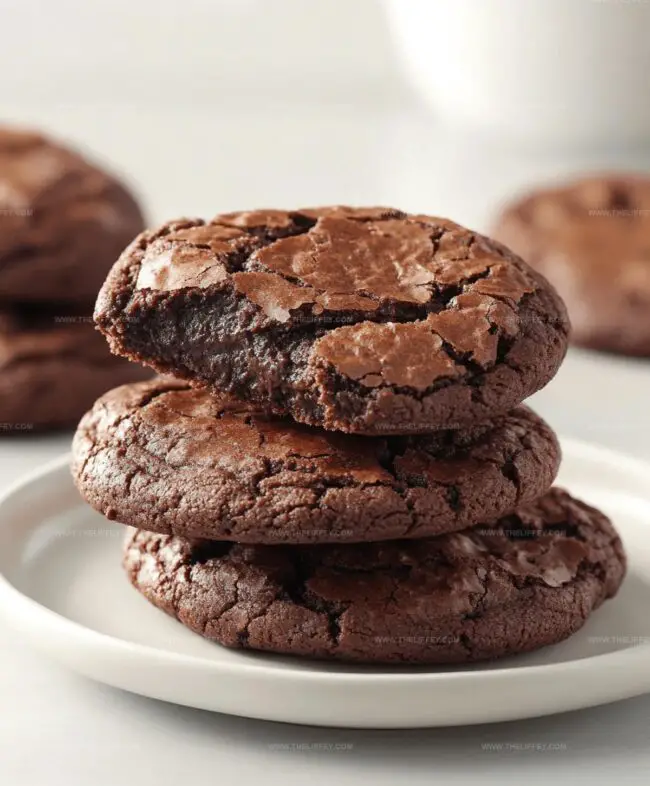
Each crispy-edged, gooey-centered morsel promises pure indulgence without complicated steps.
Chocolate lovers will swoon over the rich, intense flavor profile that emerges from simple ingredients.
Rich cocoa and melted chocolate create a decadent base that transforms ordinary cookies into extraordinary treats.
Small kitchen tools and basic pantry staples are all you need to craft these irresistible morsels.
Crisp exterior and molten interior guarantee a sensational texture that melts gloriously on your tongue.
Prepare to impress everyone with these ridiculously easy, crowd-pleasing sweet sensations.
Why 20 Minute Fudgy Brownie Cookies Rock

Ingredients For 20 Minute Fudgy Brownie Cookies
Chocolate Base:Wet Ingredients:Dry Ingredients:Optional Topping:How To Bake 20 Minute Brownie Cookies
Step 1: Prepare Baking Station
Warm up your oven to a cozy 350F. Grab a baking sheet and line it with parchment paper for easy cookie removal.
Step 2: Create Chocolate Base
In a large mixing bowl, blend together:Stir until the mixture looks silky smooth and tempting.
Step 3: Introduce Wet Ingredients
Crack in eggs and splash vanilla extract.
Mix everything until well combined and looking glossy.
Step 4: Fold in Dry Ingredients
Gently sift these ingredients over your chocolate mixture:Fold everything together with a light touch, just until the ingredients are incorporated.
Step 5: Shape Delicious Cookies
Scoop spoonfuls of batter onto your prepared baking sheet. Leave some breathing room between each cookie.
For extra chocolate lovers, sprinkle additional chocolate chips on top.
Step 6: Bake to Perfection
Slide the baking sheet into the oven.
Bake for 10-12 minutes until cookie edges look set but centers remain wonderfully soft.
Step 7: Cool and Enjoy
Transfer cookies to a wire rack and let them cool down.
Get ready to bite into the most decadent, fudgy chocolate brownie cookies ever!
Tips For Fudgy 20 Minute Brownie Cookies
Creative Spins On 20 Minute Brownie Cookies
What Goes Well With Brownie Cookies
Best Storage For 20 Minute Brownie Cookies
FAQs
These cookies have a unique fudgy brownie-like texture with crisp edges, offering the best of both dessert worlds.
Yes, you can use dark, milk, or semi-sweet chocolate based on your preference, but ensure it’s high-quality for the best flavor.
Look for set edges with slightly soft centers – they’ll continue cooking slightly after removing from the oven, which creates that perfect fudgy texture.
Sifting helps prevent lumps and ensures a smoother, more consistent cookie texture, so it’s recommended but not absolutely mandatory.
Print
Quick and Delicious Chocolate Brownie Cookies Recipe
- Total Time: 32 minutes
- Yield: 24 1x
Description
Silky chocolate brownie cookies merge classic dessert flavors into a quick, irresistible treat. Rich chocolate and crisp edges make these cookies a perfect indulgence you’ll want to savor with friends.
Ingredients
Main Chocolate Ingredients:
- 1 cup melted chocolate chips
- 1/2 cup unsweetened cocoa powder
Sugars and Wet Ingredients:
- 1 cup granulated sugar
- 1/2 cup brown sugar
- 1/2 cup unsalted butter, melted
- 2 large eggs
- 1 teaspoon vanilla extract
Dry Ingredients:
- 3/4 cup all-purpose flour
- 1/2 teaspoon baking powder
- 1/4 teaspoon salt
Instructions
- Warm the oven to 350F and prepare a baking sheet with parchment paper, ensuring even surface coverage.
- Melt chocolate and butter together, creating a glossy and smooth mixture.
- Whisk granulated and brown sugars into the melted chocolate mixture until thoroughly incorporated and silky.
- Gently fold eggs and vanilla extract into the chocolate base, blending until the mixture appears uniform and glossy.
- Carefully sift flour, cocoa powder, baking powder, and salt directly into the wet ingredients, folding gently to prevent overmixing.
- Use a cookie scoop or spoon to drop batter onto the prepared sheet, spacing cookies approximately 2 inches apart.
- Sprinkle additional chocolate chips on top of each cookie for extra decadence.
- Slide the baking sheet into the preheated oven and bake for 10-12 minutes, watching for set edges and slightly soft centers.
- Remove from oven and allow cookies to rest on the baking sheet for 2-3 minutes to firm up.
- Transfer cookies to a wire cooling rack, letting them cool completely before serving to ensure optimal texture.
Notes
- Ensure butter and chocolate are melted smoothly to create a rich, uniform base for the cookies.
- Use room temperature eggs to help them incorporate more evenly into the chocolate mixture.
- Avoid overmixing the batter to prevent tough, dense cookies; fold gently until ingredients are just combined.
- Check cookies at 10 minutes to maintain a fudgy, gooey center – they’ll continue setting as they cool.
- Prep Time: 20 minutes
- Cook Time: 12 minutes
- Category: Desserts, Snacks
- Method: Baking
- Cuisine: American
Nutrition
- Serving Size: 24
- Calories: 146 kcal
- Sugar: 12 g
- Sodium: 45 mg
- Fat: 7 g
- Saturated Fat: 4 g
- Unsaturated Fat: 3 g
- Trans Fat: 0.1 g
- Carbohydrates: 21 g
- Fiber: 2 g
- Protein: 2 g
- Cholesterol: 28 mg
John Conley
Founder & Culinary Storyteller
Expertise
Recipe Development, Culinary Writing, Home Cooking Techniques, Seasonal Ingredient Utilization
Education
Lane Community College, Eugene, OR
Certificate in Culinary Arts
Focused on foundational cooking techniques, kitchen safety, and menu planning.
Gotham Writers Workshop, New York, NY
Course in Food Writing
Explored the art of crafting engaging culinary narratives and recipe development.
John grew up where food meant connection: big bowls, warm kitchens, and meals that told a story. After earning his Certificate in Culinary Arts from Lane Community College and diving deep into food writing at Gotham Writers Workshop, he found his calling: turning everyday recipes into something worth savoring.
At The Liffey, John’s focus is all about crafting dishes that feel easy, honest, and full of heart.