Crispy Golden Pepperoni Pizza Bombs Recipe: A Fun Twist
Tucking into a classic pepperoni pizza bombs recipe always sparks memories of cozy kitchen gatherings.
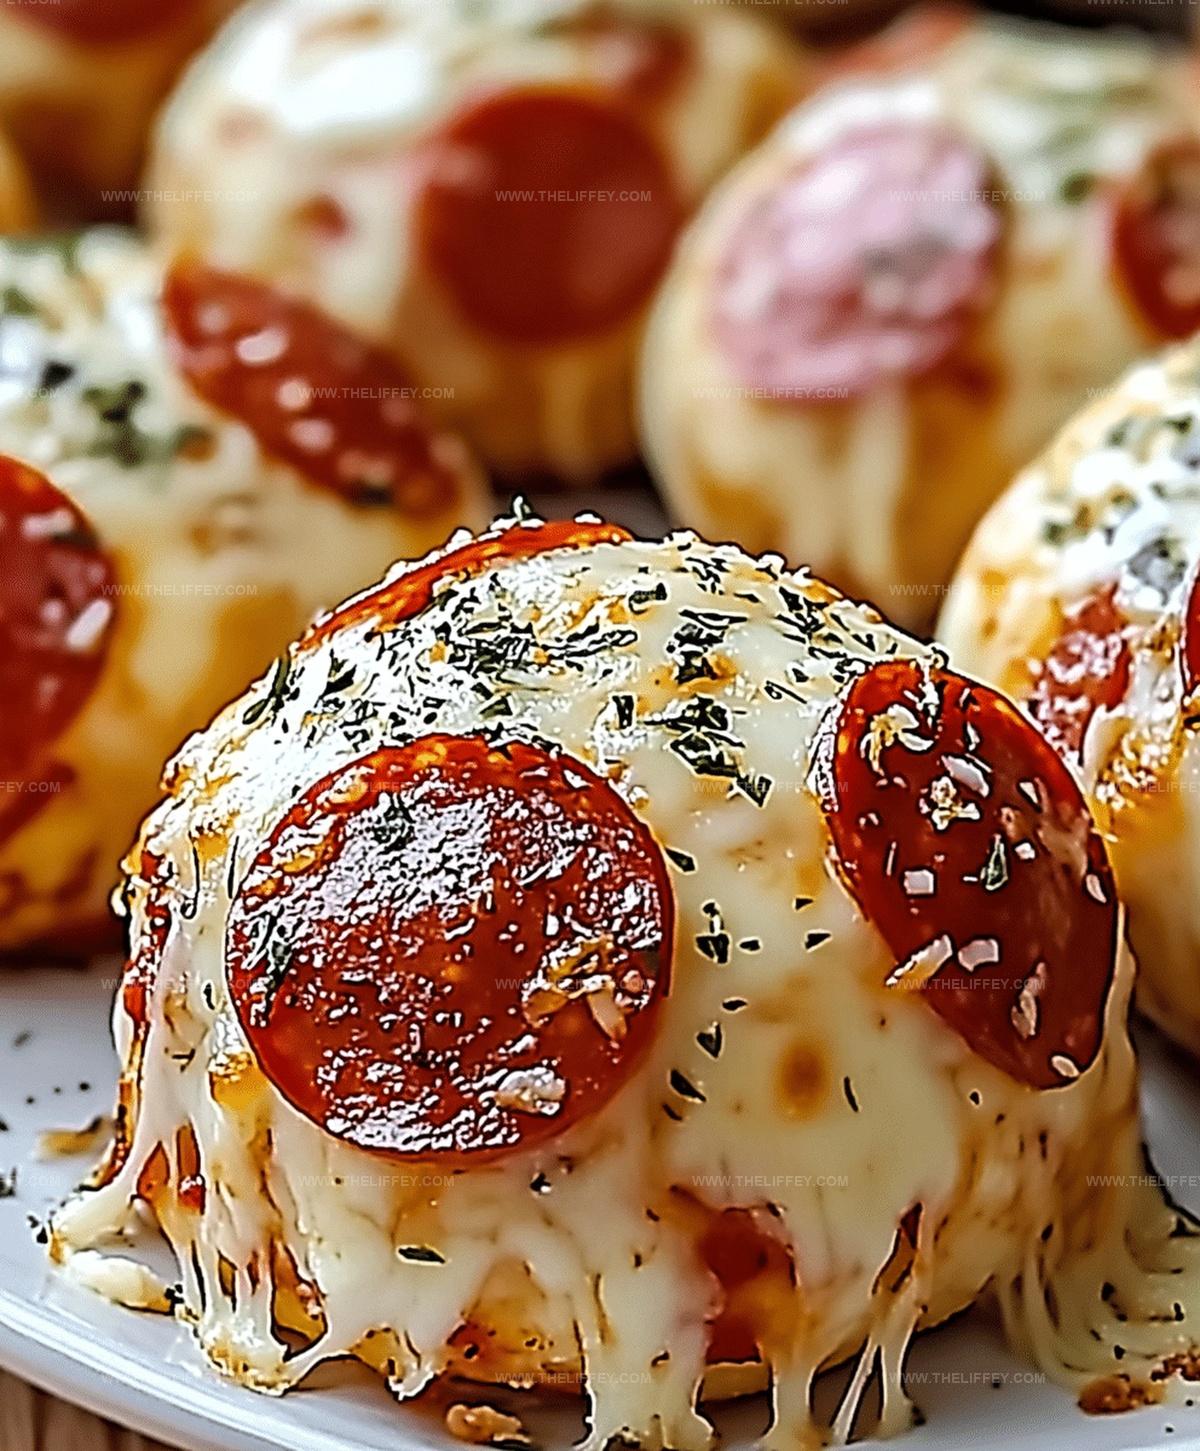
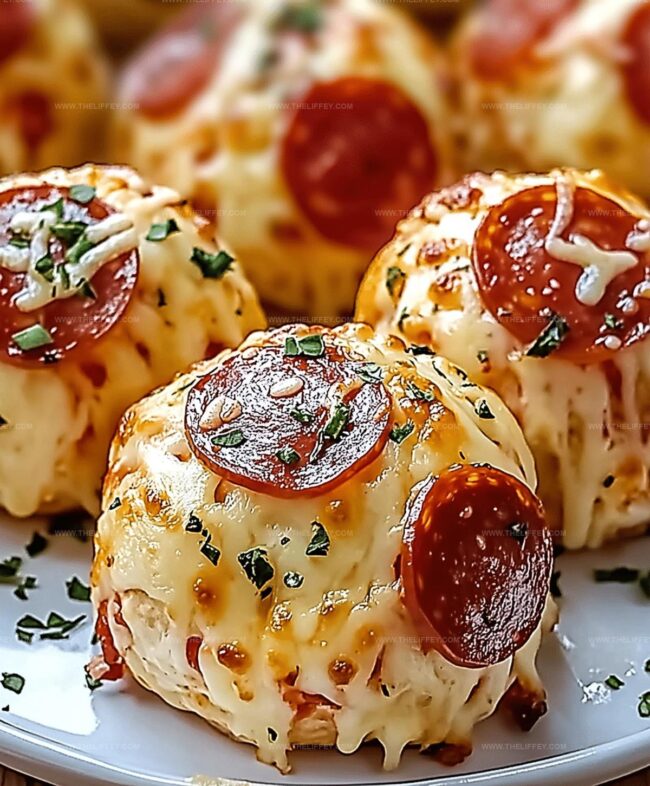
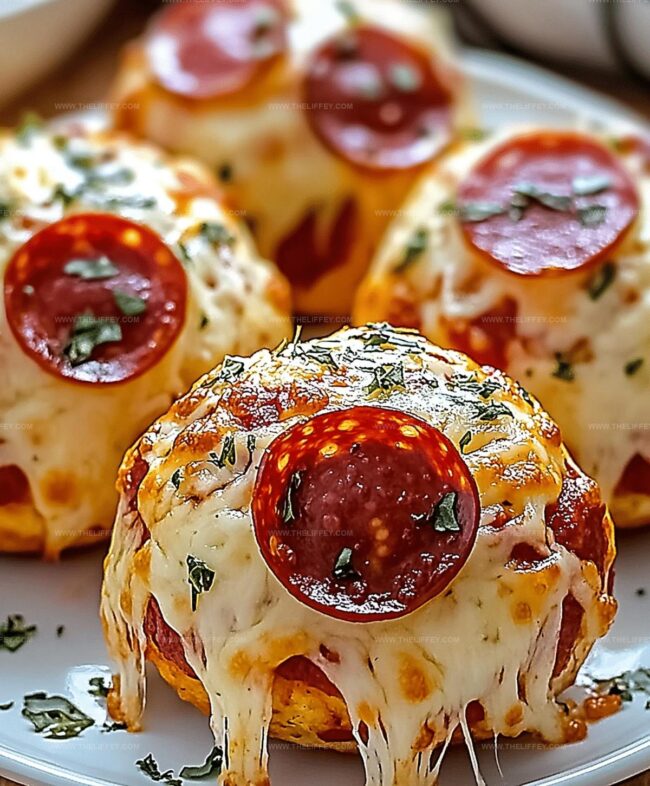
Cheese bubbles and golden edges promise delightful comfort in every bite.
Crispy exterior gives way to molten, gooey centers that surprise you with intense flavor.
Weeknight dinners become special when these little pockets of deliciousness arrive at the table.
Simple ingredients combine effortlessly, creating something far more exciting than standard pizza fare.
Minimal prep work means maximum enjoyment, letting you focus on savoring each delectable morsel.
Dive in and let these pizza bombs become your new favorite go-to snack that everyone will request again and again.
Pizza Bombs That Pop with Flavor
What’s Inside Pizza Bombs
Base Ingredients:Sauce and Seasoning Ingredients:Finishing Ingredients:Directions for Pizza Bombs
Step 1: Warm Up the Oven
Heat your oven to 375°F (190°C) and lightly grease a baking sheet with cooking spray or butter to prevent sticking.
Step 2: Prepare the Dough Base
Take each refrigerated biscuit and gently press it flat using your fingers or a rolling pin until it’s thin and wide enough to hold the fillings.
Step 3: Create Tasty Pockets
Place a dollop of marinara sauce right in the center of each flattened biscuit, keeping it away from the edges.
Step 4: Load with Delicious Toppings
Add your favorite pizza ingredients to the center of each biscuit:Step 5: Wrap and Seal the Bombs
Carefully fold the edges of the biscuit over the filling, pinching and pressing the dough together to create a complete seal.
Make sure no filling can leak out during baking.
Step 6: Arrange on Baking Sheet
Position each pizza bomb seam-side down on the prepared baking sheet, leaving some space between them for even cooking.
Step 7: Add Flavor Boosters
Brush the tops of the pizza bombs with melted butter, then sprinkle with:Step 8: Bake to Golden Perfection
Slide the baking sheet into the preheated oven and bake for 12-15 minutes until the bombs turn a beautiful golden brown color.
Step 9: Serve and Enjoy
Remove from the oven and let cool for a few minutes.
Serve warm with extra marinara sauce on the side for dipping.
Tricks for Making Pizza Bombs Work
Pizza Bombs Style Options
Serve Pizza Bombs With These Treats
Storing Pizza Bombs Made Simple
FAQs
Pizza Bombs are bite-sized appetizers made with biscuit dough stuffed with marinara sauce, mozzarella cheese, and pepperoni, then baked until golden and crispy.
Yes, you can use homemade biscuit dough, but canned biscuits provide convenience and consistent results for this recipe.
Pinch the edges firmly when sealing the dough and ensure no gaps exist. Place the bombs seam-side down on the baking sheet to help maintain their shape.
Absolutely! Kids love these handheld pizza-style snacks that are easy to eat and packed with familiar flavors they enjoy.
Print
Pepperoni Pizza Bombs Recipe
- Total Time: 30 minutes
- Yield: 8 1x
Description
Homemade pepperoni pizza bombs deliver explosive flavor in one delightful bite. Melted cheese, zesty marinara, and crisp dough create a perfect handheld meal that satisfies pizza cravings instantly.
Ingredients
Protein and Cheese:
- 16 slices pepperoni
- 1 cup mozzarella cheese, shredded
Base Ingredients:
- 1 can refrigerated biscuit dough
Seasonings and Additions:
- 1/2 teaspoon garlic powder
- 1/2 teaspoon Italian seasoning
- 2 tablespoons butter, melted
- 1/2 cup marinara sauce
Instructions
- Prepare the oven at 375F (190C) and lightly coat a baking sheet with cooking spray.
- Gently press each biscuit dough into a thin, uniform circle using your fingertips.
- Dollop a small amount of marinara sauce directly in the center of each flattened biscuit.
- Strategically position mozzarella cheese in the center, covering the marinara sauce.
- Layer pepperoni slices on top of the cheese, ensuring even distribution.
- Carefully fold the biscuit edges over the filling, creating a sealed pocket by pinching the dough together firmly.
- Arrange the sealed pizza bombs on the prepared baking sheet with the sealed side facing downward.
- Generously brush the surface of each bomb with melted butter for a golden finish.
- Sprinkle a mixture of garlic powder, Italian seasoning, and grated Parmesan cheese over the tops.
- Bake in the preheated oven for 12-15 minutes until the exterior turns a rich, golden brown color.
- Remove from oven and let cool for a few minutes before serving.
- Accompany with additional marinara sauce on the side for dipping.
Notes
- Customize the filling by swapping pepperoni with cooked ground beef, sausage, or bacon for variety.
- For a vegetarian option, replace pepperoni with roasted vegetables like bell peppers, mushrooms, or spinach.
- Ensure edges are tightly sealed to prevent cheese from leaking during baking, creating a messy baking sheet.
- Experiment with different cheese types like cheddar, provolone, or a blend for unique flavor profiles.
- Prep Time: 15 minutes
- Cook Time: 15 minutes
- Category: Lunch, Dinner, Appetizer, Snacks
- Method: Baking
- Cuisine: Italian-American
Nutrition
- Serving Size: 8
- Calories: 300 kcal
- Sugar: 3 g
- Sodium: 650 mg
- Fat: 18 g
- Saturated Fat: 7 g
- Unsaturated Fat: 9 g
- Trans Fat: 0.5 g
- Carbohydrates: 22 g
- Fiber: 1 g
- Protein: 12 g
- Cholesterol: 40 mg
Amanda Bennett
Recipe Curator & Culinary Educator
Expertise
Baking and Pastry Arts, Recipe Testing and Development, Culinary Instruction, Food Styling and Photography
Education
Asheville-Buncombe Technical Community College, Asheville, NC
Diploma in Culinary Arts
Emphasized practical cooking skills, nutrition, and kitchen management.
Cambridge School of Culinary Arts, Cambridge, MA
Certificate in Professional Pastry Arts
Specialized in baking techniques, dessert presentation, and flavor profiling
Amanda’s roots run deep in the Southern hills, where every meal started fresh from the garden and every dessert came with a story. She trained at Asheville-Buncombe Technical Community College and sharpened her pastry skills at the Cambridge School of Culinary Arts, blending classic technique with everyday charm.
At The Liffey, Amanda’s passion is making baking and home cooking feel natural and joyful. She’s all about single recipes that are simple enough for a busy afternoon, but special enough to make someone’s day a little sweeter.