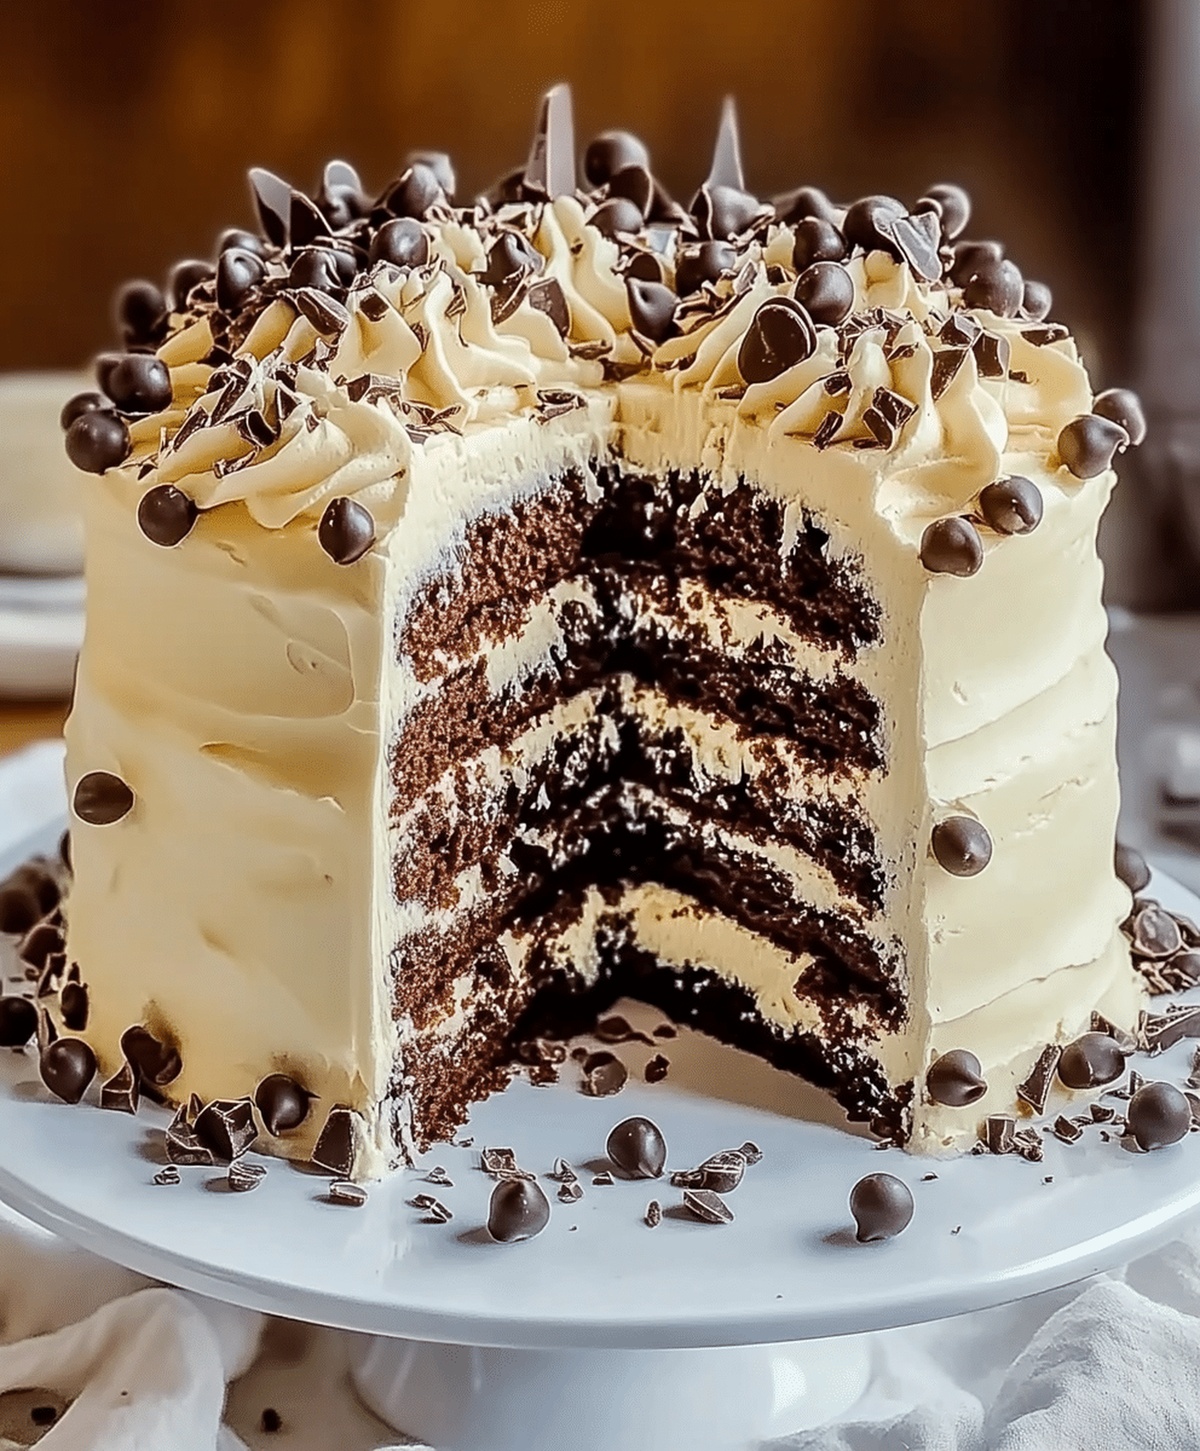
The Best Ice Crime Chocolate Overload Explosion Cake Recipe Ever
Creamy chocolate dreams meet wild indulgence in this ice cream chocolate overload explosion cake that defies dessert expectations.
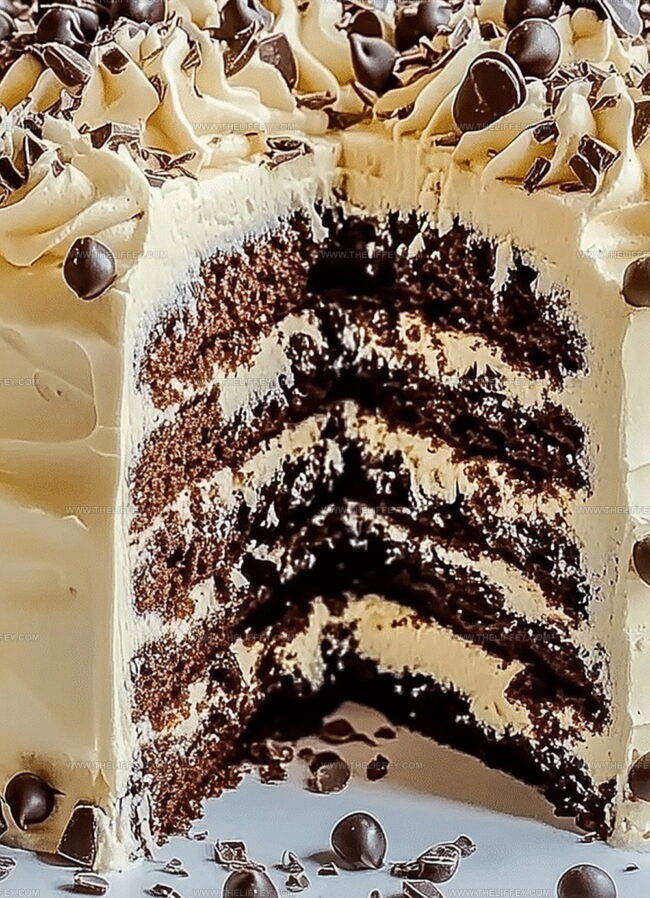
Layers of decadent richness promise an unforgettable sweet adventure.
Intense cocoa flavors mingle with cool, velvety textures that dance across your palate.
Sinful ingredients combine in a symphony of pure deliciousness, challenging traditional cake boundaries.
chocolate lovers will find themselves transported to a realm of pure bliss with every single bite.
Prepare to experience a dessert that breaks all the rules and celebrates pure, unapologetic deliciousness.
You cannot resist this epic chocolate journey.
Chocolate Explosion Cake Deep Dive
Explosion Cake Ingredient Lineup
Cake Base Ingredients:Wet Ingredients:Decoration and Finishing Ingredients:Cake Assembly Walkthrough
Step 1: Warm Up the Oven
Crank your oven to a toasty 350°F (175°C).
Grab your cake pans and give them a quick spray with cooking spray or butter them up, then dust with a light coating of flour.
Step 2: Mix Dry Ingredients
Grab a spacious mixing bowl and toss in:Whisk these dry ingredients until they’re perfectly blended.
Step 3: Combine Wet Ingredients
Pour into the dry mixture:Blend everything together until the batter looks silky smooth.
Step 4: Create Magical Batter
Pour in boiling water and stir thoroughly.
Don’t worry if the batter looks super thin – that’s exactly how it should be!
Step 5: Bake to Perfection
Divide the batter evenly between your prepared pans.
Slide them into the preheated oven and bake for 30-35 minutes.
Check doneness by inserting a toothpick – it should come out clean.
Step 6: Cool Down
Let the cake layers chill completely on a wire rack.
Patience is key here!
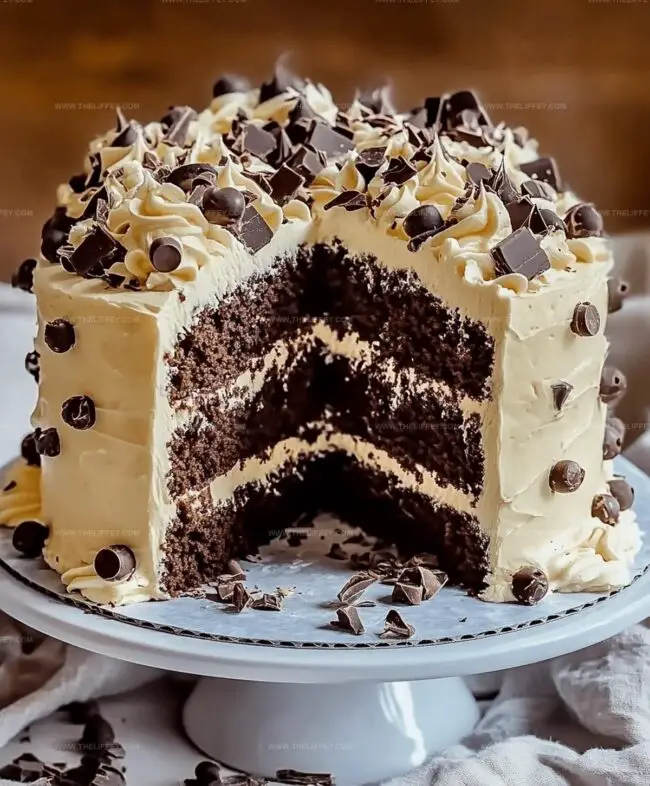
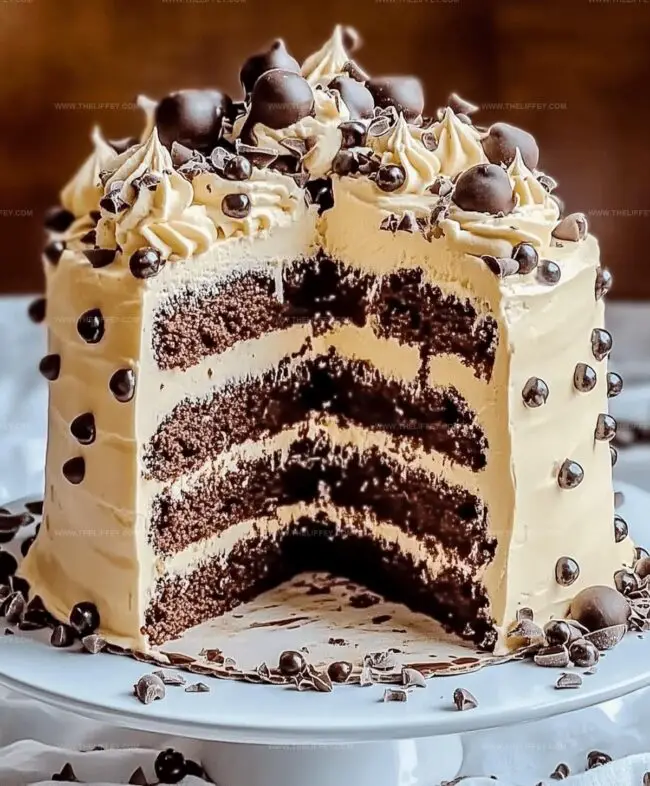
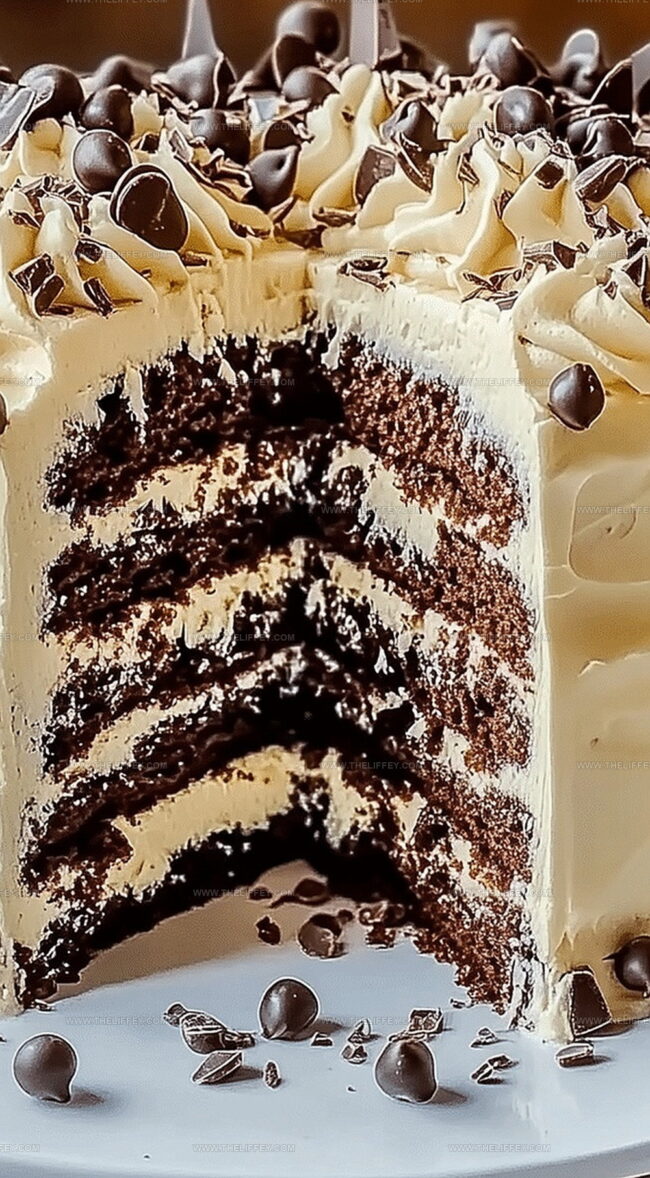
Step 7: Layer with Chocolate Frosting
Spread a generous layer of chocolate frosting on the first cake layer.
Gently place the second layer on top.
Step 8: Chocolate Ganache Glory
Cover the entire cake with rich, glossy chocolate ganache.
Let it drip dramatically down the sides.
Step 9: Decorate Like a Pro
Go wild with chocolate decorations:Step 10: Chill and Serve
Pop the cake in the refrigerator for about an hour.
This helps set the ganache and intensifies the chocolate flavor.
Slice and enjoy your chocolate explosion!
Essentials for Chocolate Explosion Cake
Makeover Ideas for Chocolate Explosion Cake
What Matches Chocolate Explosion Cake
Holding Chocolate Explosion Cake Fresh
FAQs
The batter is intentionally thin due to adding boiling water, which helps create an incredibly moist and rich chocolate cake texture that ensures a soft, tender crumb.
Boiling water helps bloom the cocoa powder, intensifying the chocolate flavor and creating a smoother, more integrated batter that results in a deeper chocolate taste and more tender cake.
When dividing the batter between cake pans, use a measuring cup or kitchen scale to guarantee equal distribution, which helps create uniform cake layers with consistent baking and texture.
Print
Ice Crime Chocolate Overload Explosion Cake Recipe
- Total Time: 55 minutes
- Yield: 12 1x
Description
Chocolate overload explosion cake delivers ultimate indulgence for serious dessert enthusiasts. Rich layers of dark chocolate, ganache, and mousse create an irresistible experience that chocolate lovers will savor completely.
Ingredients
Primary Ingredients:
- 2 cups all-purpose flour
- 2 cups granulated sugar
- 3/4 cup unsweetened cocoa powder
- 1 cup whole milk
- 1/2 cup vegetable oil
- 2 large eggs
- 1 cup boiling water
Leavening Agents:
- 2 teaspoons baking powder
- 1 1/2 teaspoons baking soda
- 1 teaspoon salt
Flavor and Decoration Ingredients:
- 2 teaspoons vanilla extract
- 1 cup chocolate chips
- 1 cup chocolate ganache
- 1 cup chocolate shavings
Instructions
- Prepare the oven to 350F (175C) and prepare two 9-inch cake pans with grease and flour coating.
- Combine dry ingredients including flour, sugar, cocoa powder, baking powder, baking soda, and salt in a spacious mixing bowl, ensuring thorough integration.
- Incorporate liquid components – milk, vegetable oil, eggs, and vanilla extract – blending until the mixture achieves a silky, uniform consistency.
- Gently fold in boiling water, creating a remarkably thin batter that promises intense chocolate richness.
- Distribute the liquid batter precisely between both cake pans, maintaining equal volume.
- Bake for 30-35 minutes in the preheated oven, checking doneness by inserting a toothpick that should emerge cleanly without wet batter.
- Allow cake layers to cool completely at room temperature, preventing structural collapse during assembly.
- Apply a generous chocolate frosting layer across the first cake base, then carefully position the second cake layer atop.
- Enrobe the entire cake structure with luxurious chocolate ganache, ensuring smooth, complete coverage.
- Embellish the cake’s exterior with an extravagant chocolate presentation – sprinkle chocolate chips, delicate shavings, crushed cookies, and drizzle additional chocolate accent.
- Refrigerate for optimal texture and flavor melding before serving this decadent chocolate masterpiece.
Notes
- Stabilize cake layers by freezing them for 30 minutes before frosting to prevent crumbling and ensure clean, smooth edges.
- Enhance moisture by brushing each cake layer with simple syrup or coffee liqueur for an extra depth of rich chocolate flavor.
- Customize texture by using different chocolate types like dark, milk, or white chocolate in ganache and decorations for varied intensity and visual appeal.
- Make gluten-free by substituting all-purpose flour with almond or gluten-free flour blend, maintaining the cake’s decadent chocolate profile.
- Prep Time: 20 minutes
- Cook Time: 35 minutes
- Category: Desserts
- Method: Baking
- Cuisine: American
Nutrition
- Serving Size: 12
- Calories: 410 kcal
- Sugar: 30 g
- Sodium: 180 mg
- Fat: 18 g
- Saturated Fat: 6 g
- Unsaturated Fat: 11 g
- Trans Fat: 0.2 g
- Carbohydrates: 55 g
- Fiber: 4 g
- Protein: 5 g
- Cholesterol: 40 mg
Amanda Bennett
Recipe Curator & Culinary Educator
Expertise
Baking and Pastry Arts, Recipe Testing and Development, Culinary Instruction, Food Styling and Photography
Education
Asheville-Buncombe Technical Community College, Asheville, NC
Diploma in Culinary Arts
Emphasized practical cooking skills, nutrition, and kitchen management.
Cambridge School of Culinary Arts, Cambridge, MA
Certificate in Professional Pastry Arts
Specialized in baking techniques, dessert presentation, and flavor profiling
Amanda’s roots run deep in the Southern hills, where every meal started fresh from the garden and every dessert came with a story. She trained at Asheville-Buncombe Technical Community College and sharpened her pastry skills at the Cambridge School of Culinary Arts, blending classic technique with everyday charm.
At The Liffey, Amanda’s passion is making baking and home cooking feel natural and joyful. She’s all about single recipes that are simple enough for a busy afternoon, but special enough to make someone’s day a little sweeter.