Zingy Homemade Sweet Chili Sauce Recipe for Flavor Lovers
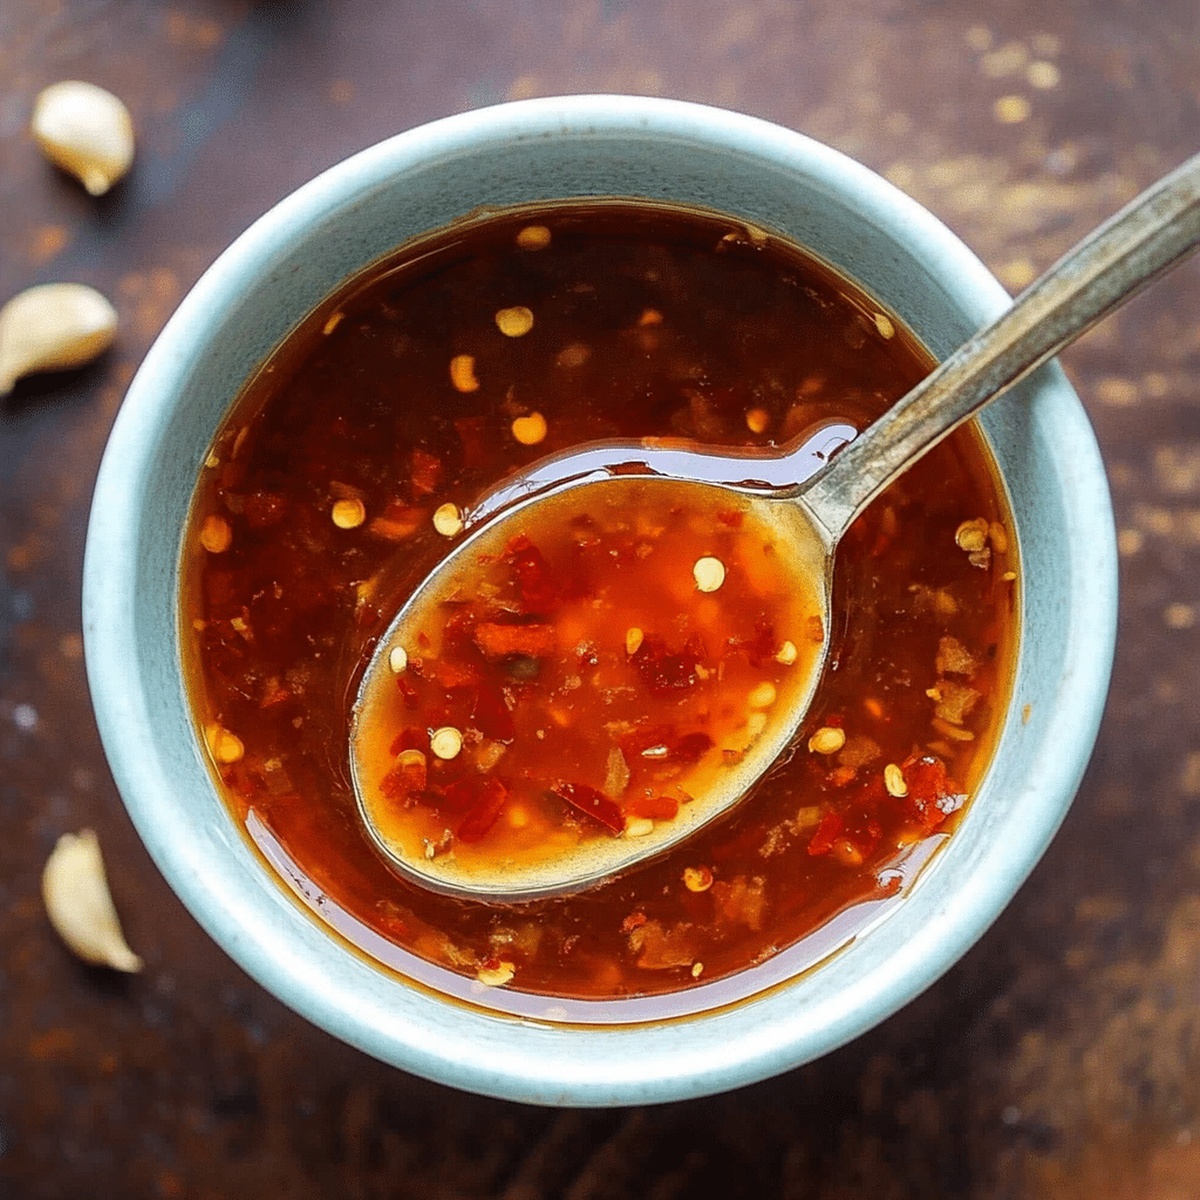
Crafting a mouthwatering homemade sweet chili sauce brings culinary magic right into your kitchen.
Vibrant colors and bold flavors dance together in this simple condiment.
Peppers, garlic, and sugar create an irresistible blend that surprises and delights.
A few basic ingredients turn an ordinary meal into something extraordinary.
Complex tastes emerge from straightforward preparation techniques.
Each spoonful carries a perfect balance of heat and sweetness.
You’ll want to drizzle this sauce on everything from grilled meats to crispy vegetables.
Easy Steps to Make Sweet Chili Sauce at Home
Step 1: Combine Base Ingredients
In a small saucepan, mix together the following ingredients:Bring the mixture to a gentle simmer over medium heat, stirring until the sugar completely dissolves.
Step 2: Develop Flavor Profile
Lower the heat and let the sauce gently bubble for 5-7 minutes.
This allows the ingredients to blend and create a rich, complex taste.
Step 3: Create Thickening Slurry
Prepare a cornstarch mixture by combining cornstarch with water in a separate small bowl.
Slowly pour this slurry into the simmering sauce, stirring continuously until the sauce reaches a smooth, slightly thick consistency.
Step 4: Enhance with Optional Ingredients
For an extra kick, consider adding:Stir thoroughly to distribute these additional flavors evenly throughout the sauce.
Step 5: Cool and Preserve
Remove the saucepan from heat and allow the sauce to cool completely.
The sauce will continue to thicken as it reaches room temperature.
Step 6: Store and Enjoy
Transfer the cooled sauce to a clean jar or bottle.
Refrigerate for up to 2 weeks, ready to add a delicious sweet and spicy touch to your favorite dishes.
Pro Tips for the Perfect Sweet Chili Sauce
Variations to Spice Up Your Sauce
Serving Suggestions for Sweet Chili Sauce
Storage Tips for Sweet Chili Sauce
FAQs
Yes, homemade sauce allows you to control sugar levels, reduce preservatives, and use fresh ingredients, making it a healthier alternative to commercial brands.
Absolutely! Increase or decrease red pepper flakes and fresh chilies to match your preferred heat tolerance. Start with small amounts and taste as you go.
White vinegar or apple cider vinegar are excellent replacements. They’ll provide similar tangy notes and help balance the sauce’s sweetness.
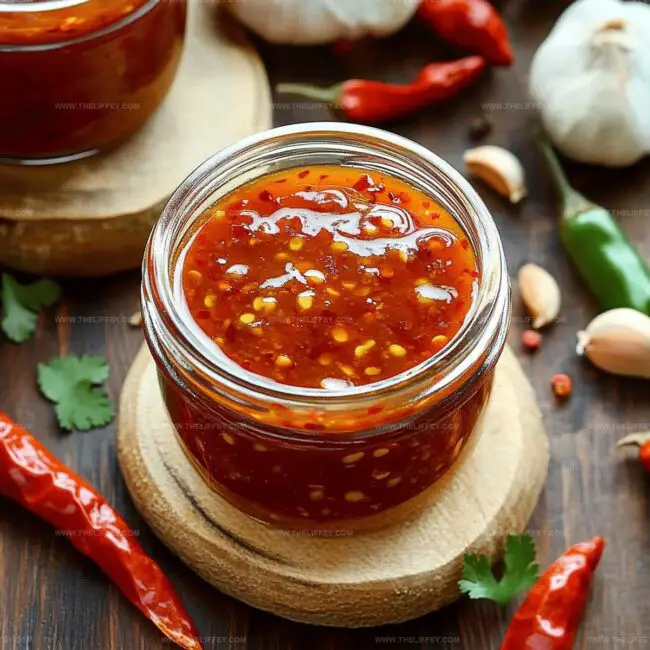
Homemade Sweet Chili Sauce Recipe for Any Dish
Ingredients for Sweet Chili Sauce
Main Ingredients:Aromatics and Flavor Enhancers:Sauce Thickeners and Binding Ingredients: Print
Homemade Sweet Chili Sauce Recipe
- Total Time: 20 minutes
- Yield: 8 1x
Description
Sweet chili sauce brings Thai-inspired zest to countless dishes with its perfect balance of heat and sweetness. Homemade preparation ensures fresh, authentic flavors you can enjoy with grilled meats, as a dipping sauce, or in marinades.
Ingredients
Peppers and Spices:
- 1 – 2 fresh red chilies, finely chopped
- 1 – 2 teaspoons red pepper flakes
- 2 – 3 cloves garlic, minced
- 1 tablespoon ginger, minced
Base Liquids and Sweeteners:
- 1/2 cup rice vinegar (or white vinegar)
- 1/2 cup water
- 1/2 cup granulated sugar
- 2 tablespoons honey
- 1 tablespoon soy sauce (or fish sauce)
- 1 tablespoon ketchup
- Lime juice (to taste)
Thickening Agent:
- 1 tablespoon cornstarch
- 2 tablespoons water
Instructions
- Combine rice vinegar, water, sugar, honey, garlic, red pepper flakes, soy sauce, and ketchup in a small saucepan over medium heat, stirring until sugar completely dissolves.
- Reduce heat to low and allow the mixture to simmer gently for 5-7 minutes, developing a rich, harmonious flavor profile.
- Create a cornstarch slurry by mixing cornstarch with water in a separate small bowl until smooth and lump-free.
- Gradually pour the cornstarch mixture into the simmering sauce, continuously stirring to prevent clumping and ensure even thickening.
- Enhance the sauce’s complexity by adding fresh red chilies, ginger, or a splash of lime juice, stirring thoroughly to distribute the additional ingredients.
- Remove the pan from heat and let the sauce cool naturally, noting that it will continue to thicken as the temperature drops.
- Transfer the cooled sauce to a sterilized glass container and refrigerate, where it will maintain its quality for approximately two weeks.
Notes
- Adjust heat levels by increasing or decreasing red pepper flakes for personalized spiciness.
- Use organic honey or alternative sweeteners like agave for different flavor profiles and dietary needs.
- Enhance sauce complexity by adding a splash of fish sauce or rice wine for deeper umami undertones.
- For gluten-free version, replace soy sauce with tamari or coconut aminos to maintain savory depth.
- Prep Time: 10 minutes
- Cook Time: 10 minutes
- Category: Appetizer, Snacks
- Method: Simmering
- Cuisine: Asian
Nutrition
- Serving Size: 8
- Calories: 57 kcal
- Sugar: 14 g
- Sodium: 280 mg
- Fat: 0 g
- Saturated Fat: 0 g
- Unsaturated Fat: 0 g
- Trans Fat: 0 g
- Carbohydrates: 15 g
- Fiber: 0.2 g
- Protein: 1 g
- Cholesterol: 0 mg
Amanda Bennett
Recipe Curator & Culinary Educator
Expertise
Baking and Pastry Arts, Recipe Testing and Development, Culinary Instruction, Food Styling and Photography
Education
Asheville-Buncombe Technical Community College, Asheville, NC
Diploma in Culinary Arts
Emphasized practical cooking skills, nutrition, and kitchen management.
Cambridge School of Culinary Arts, Cambridge, MA
Certificate in Professional Pastry Arts
Specialized in baking techniques, dessert presentation, and flavor profiling
Amanda’s roots run deep in the Southern hills, where every meal started fresh from the garden and every dessert came with a story. She trained at Asheville-Buncombe Technical Community College and sharpened her pastry skills at the Cambridge School of Culinary Arts, blending classic technique with everyday charm.
At The Liffey, Amanda’s passion is making baking and home cooking feel natural and joyful. She’s all about single recipes that are simple enough for a busy afternoon, but special enough to make someone’s day a little sweeter.