
The Spookiest Bloodshot Eyeballs Candy Recipe for Halloween
Crafting spooky Halloween bloodshot eyeballs candy will send chills down your spine and delight every ghoulish guest at your party.
Creepy confections like these transform ordinary dessert tables into horror movie sets.
Sweet white chocolate coatings create eerie surfaces mimicking realistic eyeball textures.
Scary details emerge through carefully placed food coloring and clever decorating techniques.
Edible ingredients guarantee maximum shock value without compromising deliciousness.
Kids and adults alike will scream with excitement over these wickedly fun treats.
Dare you master this haunting recipe and become the ultimate Halloween dessert champion?
Halloween Bloodshot Eyeballs Candy: A Spooky Treat
Ingredients for Halloween Bloodshot Eyeballs Candy
Candy Base:Decoration Ingredients:Finishing Touches:Crafting Halloween Bloodshot Eyeballs Candy Step by Step
Step 1: Prepare Melting Station
Set up a double boiler or microwave-safe bowl to melt white chocolate or candy melts smoothly.
Break the chocolate into even pieces to ensure quick and uniform melting.
Step 2: Dunk Marshmallows
Carefully submerge each marshmallow into the melted white chocolate, using a fork or dipping tool to completely coat the surface.
Gently tap off excess chocolate and place on a parchment-lined baking sheet.
Step 3: Create Bloodshot Effect
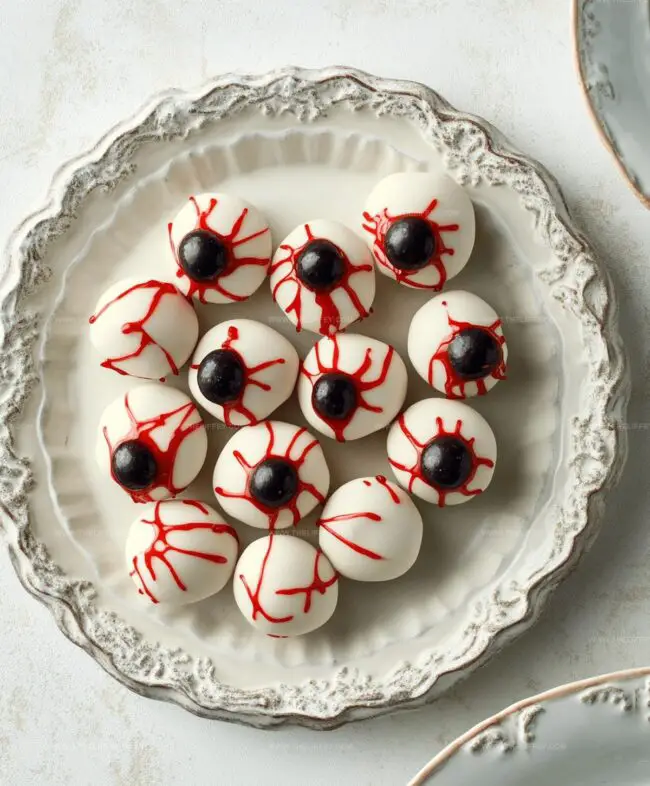
After the white chocolate coating hardens, use red food coloring gel or a fine-tipped edible marker to draw wispy, irregular red veins across the marshmallow surface.
Create realistic, slightly chaotic lines to mimic bloodshot eye appearance.
Step 4: Add Pupil Details
Select your pupil materials:Use a tiny drop of corn syrup or edible adhesive to secure the pupil precisely in the center of each marshmallow eyeball.
Step 5: Allow Final Setting
Place the completed eyeball candies in a cool, dry area to completely set and solidify.
Refrigerate briefly to speed up the hardening process if desired.
Store in an airtight container until ready to serve at your Halloween gathering.
Expert Tips for Halloween Bloodshot Eyeballs Candy
Creative Twists on Halloween Bloodshot Eyeballs Candy
Serving and Presentation Ideas for Halloween Bloodshot Eyeballs Candy
How to Store Halloween Bloodshot Eyeballs Candy Properly
FAQs
No, just basic kitchen tools like a microwave or double boiler for melting chocolate, and a food-safe brush or marker for details.
Absolutely! Kids can help dip marshmallows and add red veins, but an adult should handle the melting chocolate step for safety.
Use a thin paintbrush or food-safe marker with red food coloring gel to draw squiggly, uneven lines that mimic bloodshot veins.
Use black decorating candies, black royal icing, or even a dot of dark chocolate as an alternative for creating realistic pupils.
Print
Halloween Bloodshot Eyeballs Candy Recipe
- Total Time: 35 minutes
- Yield: 12 1x
Description
Spooky halloween bloodshot eyeballs candy delights horror movie fans with ghoulish treats. Creamy white chocolate and red icing create eerily realistic edible eyeballs perfect for seasonal parties.
Ingredients
Candy Base:
- 20 large marshmallows
- 12 ounces (340 grams) white chocolate or candy melts
Decoration Elements:
- 1 teaspoon red food coloring gel
- 20 mini chocolate chips or black candies
Binding Ingredient:
- 2 tablespoons corn syrup or edible adhesive
Instructions
- Gently liquify white chocolate or candy melts in a microwave-safe bowl, stirring every 15 seconds to prevent scorching.
- Completely immerse each marshmallow into the melted white coating, using a fork to lift and allow excess chocolate to drip off.
- Position dipped marshmallows on a parchment-lined tray and refrigerate for 10-15 minutes until chocolate hardens completely.
- With precision, use vibrant red food coloring gel to meticulously draw intricate, web-like veins across the white surface, creating a realistic bloodshot appearance.
- Select miniature chocolate chips or dark round candies to represent pupils, carefully positioning them at the marshmallow’s center.
- Apply a minuscule drop of corn syrup or edible adhesive to secure the pupils firmly in place.
- Return the decorated eyeballs to the refrigerator for an additional 5 minutes to ensure everything sets perfectly.
- Display on a festive Halloween platter and serve chilled for maximum spine-chilling effect.
Notes
- Ensure chocolate is smoothly melted at low heat to prevent burning or seizing, creating a perfect glossy coating for marshmallows.
- Use a toothpick or dipping tool for precise marshmallow coating, allowing excess chocolate to drip off for an even, thin layer.
- Create realistic bloodshot effect by carefully drawing thin, slightly jagged red lines with food coloring gel, mimicking realistic eye veins.
- For dietary variations, substitute marshmallows with vegan marshmallows or gluten-free alternatives to accommodate different dietary needs while maintaining the spooky Halloween theme.
- Prep Time: 15 minutes
- Cook Time: 20 minutes
- Category: Snacks, Desserts
- Method: Melting
- Cuisine: American
Nutrition
- Serving Size: 12
- Calories: 80 kcal
- Sugar: 12 g
- Sodium: 15 mg
- Fat: 2 g
- Saturated Fat: 1.5 g
- Unsaturated Fat: 0.4 g
- Trans Fat: 0 g
- Carbohydrates: 14 g
- Fiber: 0 g
- Protein: 0.3 g
- Cholesterol: 2 mg
Amanda Bennett
Recipe Curator & Culinary Educator
Expertise
Baking and Pastry Arts, Recipe Testing and Development, Culinary Instruction, Food Styling and Photography
Education
Asheville-Buncombe Technical Community College, Asheville, NC
Diploma in Culinary Arts
Emphasized practical cooking skills, nutrition, and kitchen management.
Cambridge School of Culinary Arts, Cambridge, MA
Certificate in Professional Pastry Arts
Specialized in baking techniques, dessert presentation, and flavor profiling
Amanda’s roots run deep in the Southern hills, where every meal started fresh from the garden and every dessert came with a story. She trained at Asheville-Buncombe Technical Community College and sharpened her pastry skills at the Cambridge School of Culinary Arts, blending classic technique with everyday charm.
At The Liffey, Amanda’s passion is making baking and home cooking feel natural and joyful. She’s all about single recipes that are simple enough for a busy afternoon, but special enough to make someone’s day a little sweeter.