
Juicy Garlic Parmesan Cheeseburger Bombs Recipe for Dinner Fun
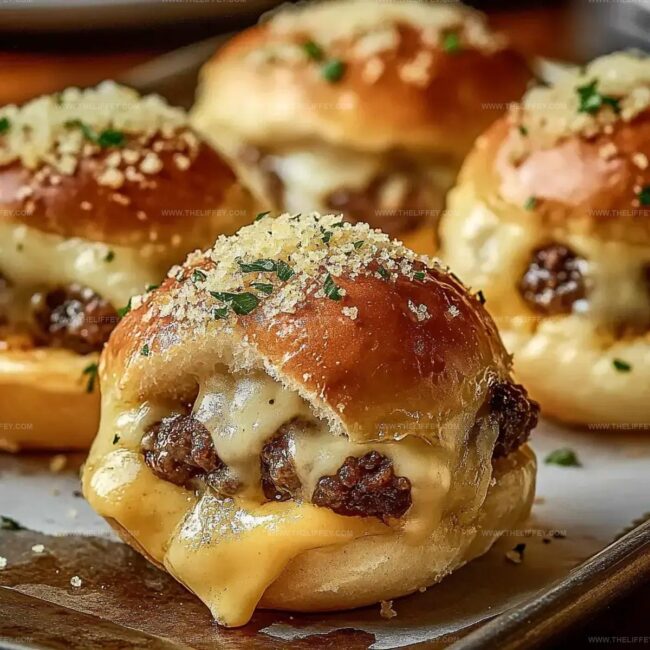
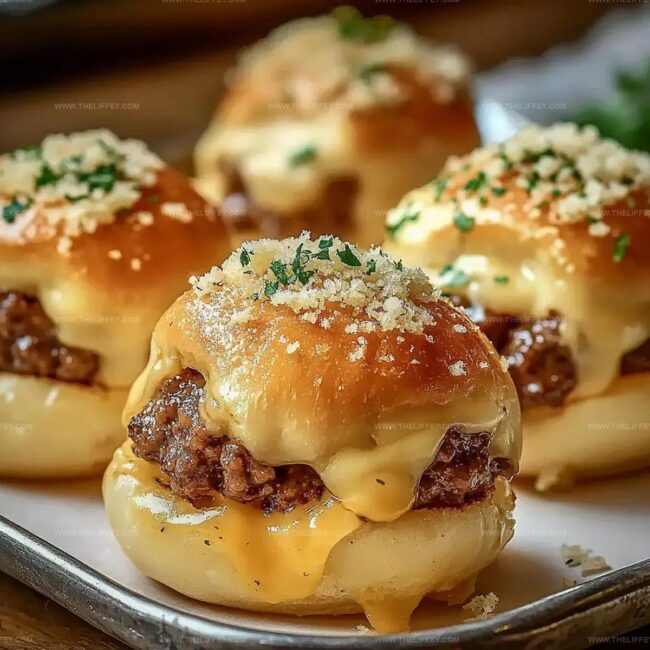
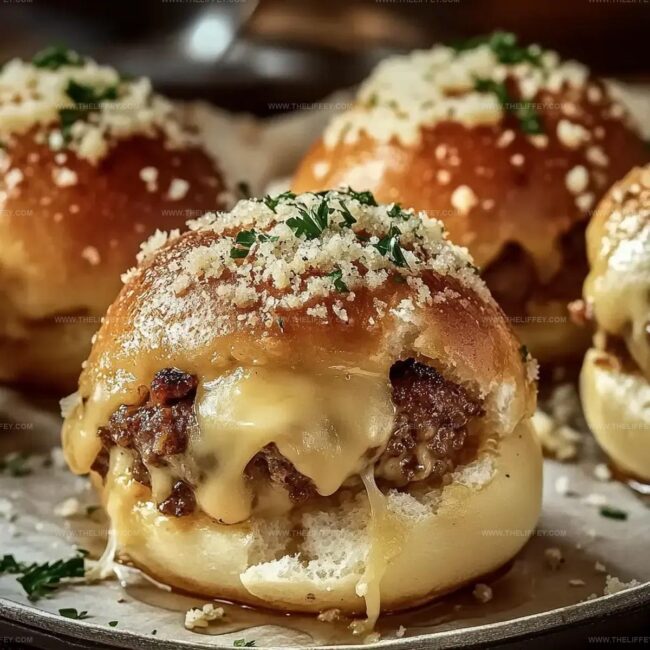
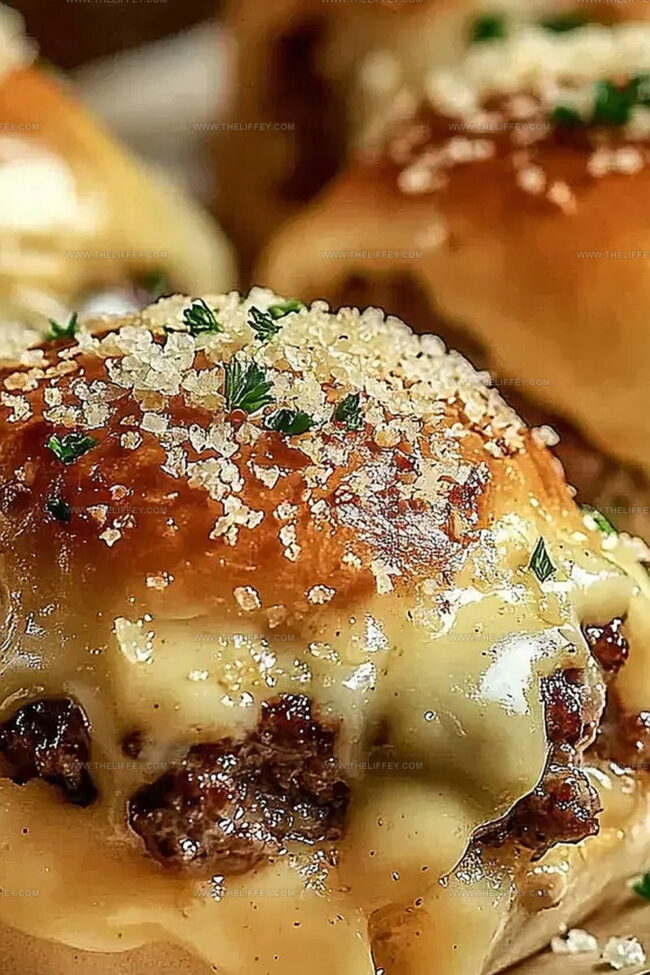
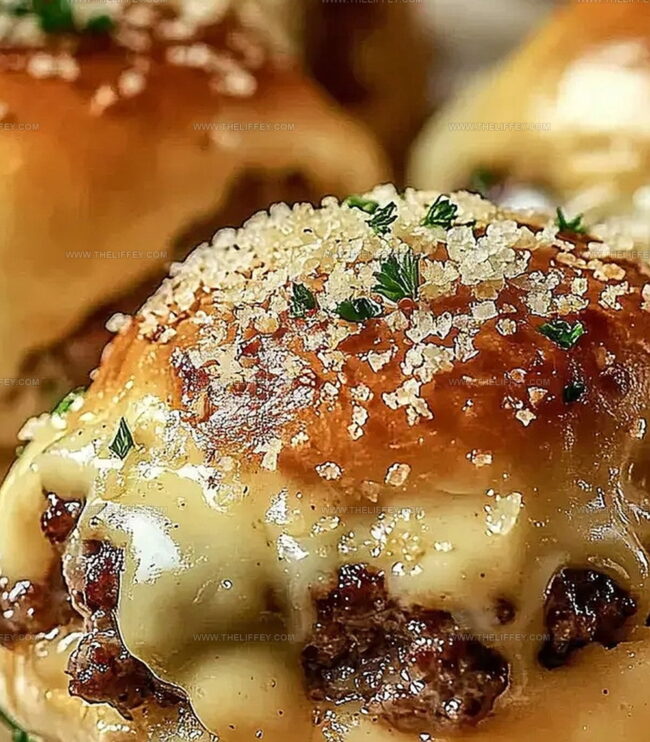
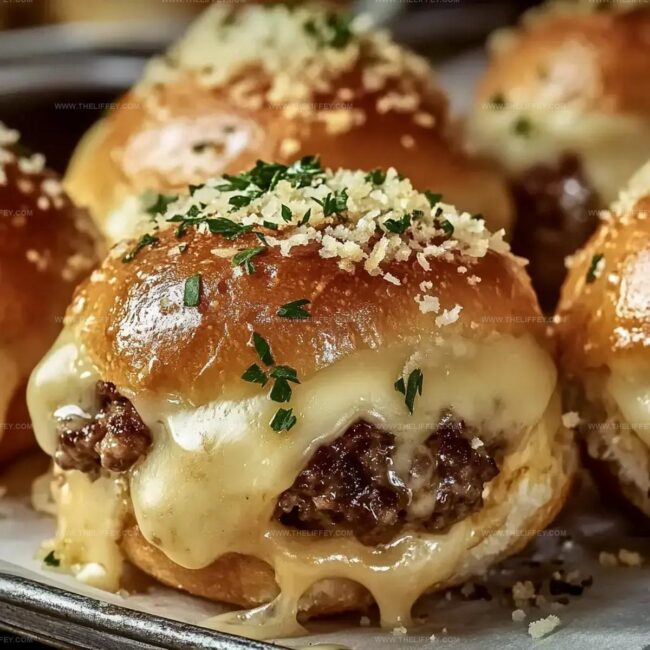
Crispy golden shells packed with molten cheese and savory garlic parmesan cheeseburger bombs promise an explosion of flavor in every bite.
These handheld delights blend classic burger elements into an irresistible appetizer that sparks conversation at any gathering.
Melted cheese oozes from tender meat nestled within a perfectly crisp exterior.
Each bomb delivers a burst of rich, meaty goodness that tantalizes taste buds.
The combination of garlic, parmesan, and seasoned ground beef creates a mouthwatering experience you won’t soon forget.
Simple ingredients transform into a culinary sensation that elevates casual dining.
Prepare to become the star of your next potluck or game day spread with these addictive little flavor bombs.
Garlic Parmesan Cheeseburger Bombs Flavorful Bites
Ingredients for Garlic Parmesan Cheeseburger Bombs
Main Ingredients:Seasoning and Aromatics:Finishing Ingredients:Steps for Cheeseburger Bombs at Home
Step 1: Fire Up The Oven
Crank your oven to a toasty 375°F.
Grab a skillet and cook ground beef with minced garlic until it’s beautifully browned.
Drain away any excess fat to keep things lean and delicious.
Step 2: Create Cheesy Magic
Blend your cooked beef with a generous mix of cheesy goodness:Stir everything together until the cheese melts and coats the meat perfectly.
Step 3: Wrap And Seal The Flavor Bombs
Take each biscuit and gently press it flat with your hands.
Spoon the cheesy beef mixture into the center of each biscuit.
Carefully fold the edges, pinching and sealing completely to prevent any leaks during baking.
Step 4: Prepare For Baking Brilliance
Line a baking sheet with parchment paper.
Place your sealed flavor bombs on the sheet.
Brush the tops with melted butter to create a golden, crispy exterior.
Step 5: Bake To Perfection
Slide the baking sheet into the preheated oven.
Bake for 12-15 minutes until the biscuits turn a gorgeous golden brown color.
Step 6: Serve And Enjoy
Let the bites cool for a few minutes.
Sprinkle fresh chopped parsley on top for a pop of color and extra flavor.
Serve these hot and watch everyone’s eyes light up!
Tips for the Best Cheeseburger Bombs
Creative Bomb Variations for Garlic Parmesan Fans
Cheeseburger Bombs Serving Inspiration
Storage Advice for Garlic Parmesan Bombs
FAQs
You can swap ground beef with ground turkey or chicken. Use different cheese varieties like mozzarella or monterey jack if preferred.
Ensure edges are completely sealed by pinching and folding carefully. Press firmly around edges to create a tight closure before baking.
Yes! Prepare and assemble bombs up to 24 hours in advance. Store covered in refrigerator and bake when ready to serve. Add 2-3 extra minutes to baking time if cooking directly from cold.
Absolutely! Kids love handheld food and these are packed with familiar flavors. The cheese and meat combination makes them appealing to children and adults alike.
Print
Garlic Parmesan Cheeseburger Bombs Recipe
- Total Time: 35 minutes
- Yield: 4 1x
Description
Garlic parmesan cheeseburger bombs explode with savory goodness, delivering a mouthwatering twist on classic burger flavors. Melted cheese, seasoned ground beef, and golden crispy edges make these handheld delights irresistible for you to devour at any gathering.
Ingredients
Meat and Protein:
- 1 pound (0.45 kilograms) ground beef
- 2 cloves garlic, minced
Cheese:
- 1/2 cup (120 milliliters) Parmesan cheese, diced
- 1 cup (240 milliliters) cheddar cheese, cubed
Dough and Finishing Ingredients:
- 1 can (16.3 ounces / 462 grams) biscuit dough
- 2 tablespoons (30 milliliters) butter, melted
- 1 tablespoon (15 milliliters) parsley, chopped
Instructions
- Preheat the oven to 375°F, preparing a baking sheet lined with parchment paper.
- In a skillet, cook ground beef with minced garlic over medium heat, breaking meat into small crumbles until fully browned. Drain excess fat thoroughly.
- Combine the cooked beef with shredded Parmesan and cheddar cheeses, mixing until evenly distributed.
- Gently flatten each biscuit dough into a circular shape, creating a wide surface for filling.
- Place a generous spoonful of the cheese-beef mixture in the center of each flattened biscuit.
- Carefully fold the edges of the biscuit over the filling, pinching and sealing completely to prevent leakage during baking.
- Arrange the sealed bombs on the prepared baking sheet, leaving space between each one.
- Brush the surface of each bomb with melted butter for a golden, crispy exterior.
- Bake in the preheated oven for 12-15 minutes, watching for a rich golden-brown color.
- Remove from oven and let cool for 3-5 minutes to allow filling to set.
- Sprinkle freshly chopped parsley over the top for added flavor and visual appeal.
- Serve warm as a delightful appetizer or hearty snack.
Notes
- Customize cheese selection by swapping cheddar with mozzarella or Swiss for varied flavor profiles.
- Ensure complete sealing of biscuit edges to prevent cheese leakage during baking, using fork edges to crimp.
- Add extra protein by incorporating cooked bacon bits or diced jalapeños into the beef mixture for more texture and kick.
- Transform into gluten-free option by using almond flour biscuit dough or low-carb lettuce wraps instead of traditional biscuits.
- Prep Time: 20 minutes
- Cook Time: 15 minutes
- Category: Lunch, Dinner, Appetizer, Snacks
- Method: Baking
- Cuisine: American
Nutrition
- Serving Size: 4
- Calories: 450
- Sugar: 1 g
- Sodium: 800 mg
- Fat: 30 g
- Saturated Fat: 15 g
- Unsaturated Fat: 10 g
- Trans Fat: 0 g
- Carbohydrates: 24 g
- Fiber: 1 g
- Protein: 22 g
- Cholesterol: 80 mg
Amanda Bennett
Recipe Curator & Culinary Educator
Expertise
Baking and Pastry Arts, Recipe Testing and Development, Culinary Instruction, Food Styling and Photography
Education
Asheville-Buncombe Technical Community College, Asheville, NC
Diploma in Culinary Arts
Emphasized practical cooking skills, nutrition, and kitchen management.
Cambridge School of Culinary Arts, Cambridge, MA
Certificate in Professional Pastry Arts
Specialized in baking techniques, dessert presentation, and flavor profiling
Amanda’s roots run deep in the Southern hills, where every meal started fresh from the garden and every dessert came with a story. She trained at Asheville-Buncombe Technical Community College and sharpened her pastry skills at the Cambridge School of Culinary Arts, blending classic technique with everyday charm.
At The Liffey, Amanda’s passion is making baking and home cooking feel natural and joyful. She’s all about single recipes that are simple enough for a busy afternoon, but special enough to make someone’s day a little sweeter.