The Perfect Ice Cream Cake With Cookie Crunch Recipe for Summer
Crafting a delightful ice cream cake with cookie crunch promises to be a sweet adventure for dessert enthusiasts.
Layers of creamy goodness blend perfectly with crispy cookie textures.
Childhood memories of classic treats inspire this delectable creation.
Smooth ice cream and crunchy cookies dance together in perfect harmony.
Summer celebrations or quiet weekend indulgences find their perfect match with this dessert.
Rich flavors and contrasting textures make each bite a delightful surprise.
Let you dive into this simple yet impressive recipe that will become a instant favorite.
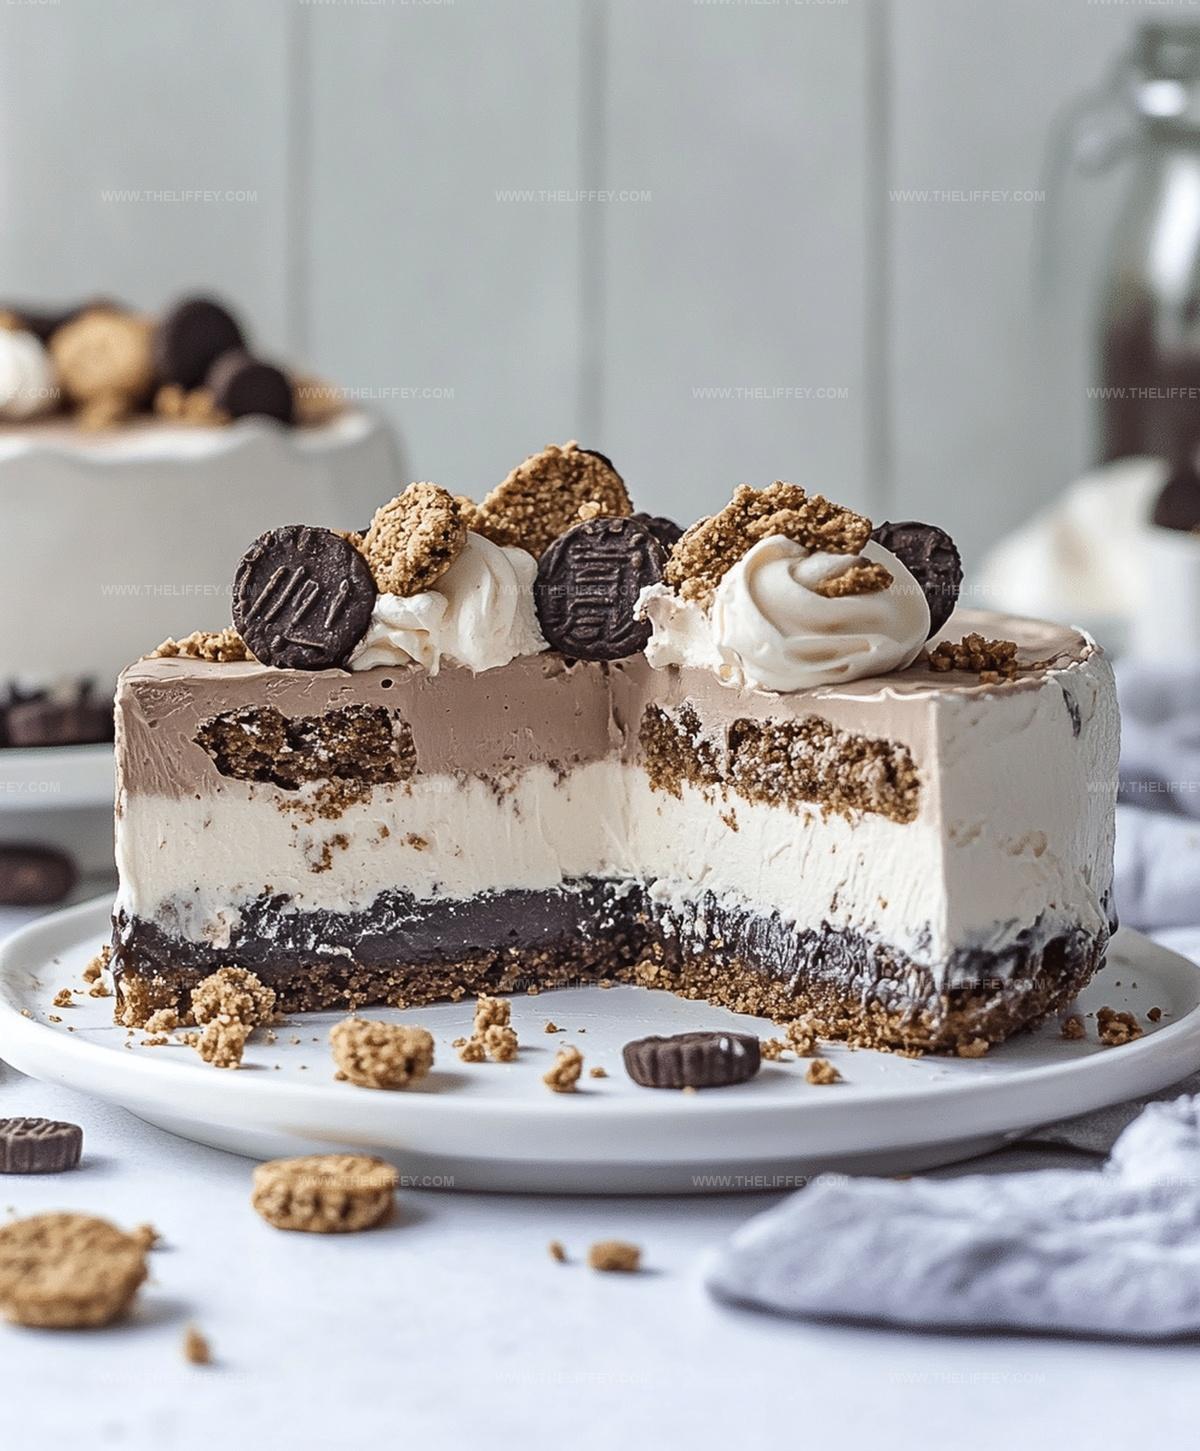
Ice Cream Cake with a Crunchy Cookie Surprise
Ingredients Needed for This Cool Dessert Treat
Base Layer:Ice Cream Layers:Topping:Stepwise Instructions for Ice Cream Cake with Cookie Crunch
Step 1: Create Crunchy Cookie Base
Grab your favorite chocolate or vanilla sandwich cookies and crush them into fine crumbs using a food processor or rolling pin. Melt butter and mix thoroughly with cookie crumbs until well combined.
Press the mixture firmly into the bottom of a lined springform pan, creating an even layer. Place the pan in the freezer for 10 minutes to set the base.
Step 2: Layer Decadent Chocolate Ice Cream
Remove the pan from the freezer and spread softened chocolate ice cream evenly over the cookie crust. Use a spatula to smooth the surface and ensure complete coverage.
Return the pan to the freezer for 30 minutes to allow the layer to firm up.
Step 3: Drizzle Rich Fudge Sauce
Pull out the pan and generously drizzle warm hot fudge sauce over the chocolate ice cream layer.
Make sure the sauce covers the surface in an appealing pattern. Place the pan back in the freezer for an additional 10 minutes to set the fudge.
Step 4: Add Creamy Vanilla Layer
Spread softened vanilla ice cream over the fudge layer, creating a smooth and even surface. Use a clean spatula to ensure a perfect finish.
Freeze the cake for at least 2 hours to allow all layers to solidify completely.
Step 5: Decorate With Whipped Topping
Top the frozen cake with fluffy whipped cream or whipped topping.
Sprinkle colorful decorative sprinkles over the surface for added fun and texture. Return the cake to the freezer until you’re ready to serve.
Step 6: Slice And Enjoy
Remove the cake from the freezer a few minutes before serving to slightly soften. Carefully release the springform pan sides and slice into wedges.
Serve immediately and enjoy the delightful combination of crunchy cookies, smooth ice cream, and rich fudge.
Pro Advice for a Smooth and Stable Cake
Creative Variations to Make It Unique

Serving Suggestions for Parties or Family Gatherings
Best Ways to Store Your Ice Cream Cake
FAQs
Yes, you can substitute graham crackers, chocolate wafers, or Oreo cookies for a unique base flavor that complements the ice cream layers.
Work quickly and keep ice cream softened but not completely melted. If it starts to melt, return the cake to the freezer for a few minutes between layers to maintain structure.
You can use a regular cake pan lined with plastic wrap, which will help you easily remove the cake after freezing. Just ensure the pan is deep enough to hold multiple layers.
Print
Delightful Ice Cream Cake With Cookie Crunch Recipe
- Total Time: 3 hours
- Yield: 12 1x
Description
Homemade ice cream cake with cookie crunch offers a delightful dessert experience blending creamy layers and crisp textures. Chocolate cookie base and smooth vanilla ice cream create a perfect summer treat for family gatherings and special celebrations.
Ingredients
Main Ingredients:
- 1.5 quarts (1.4 liters) vanilla ice cream
- 1.5 quarts (1.4 liters) chocolate ice cream
- 1 cup (240 milliliters) hot fudge sauce
Cookie Base:
- 1 package chocolate sandwich cookies
- 1/4 cup (60 milliliters) melted butter
Topping:
- 1 cup (240 milliliters) whipped topping
Instructions
- Crush cookies into fine crumbs and combine with melted butter, creating a compact base. Press mixture firmly into a lined springform pan and refrigerate for 10 minutes to set.
- Allow chocolate ice cream to soften slightly, then carefully spread an even layer over the chilled cookie crust. Return to freezer for 30 minutes to solidify.
- Gently warm hot fudge sauce and drizzle generously across the chocolate ice cream layer, ensuring uniform coverage. Freeze for an additional 10 minutes to stabilize.
- Soften vanilla ice cream at room temperature for a few minutes, then spread smoothly over the fudge-covered chocolate layer. Ensure an even, consistent surface.
- Freeze the assembled cake for a minimum of 2 hours, allowing all layers to become completely firm and integrated.
- Remove cake from freezer 5 minutes before serving to slightly soften. Decorate the top with fluffy whipped topping and colorful sprinkles.
- Slice with a knife dipped in hot water for clean, precise cuts. Serve immediately and keep remaining cake frozen.
Notes
- Chill all utensils and pan beforehand to prevent ice cream from melting quickly during assembly.
- Use room temperature ice cream for easier spreading and smoother layers without tearing the previous layer.
- Crush cookies finely and mix butter thoroughly to create a compact, stable crust that won’t crumble when slicing.
- For gluten-free version, swap regular cookies with gluten-free chocolate or graham cracker alternatives to maintain the same delicious crunch texture.
- Prep Time: 20 minutes
- Cook Time: 2 hours 40 minutes
- Category: Desserts
- Method: Freezing
- Cuisine: American
Nutrition
- Serving Size: 12
- Calories: 469 kcal
- Sugar: 41 g
- Sodium: 189 mg
- Fat: 28 g
- Saturated Fat: 17 g
- Unsaturated Fat: 9 g
- Trans Fat: 0.5 g
- Carbohydrates: 53 g
- Fiber: 2 g
- Protein: 4 g
- Cholesterol: 44 mg
John Conley
Founder & Culinary Storyteller
Expertise
Recipe Development, Culinary Writing, Home Cooking Techniques, Seasonal Ingredient Utilization
Education
Lane Community College, Eugene, OR
Certificate in Culinary Arts
Focused on foundational cooking techniques, kitchen safety, and menu planning.
Gotham Writers Workshop, New York, NY
Course in Food Writing
Explored the art of crafting engaging culinary narratives and recipe development.
John grew up where food meant connection: big bowls, warm kitchens, and meals that told a story. After earning his Certificate in Culinary Arts from Lane Community College and diving deep into food writing at Gotham Writers Workshop, he found his calling: turning everyday recipes into something worth savoring.
At The Liffey, John’s focus is all about crafting dishes that feel easy, honest, and full of heart.