Irresistible Crack Chicken Sliders Recipe for Game Day Fun
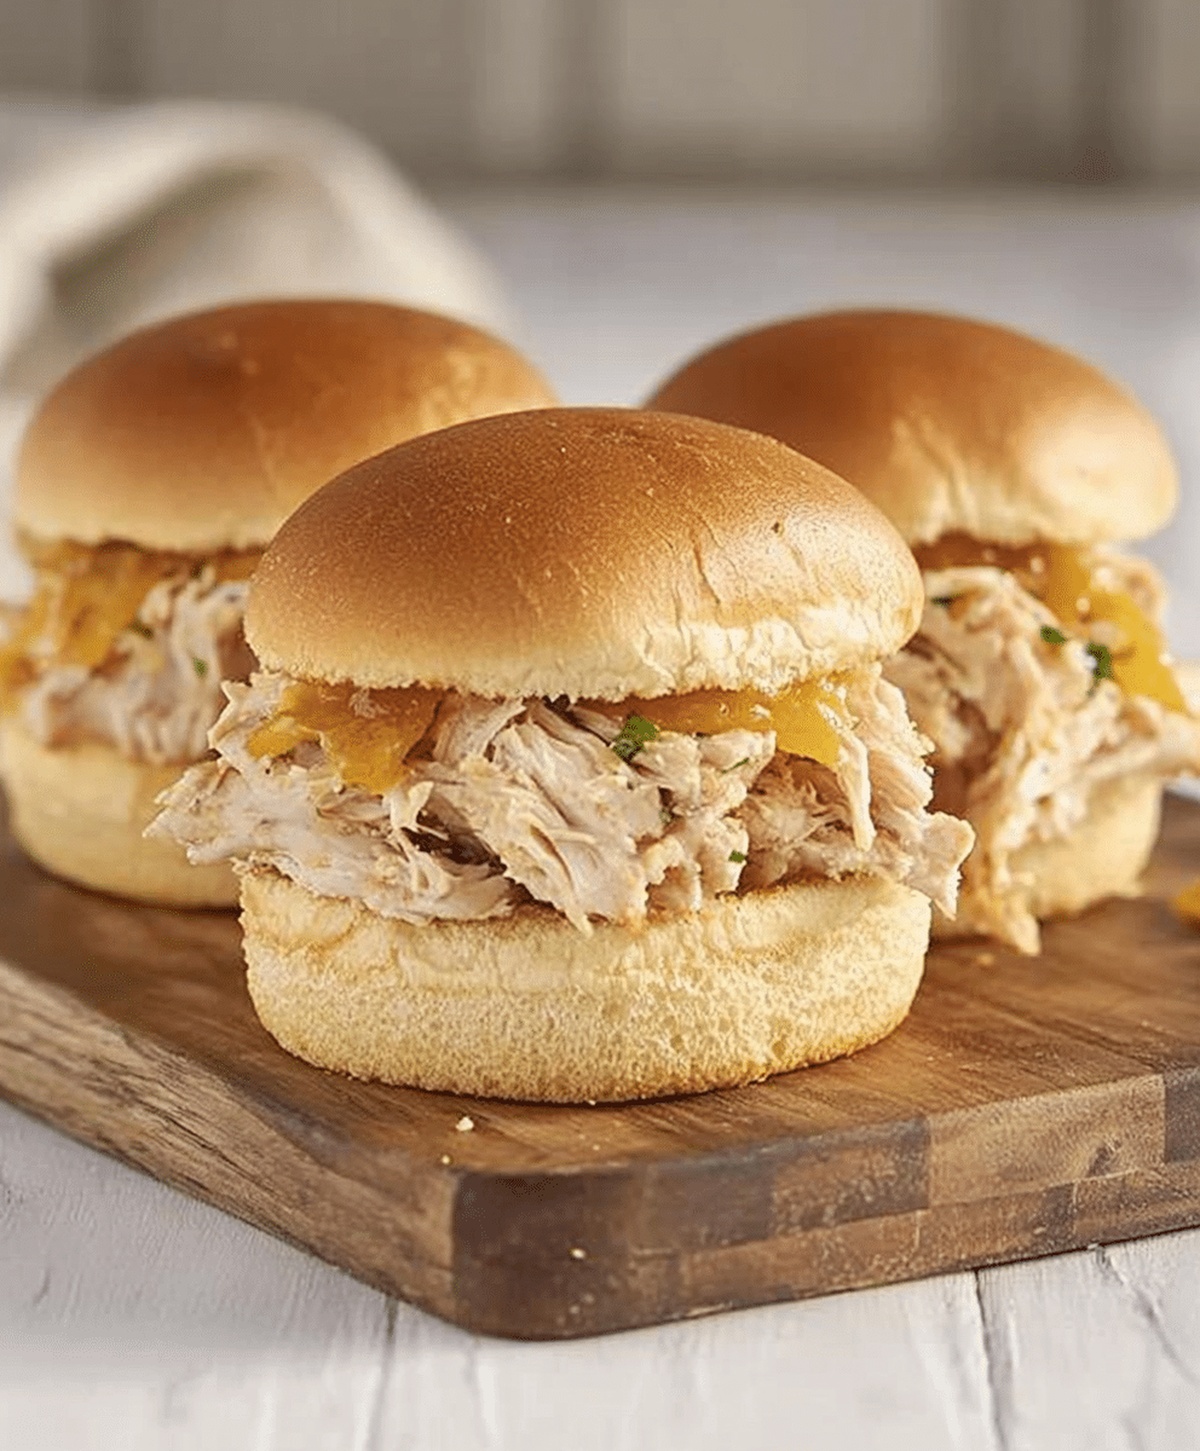
Crispy and creamy crack chicken sliders have become a mouthwatering sensation among casual dinner enthusiasts.
Packed with bold flavors, these miniature sandwiches deliver an irresistible punch of comfort.
Shredded chicken mingles with tangy cream cheese and zesty ranch seasoning for a seriously addictive combination.
Soft slider buns cradle the rich, creamy filling that keeps people coming back for more.
Quick to assemble and guaranteed to vanish from your serving plate, these sliders work magic at potlucks and game nights.
Ranch lovers and chicken fanatics will absolutely devour every single bite.
You won’t be able to resist making these again and again – so grab those ingredients and let’s get cooking!
Why Crack Chicken Sliders Are So Addictive
Ingredients Needed for Crack Chicken Sliders
Main Protein:Dairy and Cheese Components:Flavor Enhancers and Bread:How to Make Crack Chicken Sliders Recipe

Step 1: Warm Up the Oven
Fire up your oven to a toasty 350°F (175°C) so it’s ready for our delicious slider adventure.
Step 2: Create the Flavor Explosion
Grab a mixing bowl and combine these mouth-watering ingredients:Mix everything until it’s perfectly blended and looks absolutely irresistible.
Step 3: Prepare the Slider Base
Gently slice your Hawaiian rolls in half horizontally.
Place the bottom half in a greased baking dish, creating a soft foundation for your cheesy masterpiece.
Step 4: Layer on the Goodness
Spread the chicken mixture evenly across the bottom half of the rolls, making sure every inch is covered with the creamy, cheesy filling.
Step 5: Top It Off
Carefully place the top half of the rolls back on, creating a cozy sandwich that’s about to become seriously delicious.
Step 6: Add the Golden Touch
Whisk together melted butter and garlic powder, then lovingly brush this magical mixture over the tops of the rolls.
This will give them a gorgeous golden shine.
Step 7: Bake to Perfection
Slide the baking dish into the preheated oven and bake for 15-20 minutes.
You’re looking for a beautiful golden color and melted, bubbly cheese.
Step 8: Serve and Devour
Slice the sliders into individual portions and serve them warm.
Watch as everyone’s eyes light up with excitement!
Helpful Tips for Crack Chicken Sliders
Crack Chicken Slider Variations to Explore
What Complements Crack Chicken Sliders Well
Best Way to Store Crack Chicken Sliders
FAQs
Use two forks to pull apart cooked chicken breasts, or use a stand mixer with paddle attachment on low speed to quickly shred chicken in minutes.
Yes, thaw chicken completely first, then cook and shred before mixing with other ingredients. Ensure chicken is fully cooked to 165°F internal temperature.
Ranch seasoning adds significant flavor, but you can substitute with a mix of dried dill, parsley, garlic powder, onion powder, and salt if needed.
Use regular slider buns or dinner rolls as an alternative. The soft, slightly sweet Hawaiian rolls work best for authentic taste and texture.
Print
Crack Chicken Sliders Recipe
- Total Time: 35 minutes
- Yield: 12 1x
Description
Mouthwatering crack chicken sliders combine shredded chicken, cream cheese, and ranch seasoning in a delectable sandwich. Hearty sliders promise comfort and flavor in each delicious bite you’ll savor.
Ingredients
Protein:
- 2 cups cooked shredded chicken
- 1/4 cup cooked and crumbled bacon
Cheese and Dairy:
- 1 cup shredded cheddar cheese
- 1/2 cup cream cheese (softened)
- 4 tablespoons melted butter
Seasonings and Garnish:
- 1 packet ranch seasoning mix
- 1 teaspoon garlic powder
- 1/4 cup chopped green onions (optional)
Bread:
- 12 Hawaiian rolls
Instructions
- Warm the oven to 350F (175C) and prepare a baking dish with light grease.
- Combine shredded chicken with ranch seasoning, softened cream cheese, sharp cheddar, crispy crumbled bacon, and freshly chopped green onions in a mixing bowl.
- Carefully separate the Hawaiian rolls into top and bottom halves, maintaining their connected structure.
- Layer the bottom half of rolls in the prepared baking dish, ensuring they remain intact.
- Spread the chicken mixture uniformly across the bottom roll layer, creating an even, rich coverage.
- Gently replace the top half of the rolls, aligning them precisely with the bottom layer.
- Whisk melted butter with garlic powder until well blended.
- Generously brush the butter mixture over the roll tops, ensuring complete and even coverage.
- Transfer the prepared dish to the preheated oven and bake for 15-20 minutes until the rolls turn golden brown and the cheese melts completely.
- Remove from oven, let cool for 2-3 minutes, then slice into individual sliders and serve while warm.
Notes
- Customize the heat level by adding hot sauce or jalapeños to the chicken mixture for spice lovers.
- Swap Hawaiian rolls with gluten-free or low-carb alternatives to accommodate dietary restrictions.
- Use rotisserie chicken for a quick time-saving option that adds extra flavor and reduces prep work.
- Prepare the filling ahead of time and refrigerate for up to 24 hours to enhance ingredient melding and save time during meal preparation.
- Prep Time: 15 minutes
- Cook Time: 20 minutes
- Category: Lunch, Dinner, Appetizer, Snacks
- Method: Baking
- Cuisine: American
Nutrition
- Serving Size: 12
- Calories: 255
- Sugar: 1 g
- Sodium: 470 mg
- Fat: 18 g
- Saturated Fat: 8 g
- Unsaturated Fat: 7 g
- Trans Fat: 0.3 g
- Carbohydrates: 12 g
- Fiber: 0.5 g
- Protein: 14 g
- Cholesterol: 55 mg
Amanda Bennett
Recipe Curator & Culinary Educator
Expertise
Baking and Pastry Arts, Recipe Testing and Development, Culinary Instruction, Food Styling and Photography
Education
Asheville-Buncombe Technical Community College, Asheville, NC
Diploma in Culinary Arts
Emphasized practical cooking skills, nutrition, and kitchen management.
Cambridge School of Culinary Arts, Cambridge, MA
Certificate in Professional Pastry Arts
Specialized in baking techniques, dessert presentation, and flavor profiling
Amanda’s roots run deep in the Southern hills, where every meal started fresh from the garden and every dessert came with a story. She trained at Asheville-Buncombe Technical Community College and sharpened her pastry skills at the Cambridge School of Culinary Arts, blending classic technique with everyday charm.
At The Liffey, Amanda’s passion is making baking and home cooking feel natural and joyful. She’s all about single recipes that are simple enough for a busy afternoon, but special enough to make someone’s day a little sweeter.