
Sweet & Savory Cheesy Ground Beef Sliders Recipe for Busy Days
Whipping up delectable cheesy ground beef sliders can turn any ordinary evening into a flavor-packed celebration.
Small sandwich bites pack an incredible punch of savory goodness.
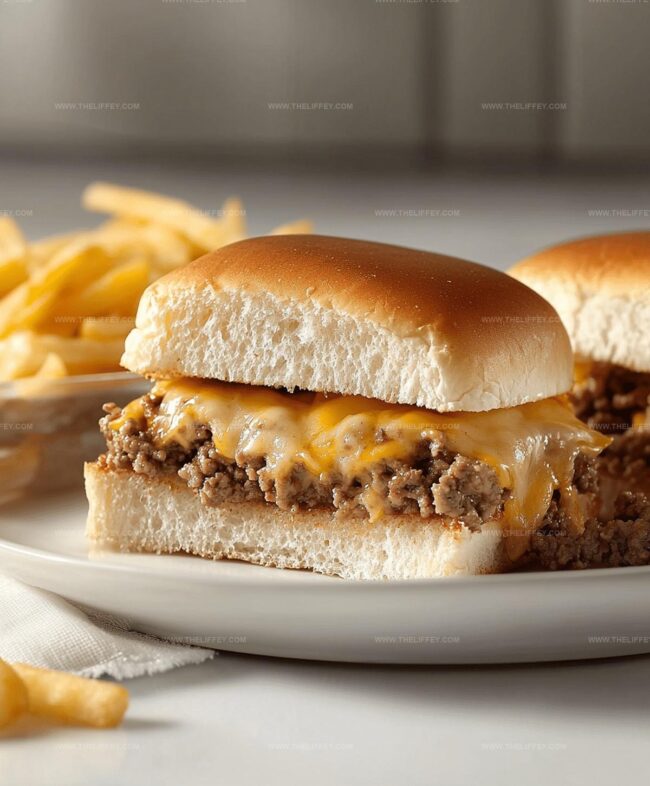
Juicy beef patties nestled between soft mini rolls create irresistible comfort food.
Melted cheese drapes over perfectly seasoned meat, creating mouthwatering layers of deliciousness.
Professional chefs and home cooks alike adore these miniature burger delights for their simplicity and bold taste.
Quick to prepare and guaranteed to impress, these sliders bring smiles around the table.
You’ll want to make extra because these little gems disappear faster than anyone expects.
Store Cheesy Ground Beef Sliders Correctly
FAQs
Sliders work great as both! They’re versatile enough to serve as a hearty main course for smaller appetites or as delicious party appetizers that everyone can enjoy.
Absolutely! Ground turkey, chicken, or pork can easily replace beef in this recipe. Just ensure the meat is fully cooked and seasoned well for maximum flavor.
Cheddar is classic, but you can experiment with other melty cheeses like Swiss, provolone, or pepper jack to create different flavor profiles. Choose a cheese that melts smoothly for the best results.
Why Cheesy Ground Beef Sliders Are So Popular
Ingredients for Cheesy Ground Beef Sliders Recipe
Main Ingredients:Flavor Enhancers:Topping and Finishing Ingredients:How to Make Cheesy Ground Beef Sliders

Step 1: Brown the Beef
Sizzle ground beef in a skillet over medium heat until completely cooked through.
Carefully drain any excess fat from the pan to keep your sliders light and delicious.
Step 2: Enhance the Beef Flavor
Sprinkle onion soup mix into the cooked beef and stir thoroughly to distribute the savory seasonings evenly throughout the meat.
Step 3: Prepare the Slider Base
Split slider buns horizontally and arrange the bottom halves in a baking dish, creating a perfect foundation for your cheesy masterpiece.
Step 4: Create the Meaty Layer
Spread the seasoned beef mixture uniformly across the bottom bun halves, ensuring every bite will be packed with flavor.
Step 5: Add the Cheese Blanket
Carefully layer cheddar cheese slices over the beef, allowing the cheese to drape across the meat like a delicious blanket.
Step 6: Crown with Bun Tops
Gently place the top halves of the slider buns over the cheese layer, completing the slider sandwich.
Step 7: Butter and Season
Brush melted butter generously over the bun tops, then sprinkle with:Step 8: Bake to Perfection
Slide the baking dish into a preheated oven at 350F (175C).
Bake for 15 minutes until the cheese melts completely and the bun tops turn a beautiful golden brown.
Step 9: Serve and Devour
Remove from the oven and serve these irresistible sliders while they’re warm, ready to be enjoyed by hungry friends and family.
Tips for Perfect Cheesy Ground Beef Sliders
Cheesy Ground Beef Slider Variations to Try
What to Serve With Cheesy Ground Beef Sliders
Print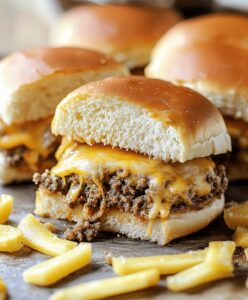
Cheesy Ground Beef Sliders Recipe
- Total Time: 30 minutes
- Yield: 12 1x
Description
Mouthwatering cheesy ground beef sliders delight sandwich enthusiasts with bold flavors. Mini burgers pack hearty beef, melted cheese, and zesty seasonings for irresistible party snacks you’ll crave again and again.
Ingredients
Meat:
- 1 pound (1 lb) ground beef
Cheese and Dairy:
- 6 slices cheddar cheese (halved)
- 2 tablespoons butter, melted
Buns and Seasonings:
- 12 slider buns
- 1 packet onion soup mix
- 1 teaspoon garlic powder
- 1 tablespoon sesame seeds (optional)
Instructions
- Warm the oven to 350F (175C), preparing a baking dish for the sliders.
- Sauté the ground beef in a skillet over medium heat, cooking until completely browned and crumbled.
- Carefully drain any excess fat from the meat, then incorporate the onion soup mix thoroughly.
- Gently separate the slider buns into top and bottom halves, positioning the bottom layer in the prepared baking dish.
- Distribute the seasoned beef mixture evenly across the bottom bun layer, creating a uniform meat base.
- Create a complete cheese blanket by arranging cheddar cheese slices directly over the beef mixture.
- Cap the sliders by placing the top bun halves over the cheese layer.
- Transform the bun tops with a lavish brush of melted butter, then dust generously with garlic powder and sprinkle sesame seeds for added texture and flavor.
- Transfer the assembled sliders to the preheated oven, baking for 15 minutes until the cheese melts completely and the bun tops turn a golden, crispy brown.
- Remove from oven, let rest briefly, then serve these delectable mini sandwiches while warm for maximum enjoyment.
Notes
- Choose lean ground beef to reduce excess grease and create a healthier slider option.
- For a gluten-free version, swap regular slider buns with gluten-free alternatives or lettuce wraps.
- Experiment with different cheese varieties like pepper jack or Swiss for unique flavor profiles.
- Prep ingredients ahead of time to streamline the cooking process and make assembly quicker and easier.
- Prep Time: 15 minutes
- Cook Time: 15 minutes
- Category: Lunch, Dinner, Appetizer, Snacks
- Method: Baking
- Cuisine: American
Nutrition
- Serving Size: 12
- Calories: 270 kcal
- Sugar: 2 g
- Sodium: 520 mg
- Fat: 18 g
- Saturated Fat: 7 g
- Unsaturated Fat: 8 g
- Trans Fat: 0.5 g
- Carbohydrates: 15 g
- Fiber: 1 g
- Protein: 15 g
- Cholesterol: 50 mg
Amanda Bennett
Recipe Curator & Culinary Educator
Expertise
Baking and Pastry Arts, Recipe Testing and Development, Culinary Instruction, Food Styling and Photography
Education
Asheville-Buncombe Technical Community College, Asheville, NC
Diploma in Culinary Arts
Emphasized practical cooking skills, nutrition, and kitchen management.
Cambridge School of Culinary Arts, Cambridge, MA
Certificate in Professional Pastry Arts
Specialized in baking techniques, dessert presentation, and flavor profiling
Amanda’s roots run deep in the Southern hills, where every meal started fresh from the garden and every dessert came with a story. She trained at Asheville-Buncombe Technical Community College and sharpened her pastry skills at the Cambridge School of Culinary Arts, blending classic technique with everyday charm.
At The Liffey, Amanda’s passion is making baking and home cooking feel natural and joyful. She’s all about single recipes that are simple enough for a busy afternoon, but special enough to make someone’s day a little sweeter.