
The Best Easy Chicken Enchiladas Recipe for Cozy Family Dinners
Crafting delicious chicken enchiladas has become my go-to comfort meal during hectic weeknights.
Weekends inspire me to experiment with bold flavors and simple ingredients.
Mexican cuisine offers incredible depth through minimal preparation techniques.
Home cooks appreciate straightforward approaches that deliver maximum satisfaction.
Our enchilada approach combines tender chicken, zesty spices, and melted cheese in a quick, crowd-pleasing dish.
Soft tortillas wrapped around seasoned meat create a perfect balance of texture and taste.
You’ll want to bookmark this recipe for future dinner adventures.
Chicken Enchiladas Everyone Will Enjoy
Ingredients For Chicken Enchiladas
Main Protein:Spices and Seasonings:Tortilla and Sauce Base:Cheese and Garnish:Other Ingredients:Step-By-Step Chicken Enchiladas Instructions

Step 1: Warm Up The Oven
Crank the oven to a toasty 375°F. Grab your 9×13-inch baking dish and give it a quick olive oil massage to prevent sticking.
Step 2: Create Flavorful Chicken Filling
Heat olive oil in a skillet over medium flame. Toss in onions and let them dance until soft and translucent.
Introduce shredded chicken to the party, sprinkle with:Stir everything together until well combined and bursting with flavor.
Step 3: Prep The Baking Dish
Spread a silky layer of enchilada sauce across the bottom of your baking dish.
This creates a tasty foundation for your enchiladas.
Step 4: Roll Up The Magic
Time to assemble!
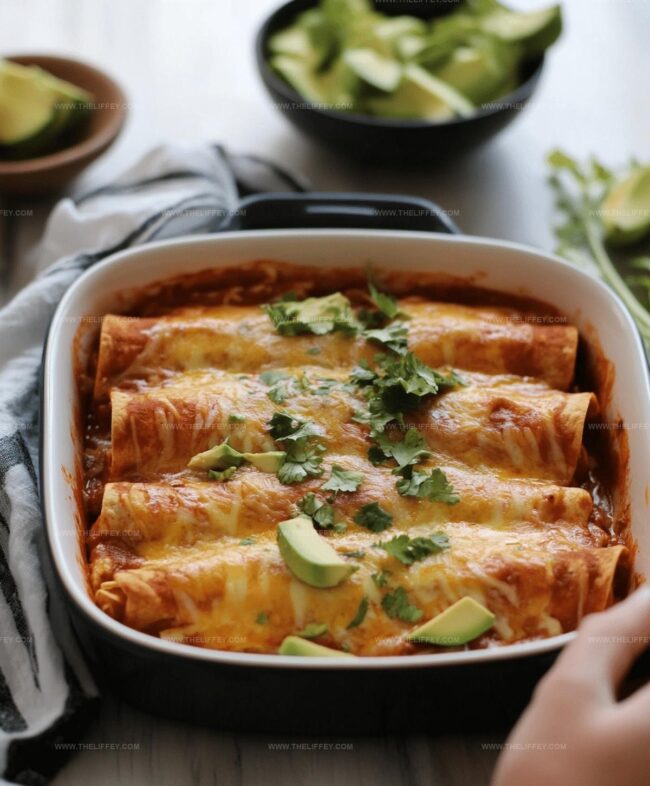
Grab your tortillas and load them up with the chicken mixture. Sprinkle cheese inside each tortilla, then roll them up tight like little flavor bundles.
Nestle these rolled enchiladas seam-side down in the saucy dish.
Step 5: Sauce And Cheese Finale
Pour the remaining enchilada sauce over your rolled enchiladas.
Shower them with a generous snowfall of cheese.
Step 6: Bake To Perfection
Slide the dish into the preheated oven.
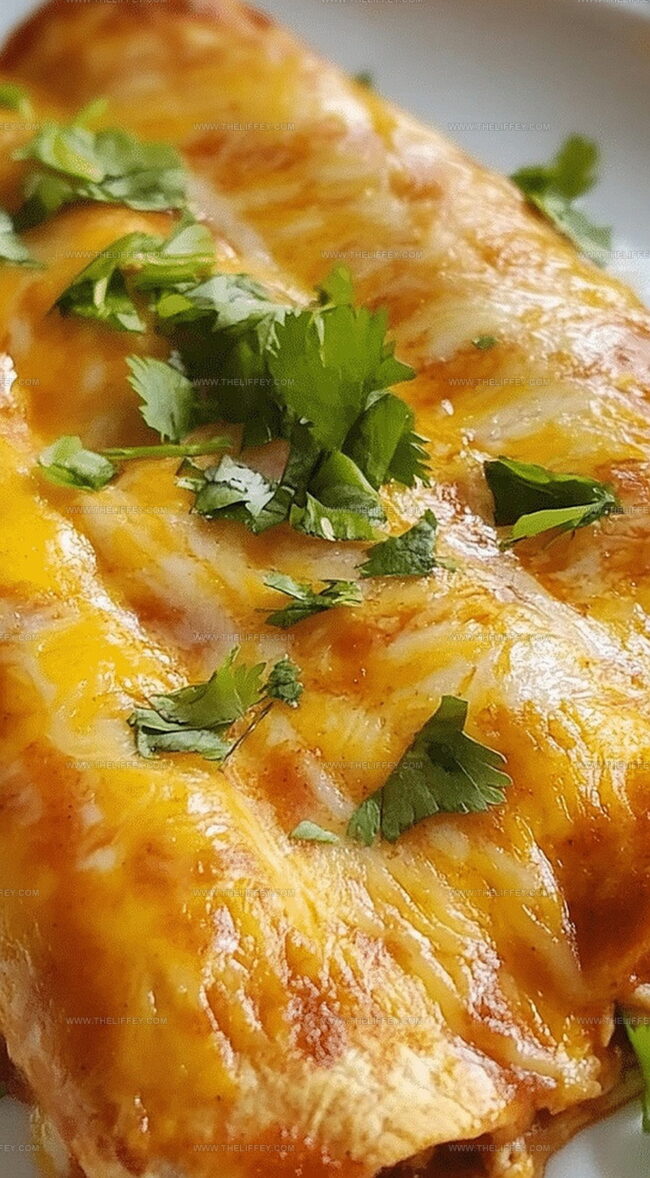
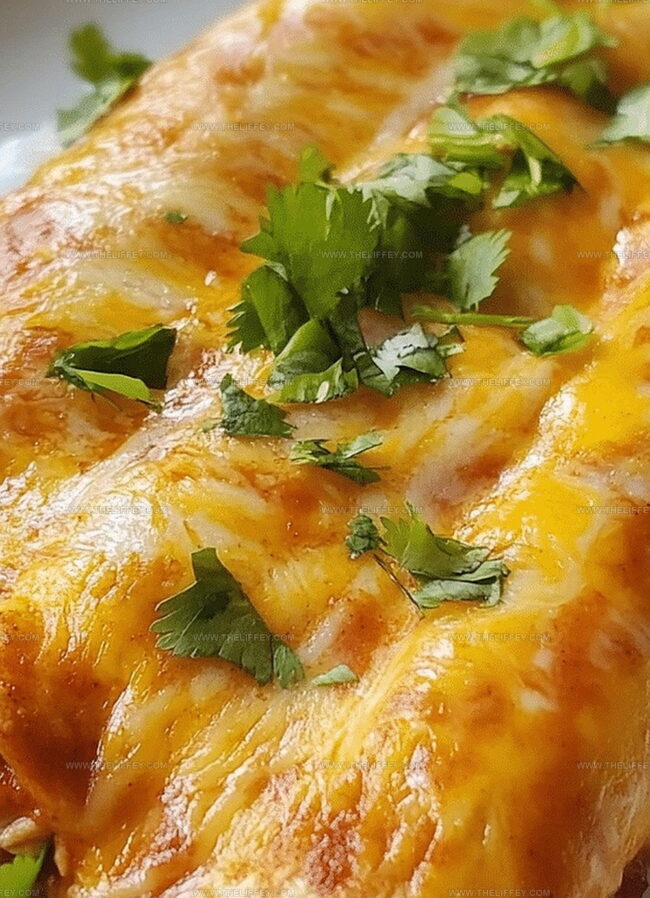
Bake for 20-25 minutes until the cheese transforms into a melty, bubbly wonderland.
Step 7: Garnish And Serve
Sprinkle fresh cilantro on top for a burst of color and freshness.
Serve hot and enjoy your homemade enchilada feast!
Tips For Tasty Chicken Enchiladas
Different Versions Of Chicken Enchiladas
What Goes Well With Chicken Enchiladas
How To Store Chicken Enchiladas Correctly
FAQs
Yes, rotisserie chicken works perfectly and saves time. Simply shred the meat and follow the recipe as instructed.
Add diced jalapeños to the chicken mixture or use a spicy enchilada sauce to increase heat levels. You can also sprinkle red pepper flakes for extra kick.
Absolutely! Assemble the enchiladas, cover tightly with foil, and refrigerate for up to 24 hours before baking. When ready, bake directly from the refrigerator, adding 5-10 minutes to cooking time.
Print
Cheesy Chicken Enchiladas Recipe
- Total Time: 45 minutes
- Yield: 8 1x
Description
Mexican chicken enchiladas bring authentic flavors straight from traditional kitchens to dinner tables. Rich corn tortillas wrapped around seasoned chicken create a comforting meal you’ll crave again and again.
Ingredients
Protein:
- 2 cups cooked, shredded chicken
Cheeses:
- 1 cup shredded cheddar cheese
- 1 cup shredded Monterey Jack cheese
Other Ingredients:
- 8 flour tortillas (8-inch size)
- 1.5 cups enchilada sauce
- 1 small onion, diced
- 2 tablespoons (30 milliliters) olive oil
- 1 teaspoon cumin
- 1 teaspoon garlic powder
- Fresh cilantro for garnish
Instructions
- Warm the oven to 375F (190C) and lightly coat a 9×13-inch baking dish with olive oil to prevent sticking.
- Heat olive oil in a skillet over medium temperature and gently sauté onions until they become translucent and soft.
- Add shredded chicken to the skillet, incorporating cumin and garlic powder, stirring to ensure even seasoning and distribution.
- Create a thin protective layer of enchilada sauce across the bottom of the prepared baking dish to prevent tortillas from sticking.
- Distribute the chicken mixture evenly among tortillas, carefully sprinkling cheese inside each one before rolling them tightly and compactly.
- Arrange the rolled enchiladas seam-side down in the baking dish, ensuring they are snug and secure.
- Generously drizzle the remaining enchilada sauce over the rolled tortillas, covering them completely.
- Liberally sprinkle the remaining cheese across the top of the enchiladas, creating a rich and melty surface.
- Place the baking dish in the preheated oven and bake for 20-25 minutes until the cheese becomes golden, melted, and slightly bubbly.
- Remove from the oven and garnish with fresh, vibrant cilantro leaves before serving to add a burst of color and fresh flavor.
Notes
- Customize heat levels by choosing mild, medium, or spicy enchilada sauce to match personal taste preferences.
- Swap traditional tortillas with gluten-free or low-carb alternatives like cauliflower wraps for dietary restrictions.
- Enhance protein variety by substituting chicken with shredded beef, turkey, or vegetarian options like black beans and roasted vegetables.
- Prep enchiladas ahead of time by assembling and refrigerating up to 24 hours before baking, which intensifies flavor and saves cooking time.
- Prep Time: 20 minutes
- Cook Time: 25 minutes
- Category: Lunch, Dinner
- Method: Baking
- Cuisine: Mexican
Nutrition
- Serving Size: 8
- Calories: 370 kcal
- Sugar: 3 g
- Sodium: 560 mg
- Fat: 18 g
- Saturated Fat: 7 g
- Unsaturated Fat: 9 g
- Trans Fat: 0.2 g
- Carbohydrates: 25 g
- Fiber: 3 g
- Protein: 28 g
- Cholesterol: 70 mg
John Conley
Founder & Culinary Storyteller
Expertise
Recipe Development, Culinary Writing, Home Cooking Techniques, Seasonal Ingredient Utilization
Education
Lane Community College, Eugene, OR
Certificate in Culinary Arts
Focused on foundational cooking techniques, kitchen safety, and menu planning.
Gotham Writers Workshop, New York, NY
Course in Food Writing
Explored the art of crafting engaging culinary narratives and recipe development.
John grew up where food meant connection: big bowls, warm kitchens, and meals that told a story. After earning his Certificate in Culinary Arts from Lane Community College and diving deep into food writing at Gotham Writers Workshop, he found his calling: turning everyday recipes into something worth savoring.
At The Liffey, John’s focus is all about crafting dishes that feel easy, honest, and full of heart.