
Sizzling Grilled Cheese Patty Melts Recipe: Comfort Food Magic
Crafting the ultimate grilled cheese patty melts requires more than just basic cooking skills.
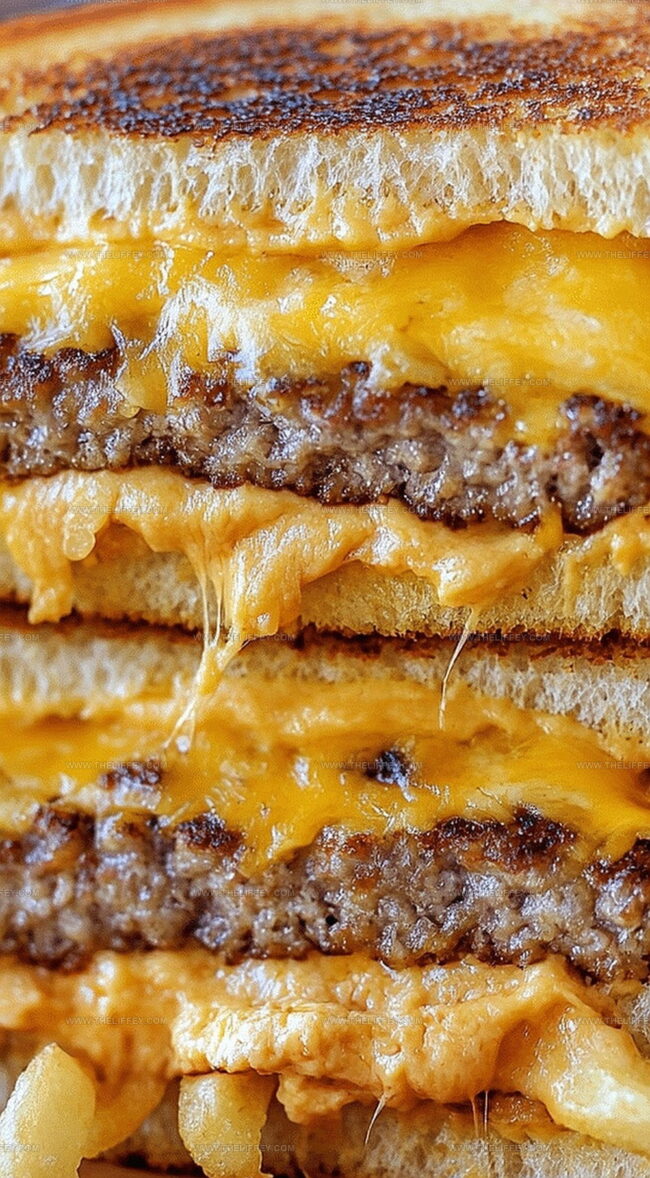
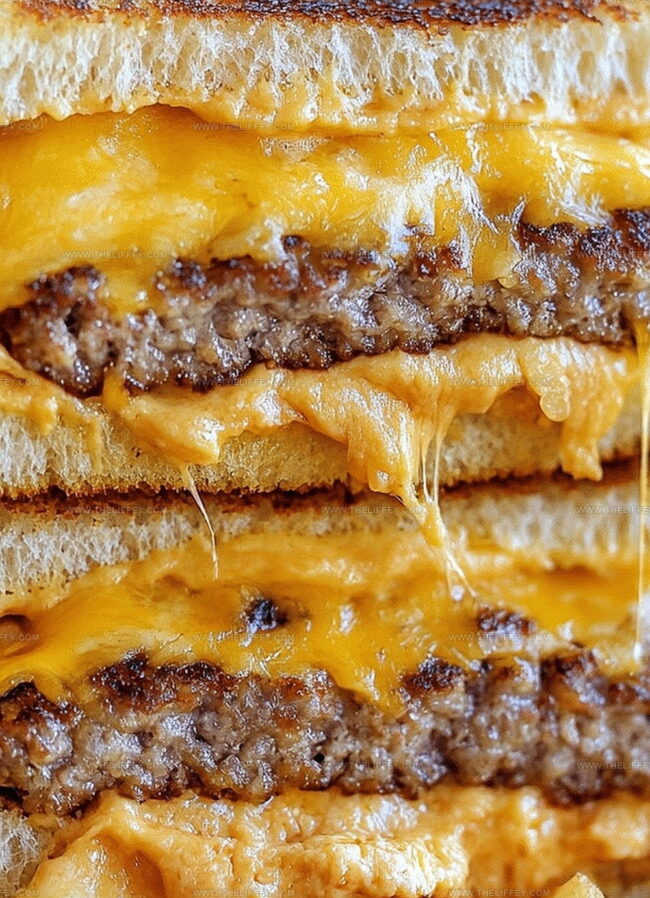
Melted cheese creates magic between perfectly toasted bread slices.
Sandwich lovers understand the deep comfort these mouthwatering creations bring to any meal.
Our simple technique guarantees golden-brown perfection with minimal effort.
Crispy edges and gooey centers make this recipe irresistible for weekend lunches or quick dinners.
Hearty ingredients combine to deliver a satisfying experience you’ll want to savor.
Prepare to embark on a delicious culinary adventure that promises to become your new favorite comfort food.
Why Grilled Cheese Patty Melts Are Popular
Ingredients for Grilled Cheese Patty Melts Recipe
Main Ingredients:Cheese:Aromatics and Seasonings:Cooking Fats:How to Prepare Grilled Cheese Patty Melts
Step 1: Prepare Beef Patties
Mix ground beef with salt and pepper. Shape the meat into flat, round patties that will fit perfectly inside your sandwich bread.
Step 2: Cook Beef Patties
Heat olive oil in a skillet over medium heat. Cook the beef patties for 4-5 minutes on each side until they develop a beautiful golden-brown exterior and reach desired doneness.
Transfer cooked patties to a plate.
Step 3: Caramelize Onions
Using the same skillet, melt butter and add sliced onions.
Slowly cook onions, stirring occasionally, until they turn a rich golden-brown color and become soft and sweet, which takes approximately 10 minutes.
Step 4: Prepare Bread
Take bread slices and butter one side of each slice completely.
This will create a crispy, golden exterior when grilled.
Step 5: Build Sandwiches
Layer the sandwich ingredients:Place another bread slice on top, with buttered side facing outward.
Step 6: Grill Sandwiches
Heat a clean skillet over medium heat. Carefully place sandwiches in the pan and cook for 3-4 minutes per side.
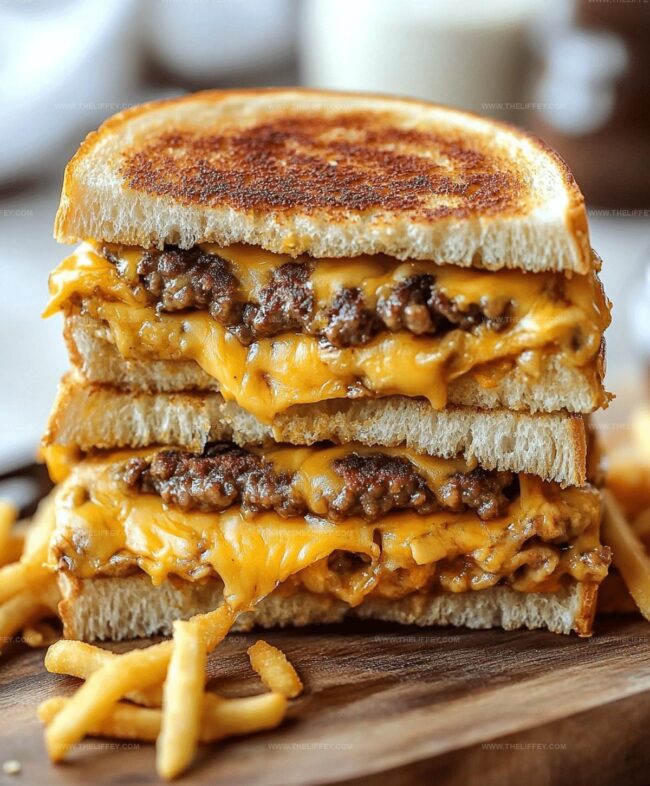
Look for a golden-brown crust and melted, gooey cheese.
Step 7: Serve and Enjoy
Transfer hot patty melts to plates.
Slice diagonally and serve immediately while cheese is still melted and bread is crispy.
Helpful Tips for Grilled Cheese Patty Melts
Flavor Twists for Grilled Cheese Patty Melts
Suggested Pairings for Grilled Cheese Patty Melts
Proper Storage for Grilled Cheese Patty Melts
FAQs
Use ground chuck with 80/20 fat content for juiciest, most flavorful patties that stay tender and don’t dry out during cooking.
Partially prepare by cooking patties and caramelizing onions in advance, then assemble and grill sandwiches just before serving to maintain crispy bread and melted cheese.
Use medium-low heat and cook slowly, which allows cheese to melt completely while achieving a crispy, golden-brown exterior without scorching the bread.
Print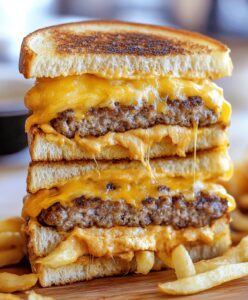
Best Grilled Cheese Patty Melts Recipe
- Total Time: 40 minutes
- Yield: 4 1x
Description
Savory grilled cheese patty melts combine classic diner comfort with homemade charm. Melted cheese, caramelized onions, and perfectly seasoned beef patties create a mouthwatering sandwich you’ll crave again and again.
Ingredients
Meat and Protein:
- 1 pound ground beef
- 2 slices cheddar cheese
- 2 slices swiss cheese
Seasonings and Aromatics:
- 1 teaspoon salt
- 1/2 teaspoon black pepper
- 1 onion (sliced)
Bread and Cooking Fats:
- 4 slices rye or sourdough bread
- 2 tablespoons butter
- 2 tablespoons olive oil
Instructions
- Craft seasoned ground beef patties with salt and pepper, ensuring uniform thickness for even cooking.
- Sear patties in olive oil over medium heat for 4-5 minutes per side until richly browned and fully cooked, then transfer to a plate.
- Using the same skillet, melt butter and slowly caramelize onion slices, stirring occasionally until deep golden and tender, approximately 10 minutes.
- Generously spread softened butter on one side of each bread slice, creating a crisp exterior.
- Layer sandwich components strategically: place cheddar and Swiss cheese on unbuttered bread surface, position cooked beef patty centrally, distribute caramelized onions evenly, and crown with additional cheese slice.
- Complete sandwich assembly by topping with second bread slice, ensuring buttered side faces outward.
- Grill sandwiches in preheated skillet over medium heat for 3-4 minutes per side, achieving a golden-brown crust and completely melted cheese interior.
- Slice diagonally and serve immediately while warmth and crispness are at peak quality.
Notes
- Customize patty seasoning with garlic powder, smoked paprika, or dried herbs for extra flavor complexity.
- Choose high-fat ground beef like 80/20 for juicier, more tender patties that won’t dry out during cooking.
- Caramelize onions slowly on low-medium heat to develop deep, sweet, rich flavor without burning.
- Use room temperature butter for easier spreading and more even browning on sandwich exteriors.
- Prep Time: 15 minutes
- Cook Time: 25 minutes
- Category: Lunch, Dinner, Snacks, Appetizer
- Method: Sautéing
- Cuisine: American
Nutrition
- Serving Size: 4
- Calories: 450 kcal
- Sugar: 2 g
- Sodium: 600 mg
- Fat: 30 g
- Saturated Fat: 12 g
- Unsaturated Fat: 14 g
- Trans Fat: 1 g
- Carbohydrates: 25 g
- Fiber: 3 g
- Protein: 25 g
- Cholesterol: 80 mg
John Conley
Founder & Culinary Storyteller
Expertise
Recipe Development, Culinary Writing, Home Cooking Techniques, Seasonal Ingredient Utilization
Education
Lane Community College, Eugene, OR
Certificate in Culinary Arts
Focused on foundational cooking techniques, kitchen safety, and menu planning.
Gotham Writers Workshop, New York, NY
Course in Food Writing
Explored the art of crafting engaging culinary narratives and recipe development.
John grew up where food meant connection: big bowls, warm kitchens, and meals that told a story. After earning his Certificate in Culinary Arts from Lane Community College and diving deep into food writing at Gotham Writers Workshop, he found his calling: turning everyday recipes into something worth savoring.
At The Liffey, John’s focus is all about crafting dishes that feel easy, honest, and full of heart.