Dreamy Home Made Chocolate Cake Recipe Everyone Will Love
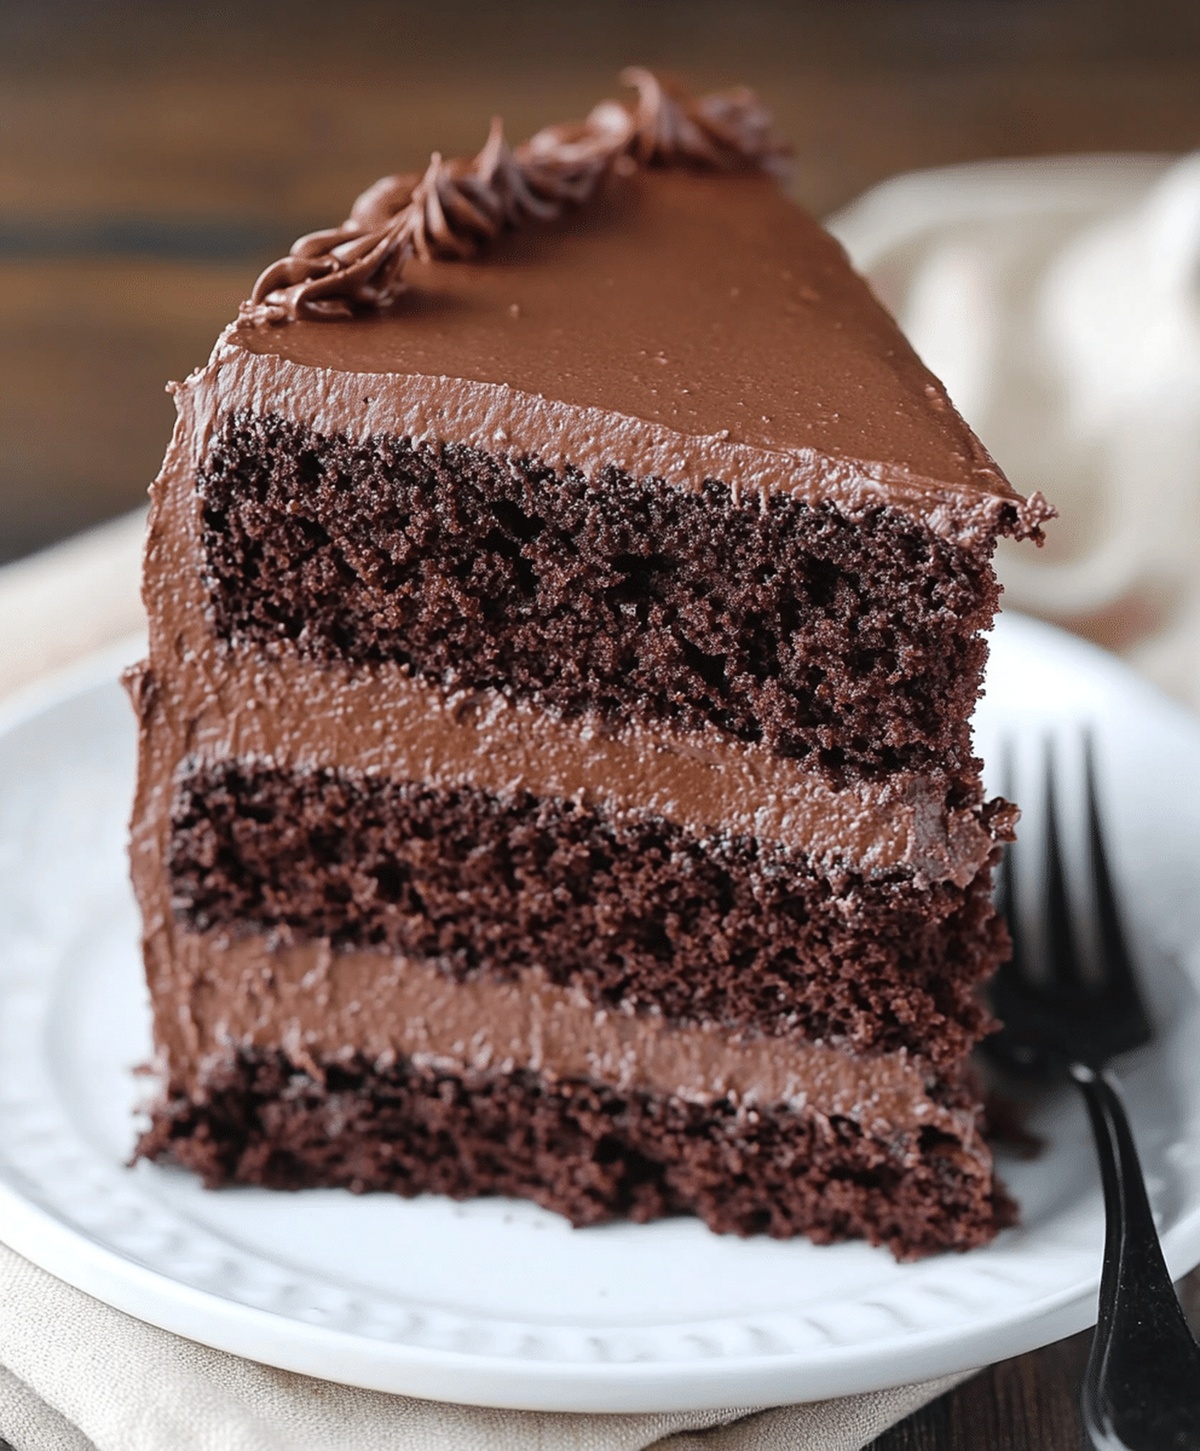
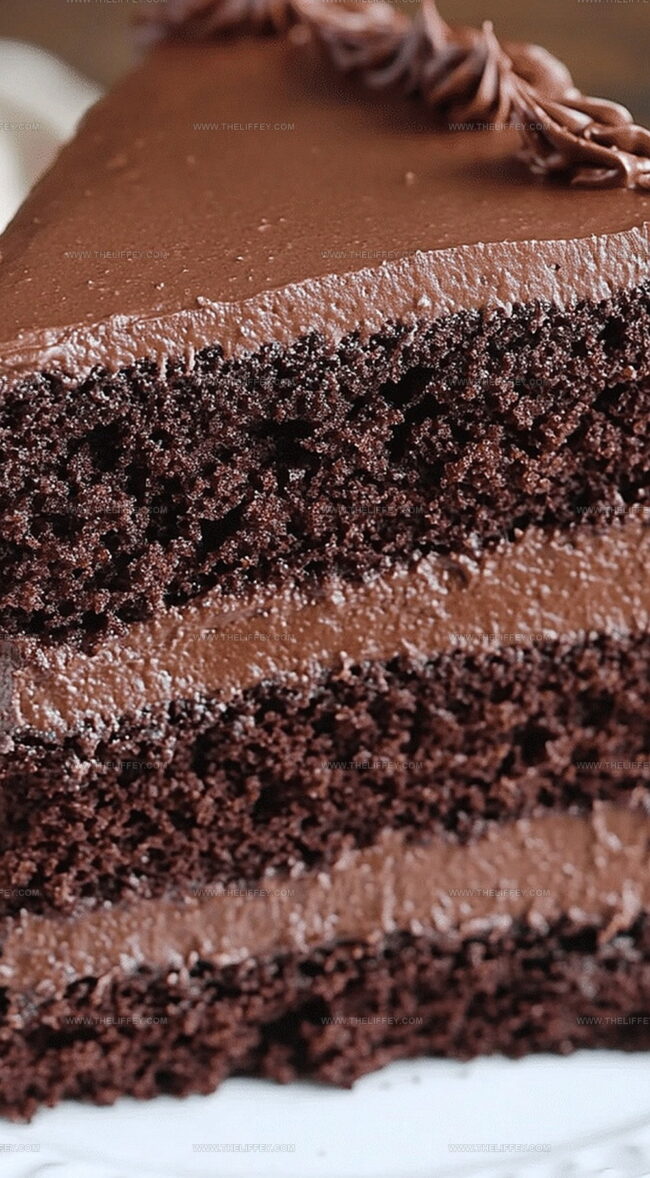
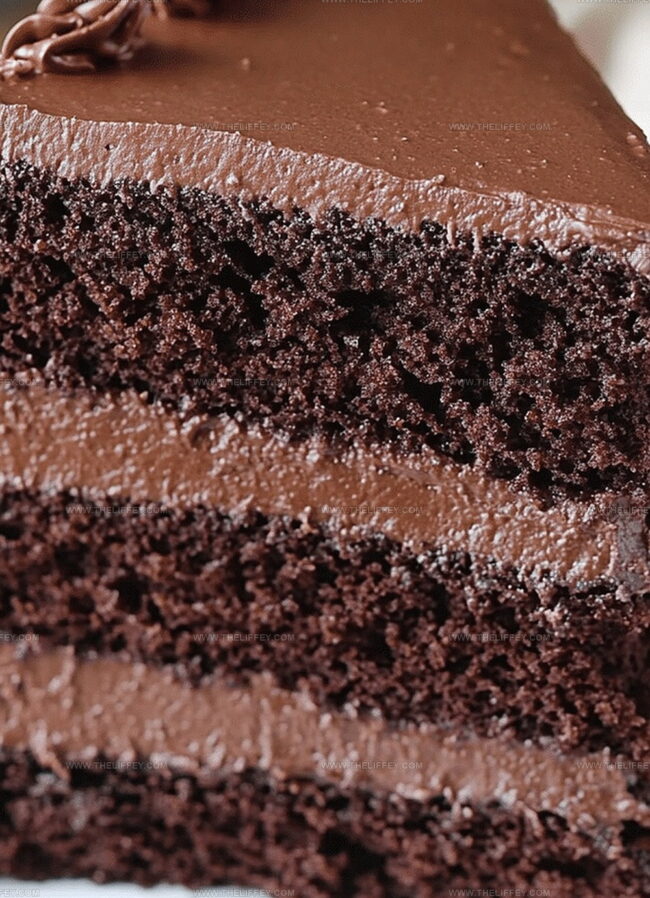
Sweet memories flood back whenever I whip up this delectable home made chocolate cake recipe that transports me straight to grandma’s cozy kitchen.
Whispers of cocoa and vanilla dance through the air, promising pure comfort.
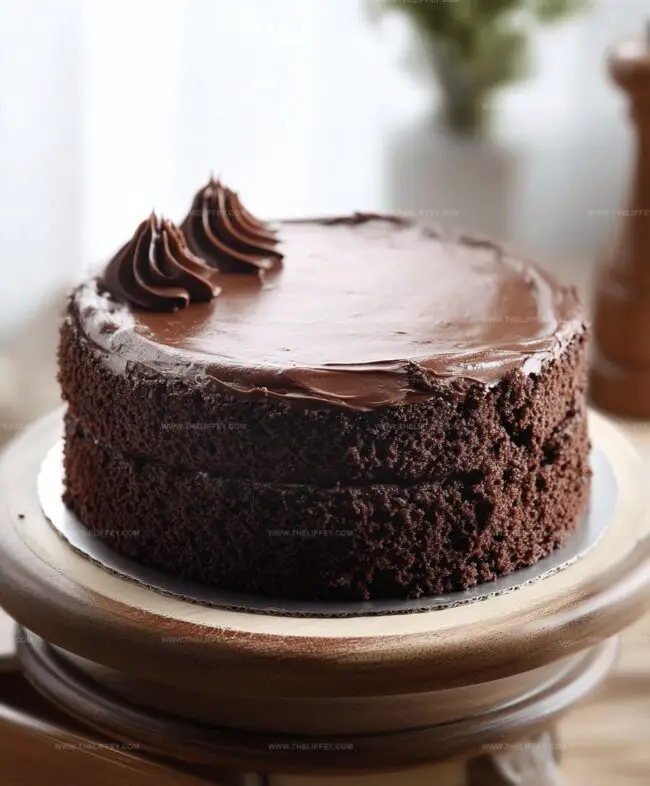
Layers of rich, moist goodness await you with each slice.
Perfectly balanced ingredients create a dessert that melts effortlessly on your tongue.
Baking becomes an adventure of pure joy and indulgence.
Warm aromas will fill your space, beckoning everyone near.
Grab a fork and get ready to experience chocolate bliss that feels like a warm hug.
Reasons To Make Home Made Chocolate Cake Today
Ingredients For Classic Home Made Chocolate Cake
Cake Base Ingredients:Liquid Ingredients:Flavor Enhancers:How To Bake Home Made Chocolate Cake Perfectly
Step 1: Prepare Baking Station
Warm up your oven to 350F. Grab two round cake pans and coat them with butter or cooking spray.
Line the bottom with parchment paper for easy cake removal.
Step 2: Create Dry Mixture
Grab a large mixing bowl and combine these dry ingredients:Whisk everything together until completely blended and smooth.
Step 3: Blend Wet Components
Add these ingredients to your dry mixture:Use an electric mixer to blend everything until the batter looks silky and consistent.
Step 4: Introduce Liquid Magic
Pour hot water slowly into the batter while mixing on low speed.
The mixture will become thin and slightly runny – this is exactly what you want.
Step 5: Bake to Perfection
Divide the batter evenly between the prepared pans.
Slide them into the preheated oven and bake for 30-35 minutes. Check doneness by inserting a toothpick – it should come out clean.
Step 6: Cool and Rest
Remove cakes from the oven and let them sit in the pans for 10 minutes. Carefully transfer to a wire cooling rack and allow them to reach room temperature before adding frosting.
Tips To Perfect Home Made Chocolate Cake
Fun Ways To Personalize Home Made Chocolate Cake
What To Serve With Home Made Chocolate Cake
Best Ways To Store Home Made Chocolate Cake
FAQs
Hot water helps activate the cocoa powder, creating a richer chocolate flavor and making the cake more moist and tender.
Yes, you can substitute hot brewed coffee, which enhances the chocolate flavor even more, or use hot water with a touch of instant coffee powder.
You can mix the ingredients by hand using a whisk, but be sure to mix thoroughly to avoid lumps and achieve a smooth batter consistency.
Insert a toothpick into the center of the cake. If it comes out clean or with just a few moist crumbs, the cake is done. Avoid overbaking, which can make the cake dry.
Print
Ultimate Chocolate Cake Recipe
- Total Time: 55 minutes
- Yield: 8 1x
Description
Rich chocolate cake delivers pure indulgence for dessert enthusiasts. Moist layers combine silky frosting with deep cocoa notes, promising delightful moments of sweet satisfaction for chocolate lovers.
Ingredients
Main Ingredients:
- 2 cups granulated sugar
- 1 3/4 cups all-purpose flour
- 3/4 cup unsweetened cocoa powder
- 2 large eggs
- 1 cup whole milk
- 1/2 cup vegetable oil
Leavening Agents:
- 1 1/2 teaspoons baking powder
- 1 1/2 teaspoons baking soda
Flavor Enhancers:
- 1 teaspoon salt
- 2 teaspoons vanilla extract
- 1 cup hot water (or brewed coffee)
Instructions
- Prepare the baking environment by heating the oven to 350F (175C). Prepare two 9-inch round cake pans with grease and flour or parchment paper lining.
- Create a dry ingredient foundation by whisking flour, cocoa powder, baking powder, baking soda, salt, and sugar together in a large mixing bowl.
- Introduce wet components to the dry mixture: crack eggs, pour vegetable oil, milk, and vanilla extract into the bowl. Use an electric mixer to blend ingredients thoroughly at medium speed until completely integrated.
- Transform batter texture by slowly incorporating hot water (or brewed coffee) while mixing at low speed. Note that the resulting batter will appear thin, which is perfectly normal.
- Distribute batter evenly between prepared cake pans, ensuring balanced volume for consistent baking. Place in preheated oven and bake for 30-35 minutes until a toothpick inserted into the center emerges clean.
- Allow cakes to rest in their pans for 10 minutes to stabilize structure. Carefully transfer to a wire cooling rack and let them cool completely before applying frosting.
Notes
- Use room temperature ingredients to ensure smooth mixing and even cake texture.
- Replace milk with non-dairy alternatives like almond or oat milk for vegan version.
- Add a tablespoon of instant espresso powder to enhance chocolate’s deep, rich flavor without making it taste like coffee.
- For gluten-free option, substitute all-purpose flour with a blend of almond and gluten-free flour mix to maintain moisture and structure.
- Prep Time: 20 minutes
- Cook Time: 35 minutes
- Category: Desserts
- Method: Baking
- Cuisine: American
Nutrition
- Serving Size: 8
- Calories: 285 kcal
- Sugar: 32 g
- Sodium: 280 mg
- Fat: 11 g
- Saturated Fat: 2 g
- Unsaturated Fat: 9 g
- Trans Fat: 0 g
- Carbohydrates: 44 g
- Fiber: 3 g
- Protein: 4 g
- Cholesterol: 37 mg
John Conley
Founder & Culinary Storyteller
Expertise
Recipe Development, Culinary Writing, Home Cooking Techniques, Seasonal Ingredient Utilization
Education
Lane Community College, Eugene, OR
Certificate in Culinary Arts
Focused on foundational cooking techniques, kitchen safety, and menu planning.
Gotham Writers Workshop, New York, NY
Course in Food Writing
Explored the art of crafting engaging culinary narratives and recipe development.
John grew up where food meant connection: big bowls, warm kitchens, and meals that told a story. After earning his Certificate in Culinary Arts from Lane Community College and diving deep into food writing at Gotham Writers Workshop, he found his calling: turning everyday recipes into something worth savoring.
At The Liffey, John’s focus is all about crafting dishes that feel easy, honest, and full of heart.