Spooky Halloween Bloodshot Eyeballs Candy Recipe for Fright Night
Crafting spooky Halloween bloodshot eyeballs candy sends shivers down my spine with its wickedly delightful presentation.
Ghoulish treats like these make party guests gasp in delighted horror.
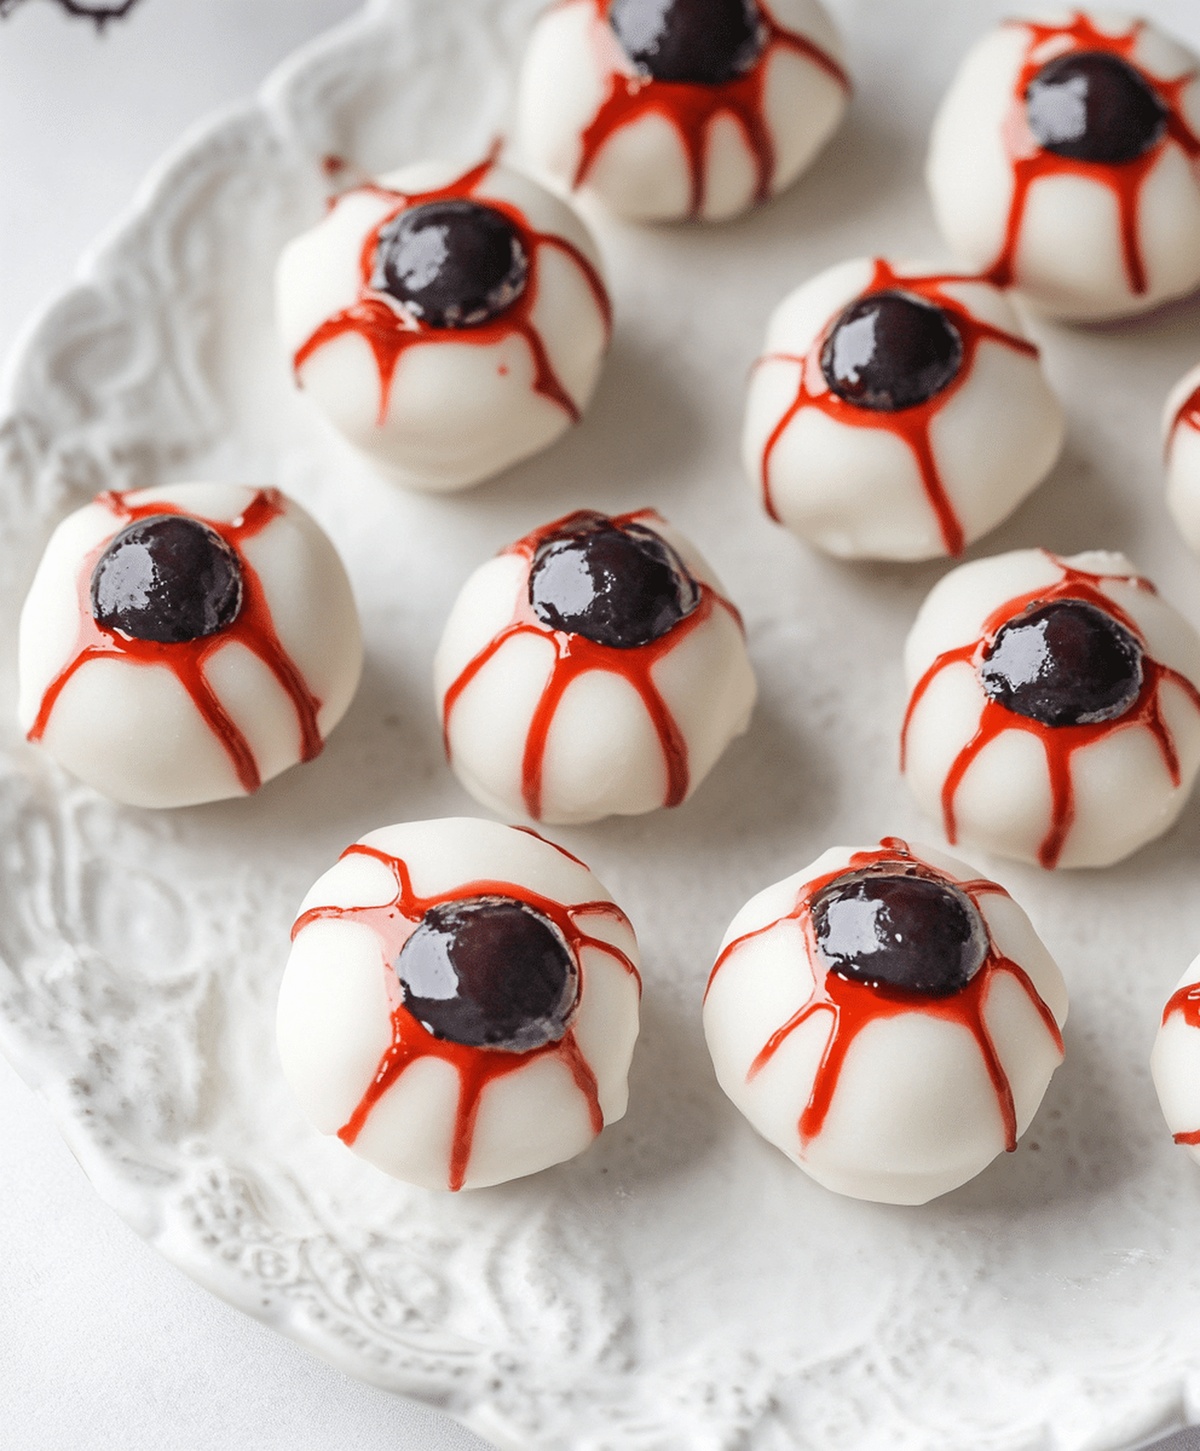
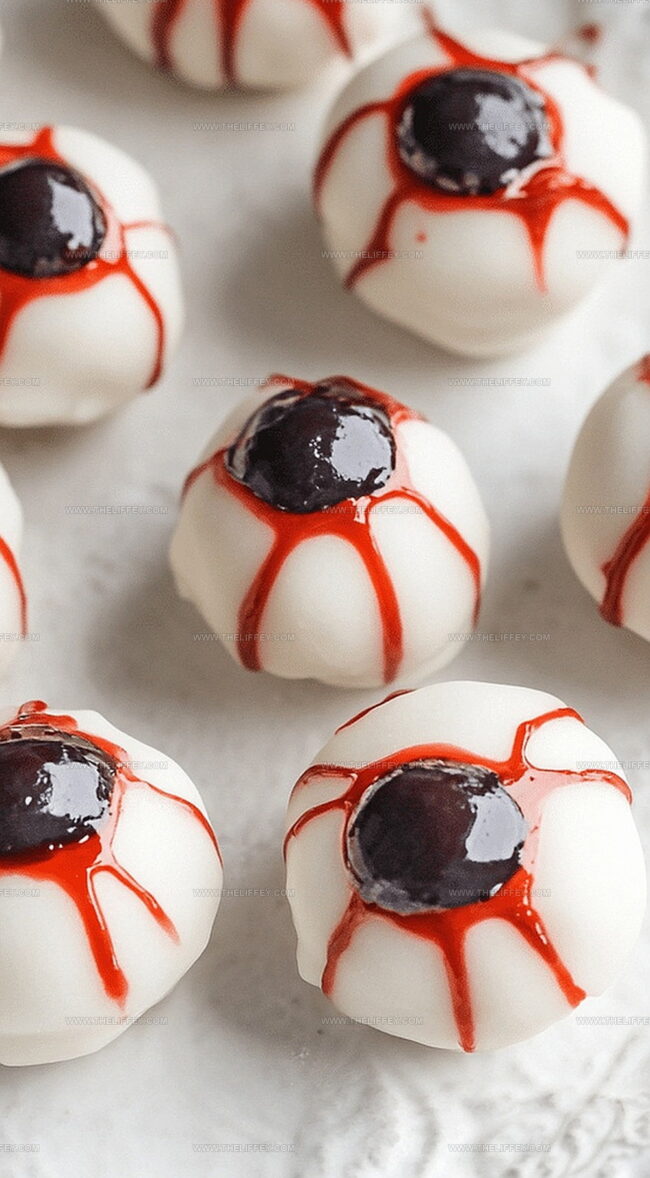
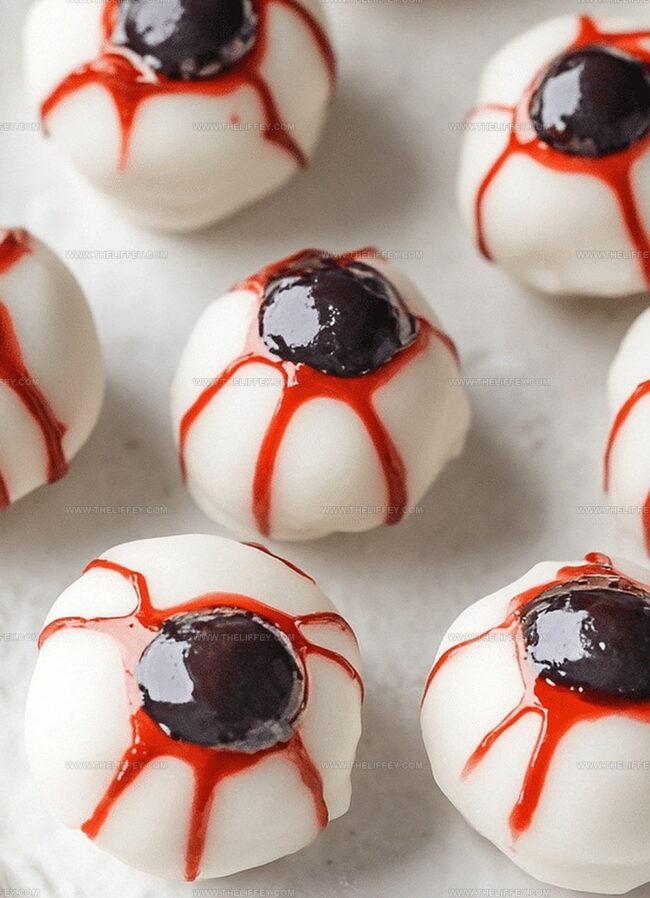
Creamy centers wrapped in white chocolate create eerie realistic orbs that look disturbingly lifelike.
Chocolate and marshmallow combine into ghastly confections perfect for frightening celebrations.
Delicate red veins painted carefully give these sweet bites an authentic, gruesome appearance.
Skilled home cooks can master this playful recipe with just a few simple ingredients.
You’ll want to surprise everyone at your next haunting gathering with these wickedly fun candies.
Halloween Bloodshot Eyeballs Candy: Spooky Fun
What You Need for Bloodshot Eyeballs Candy
Candy Base:Decorative Elements:Steps to Craft Creepy Candy Eyeballs
Step 1: Prepare Melting Station
Set up a double boiler or microwave-safe bowl for melting white chocolate or candy melts. Ensure all equipment is clean and dry to prevent water from interfering with the melting process.
Step 2: Coat Treats
Select round candies or small donuts as your base. Carefully dip each treat into the melted white chocolate, using a fork or dipping tool to ensure complete and even coverage.
Gently tap off excess chocolate and place on a parchment-lined baking sheet.
Step 3: Allow Initial Cooling
Let the chocolate-coated treats rest at room temperature or place in the refrigerator to firm up.
The coating should become solid and smooth, creating a perfect canvas for the eyeball design.
Step 4: Create Colorful Iris
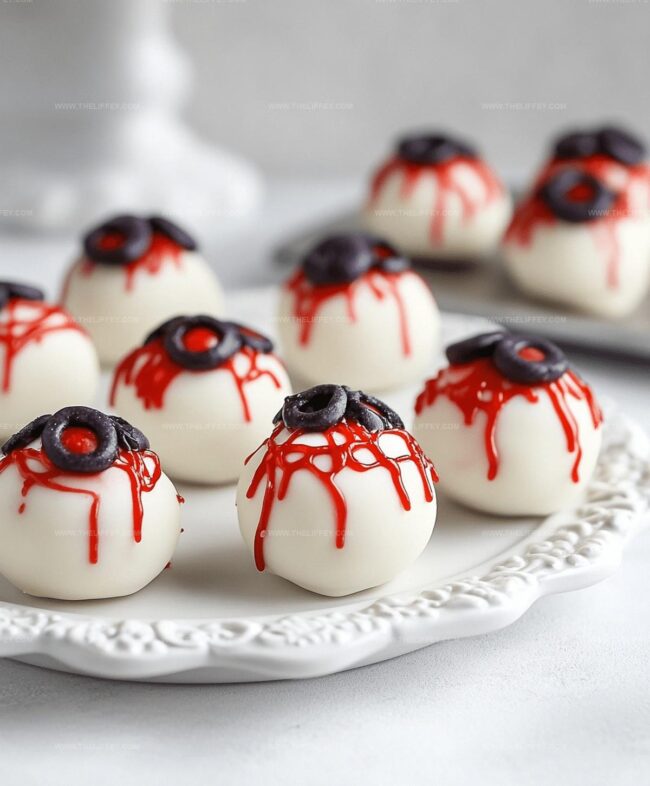
Using food coloring gel or liquid, carefully paint or pipe a circular iris onto the white chocolate surface.
Choose colors like blue, green, or brown to make the eyeballs look realistic.
Step 5: Add Pupil Detail
Place a small dark chocolate chip or round candy in the center of the iris to create a pupil.
Press gently to ensure it adheres to the chocolate surface.
Step 6: Design Bloodshot Effect
Take red gel icing or carefully applied red food coloring and create wispy, vein-like lines radiating from the iris.
Make the lines irregular and slightly branching for a more authentic bloodshot appearance.
Step 7: Final Chilling
Return the decorated eyeball treats to the refrigerator.
Chill until completely set and the decorations are firmly in place. Remove just before serving for maximum visual impact and freshness.
Pro Tip for Realistic “Bloodshot” Effect
Creative Variations for Your Eyeballs Candy
Fun Serving Ideas for Halloween Candy
Storage Advice to Keep Candy Fresh
FAQs
White chocolate or candy melts, round candies or donuts, food coloring, red gel icing, and small chocolate chips or candies for the pupil are the key ingredients.
These eyeball candies are surprisingly simple to create, requiring basic dipping and decorating skills that even beginners can master quickly.
The entire process takes about 30-45 minutes, including melting chocolate, cooling, and adding detailed decorations.
Absolutely! Kids can help with fun steps like adding food coloring for the iris and placing the pupil, making it a great Halloween crafting activity.
Print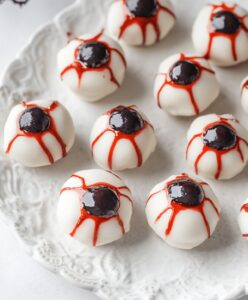
Spooky Halloween Bloodshot Eyeballs Candy Recipe
- Total Time: 20 minutes
- Yield: 12 1x
Description
Spooky halloween bloodshot eyeballs candy brings ghoulish delight to party dessert tables. Creamy white chocolate and red gel details create scary-cute treats perfect for festive gatherings.
Ingredients
Candy Base:
- 1 pound white chocolate or candy melts
- 8 round donuts or large round candies
Decorative Elements:
- 1 tube red gel icing
- 4 small black or brown candies
Color Components:
- 1 bottle green, blue, or brown food coloring
Instructions
- Gently liquefy white chocolate or candy melts in a microwave-safe bowl, stirring every 30 seconds to prevent burning.
- Delicately enrobe round candies or donuts completely with the melted white chocolate, ensuring smooth and even coverage.
- Allow the chocolate-coated treats to rest at room temperature for 10-15 minutes until they become firm and glossy.
- Using food-safe brushes or toothpicks, meticulously paint vibrant colored irises onto the white surface with gel food coloring.
- Place a miniature chocolate chip or small round candy precisely in the center of each eyeball to create a realistic pupil effect.
- Carefully pipe thin, meandering red gel icing across the white surface to simulate realistic bloodshot veins, varying the lines for a more natural appearance.
- Transfer the decorated eyeball candies into the refrigerator for approximately 20 minutes to solidify the design and maintain their eerie appearance.
- Remove from refrigerator just before serving, presenting these ghoulish treats on a Halloween-themed platter for maximum visual impact.
Notes
- Swap white chocolate with dairy-free alternatives like coconut-based candy melts for vegan options.
- Select round candies with smooth surfaces for the cleanest, most realistic eyeball effect.
- Use toothpicks for precise food coloring application when creating iris details.
- Experiment with different colored candies or chocolates to create unique eye variations for Halloween parties.
- Prep Time: 20 minutes
- Cook Time: 0 minutes
- Category: Snacks, Desserts
- Method: Melting
- Cuisine: American
Nutrition
- Serving Size: 12
- Calories: 50 kcal
- Sugar: 6 g
- Sodium: 10 mg
- Fat: 2 g
- Saturated Fat: 1.5 g
- Unsaturated Fat: 0.4 g
- Trans Fat: 0 g
- Carbohydrates: 7 g
- Fiber: 0 g
- Protein: 0.5 g
- Cholesterol: 3 mg
John Conley
Founder & Culinary Storyteller
Expertise
Recipe Development, Culinary Writing, Home Cooking Techniques, Seasonal Ingredient Utilization
Education
Lane Community College, Eugene, OR
Certificate in Culinary Arts
Focused on foundational cooking techniques, kitchen safety, and menu planning.
Gotham Writers Workshop, New York, NY
Course in Food Writing
Explored the art of crafting engaging culinary narratives and recipe development.
John grew up where food meant connection: big bowls, warm kitchens, and meals that told a story. After earning his Certificate in Culinary Arts from Lane Community College and diving deep into food writing at Gotham Writers Workshop, he found his calling: turning everyday recipes into something worth savoring.
At The Liffey, John’s focus is all about crafting dishes that feel easy, honest, and full of heart.