
The Ultimate No Bake Mint Chocolate Cheesecake Recipe for Bliss
Cool summer nights call for a delectable mint chocolate cheesecake that melts smoothly on your tongue.
Creamy textures blend perfectly with refreshing mint notes dancing through each silky bite.
chocolate lovers will adore this dreamy dessert that requires zero baking skills.
Simple ingredients come together in minutes, creating a showstopping treat anyone can master.
no complicated techniques or professional pastry training needed for this crowd-pleasing recipe.
Chilled and rich, each slice promises pure indulgence without heating up your kitchen.
Whip up this decadent cheesecake and watch everyone ask for seconds.
No Bake Mint Chocolate Cheesecake To Try
Ingredients For Mint Chocolate Cheesecake
Base Ingredients:Cheesecake Filling Ingredients:Chocolate and Cream Ingredients:Finishing Ingredients:How To Assemble No Bake Mint Cheesecake
Step 1: Crush Oreo Cookies
Grab a bunch of Oreo cookies and pulverize them into fine crumbs using a food processor or a rolling pin. Crush those cookies until they’re completely broken down into a sandy texture.
Step 2: Create Crust Foundation
Mix the cookie crumbs with melted butter until the mixture becomes clumpy and holds together. Press this delightful mixture firmly into the bottom of a springform pan, creating a solid base for your cheesecake.
Pop the pan into the refrigerator to let the crust firm up.
Step 3: Whip Cream Cheese Mixture
Beat the cream cheese until it becomes silky smooth and creamy.
Blend in the powdered sugar and peppermint extract, creating a luscious and fragrant filling that’ll make your taste buds dance.
Step 4: Incorporate Chocolate Magic
Gently fold the melted chocolate into the cream cheese mixture, creating a beautiful marbled effect.
Ensure the chocolate is fully integrated for a rich, decadent flavor.
Step 5: Whip Cream to Perfection
In a separate bowl, whip the heavy cream until it forms stiff, billowy peaks.
Carefully fold this airy cream into the chocolate mixture, creating a light and fluffy texture.
Step 6: Optional Color Boost
Add a few drops of green food coloring to give your cheesecake a fun, minty appearance.
Mix until the color is evenly distributed.
Step 7: Assemble and Chill
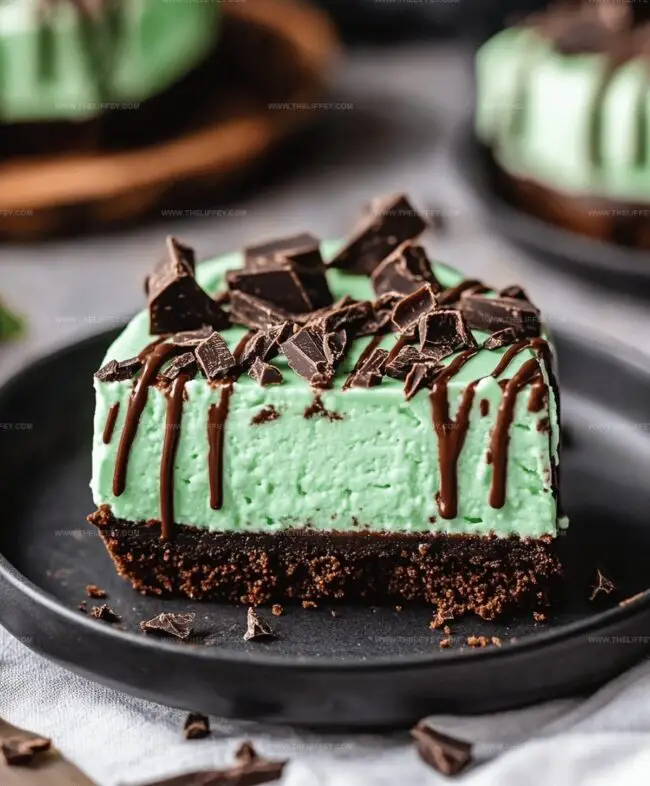
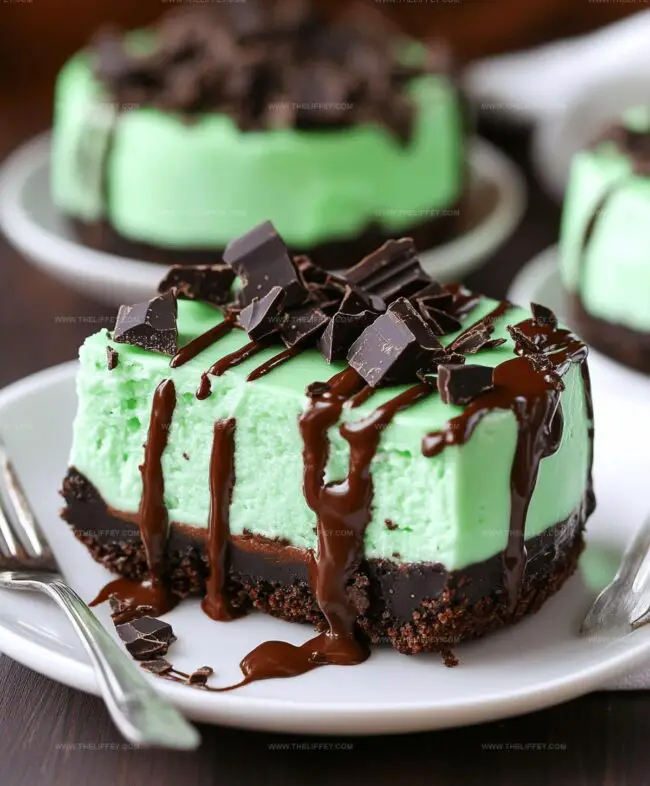
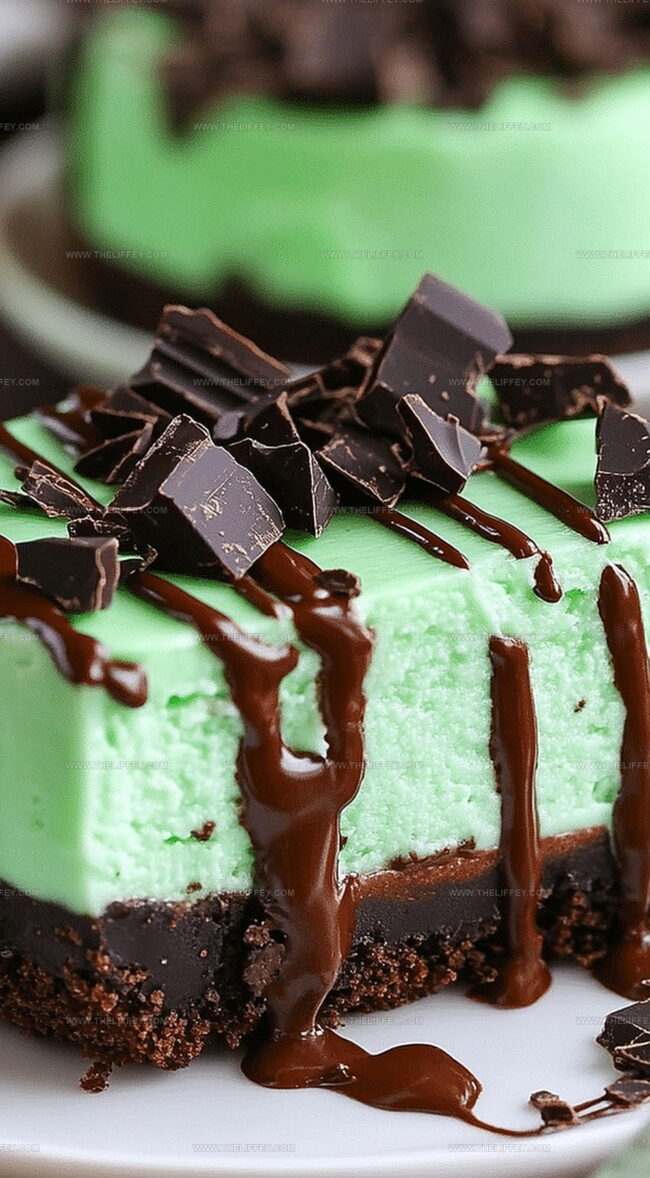
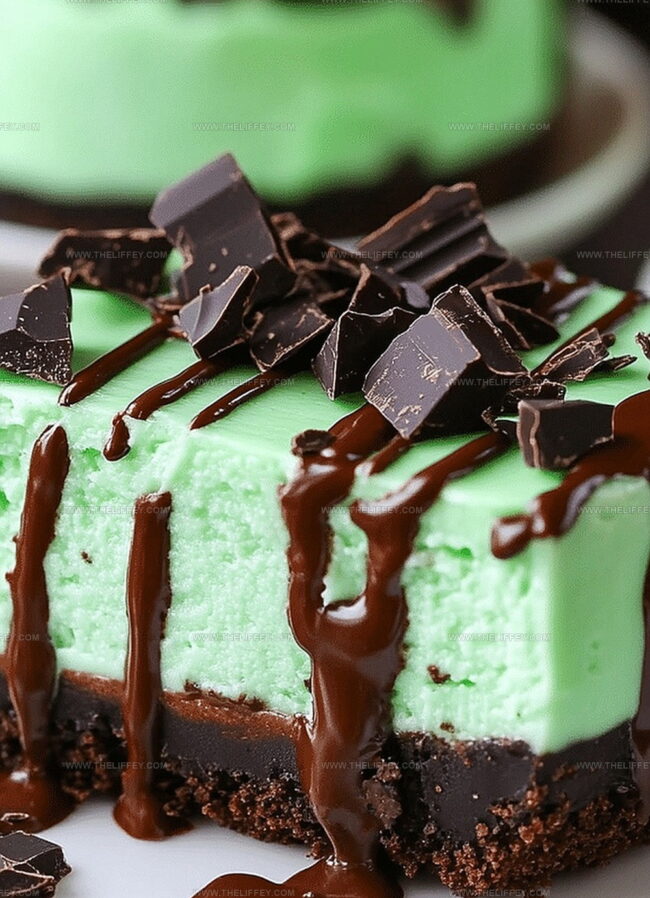
Spread the creamy filling evenly over the chilled Oreo crust.
Smooth the top with a spatula and place the cheesecake in the refrigerator. Let it set for at least 6 hours or overnight for the ultimate texture.
Step 8: Garnish and Serve
Before serving, sprinkle chocolate shavings or chips on top for an extra touch of decadence. Slice and enjoy your no-bake mint chocolate cheesecake!
Tips To Nail Mint Chocolate Cheesecake
Variations On Mint Chocolate Cheesecake
What To Serve With Mint Cheesecake
How To Keep Mint Chocolate Cheesecake Fresh
FAQs
Yes, graham crackers or chocolate wafers work great as alternatives to Oreo cookies for the crust.
Avoid overmixing the filling and make sure all ingredients are at room temperature before combining to reduce the risk of cracks.
No, you can skip it if you don’t like mint flavor, or substitute with vanilla extract for a classic cheesecake taste.
Absolutely! This no-bake cheesecake can be prepared up to 2-3 days in advance and stored in the refrigerator.
Print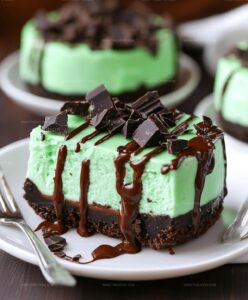
Quick Mint Chocolate Cheesecake Recipe
- Total Time: 30 minutes
- Yield: 8 1x
Description
Mint chocolate cheesecake combines creamy richness with refreshing mint flavor. Cool, silky layers delight palates and provide a simple dessert experience you’ll savor with each luxurious bite.
Ingredients
Main Ingredients:
- 16 ounces (454 grams) cream cheese
- 8 ounces (226 grams) semi-sweet chocolate
- 1 1/2 cups (360 milliliters) heavy whipping cream
Crust Ingredients:
- 24 oreo cookies
- 5 tablespoons (75 milliliters) unsalted butter
Additional Ingredients:
- 1 cup (120 grams) powdered sugar
- 1 teaspoon (5 milliliters) peppermint extract
- Green food coloring
- Chocolate shavings or chips (for garnish)
Instructions
- Crush Oreo cookies into fine crumbs and blend thoroughly with melted butter to create a uniform base mixture.
- Press the cookie mixture firmly and evenly into the bottom of a springform pan, ensuring a compact and smooth surface.
- Chill the crust in the refrigerator for 15 minutes to help it set and stabilize.
- Using an electric mixer, whip cream cheese until creamy and completely smooth with no lumps.
- Gradually incorporate powdered sugar and peppermint extract, mixing until the filling becomes light and fluffy.
- Carefully melt chocolate using a double boiler or microwave, stirring until completely smooth and glossy.
- Gently fold the melted chocolate into the cream cheese mixture, creating a marbled mint chocolate texture.
- In a separate chilled bowl, whip heavy cream until stiff, voluminous peaks form.
- Delicately fold the whipped cream into the chocolate mixture, maintaining its airiness and preventing deflation.
- Optional: Add a few drops of green food coloring to achieve a vibrant mint appearance.
- Pour the filling evenly over the chilled crust, smoothing the top with a spatula.
- Refrigerate for 6-8 hours or preferably overnight to allow complete setting and flavor development.
- Before serving, garnish with chocolate shavings or mini chocolate chips for added texture and visual appeal.
Notes
- Swap traditional Oreos with gluten-free alternatives for a celiac-friendly version.
- Experiment with dark or white chocolate variations to customize the flavor profile.
- Ensure cream cheese is at room temperature for smoother, lump-free mixing.
- Use pure peppermint extract sparingly to avoid overwhelming the delicate cheesecake taste.
- Prep Time: 30 minutes
- Cook Time: 0 minutes
- Category: Desserts
- Method: None
- Cuisine: American
Nutrition
- Serving Size: 8
- Calories: 422 kcal
- Sugar: 32 g
- Sodium: 190 mg
- Fat: 31 g
- Saturated Fat: 19 g
- Unsaturated Fat: 10 g
- Trans Fat: 0.5 g
- Carbohydrates: 36 g
- Fiber: 1.5 g
- Protein: 5 g
- Cholesterol: 80 mg
John Conley
Founder & Culinary Storyteller
Expertise
Recipe Development, Culinary Writing, Home Cooking Techniques, Seasonal Ingredient Utilization
Education
Lane Community College, Eugene, OR
Certificate in Culinary Arts
Focused on foundational cooking techniques, kitchen safety, and menu planning.
Gotham Writers Workshop, New York, NY
Course in Food Writing
Explored the art of crafting engaging culinary narratives and recipe development.
John grew up where food meant connection: big bowls, warm kitchens, and meals that told a story. After earning his Certificate in Culinary Arts from Lane Community College and diving deep into food writing at Gotham Writers Workshop, he found his calling: turning everyday recipes into something worth savoring.
At The Liffey, John’s focus is all about crafting dishes that feel easy, honest, and full of heart.