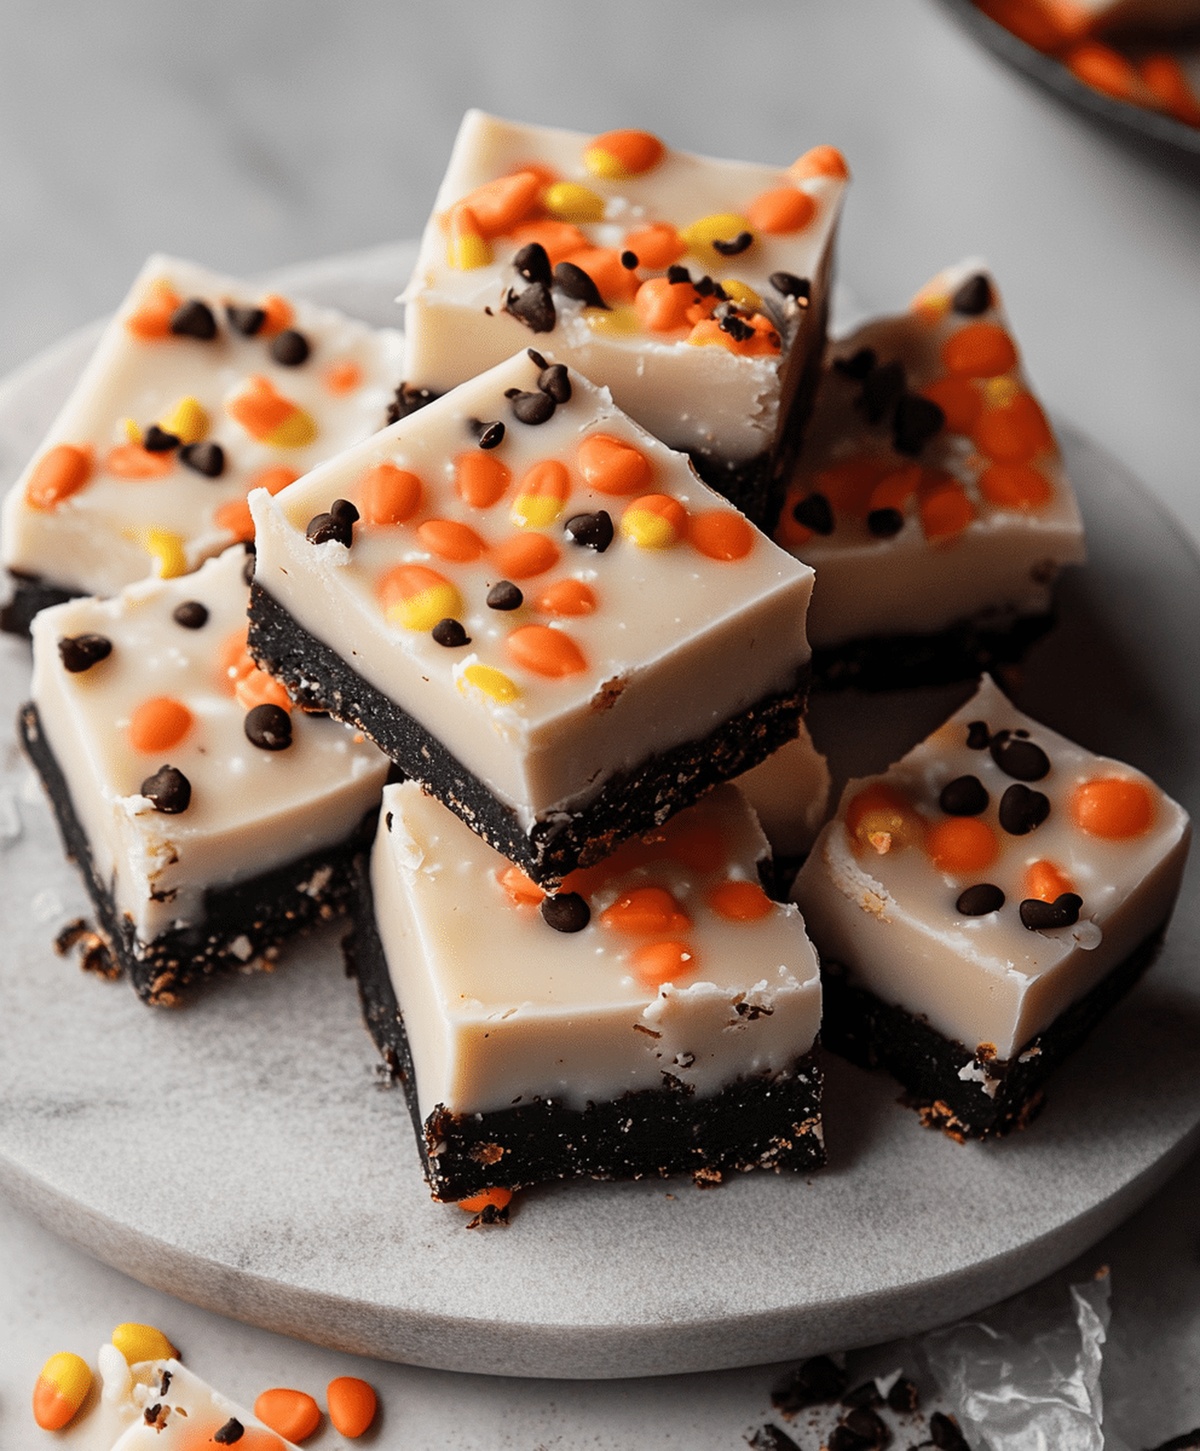
Spooky & Sweet: Easy Halloween Fudge Recipe for Fall Fun
Crafting a spooky Halloween fudge recipe can turn an ordinary dessert into a memorable treat that delights everyone at your party.
Ghoulish decorations and creepy colors make this confection stand out from typical sweets.
Sweet chocolate serves as the perfect base for creating something wickedly delicious.
Kids and adults alike will fall in love with these playful, festive squares.
Marshmallows and sprinkles add whimsical touches that bring the Halloween spirit to life.
Simple ingredients and quick preparation mean you can whip up this dessert in no time.
Prepare to shock and delight your guests with this hauntingly good fudge that promises to be the star of any Halloween celebration.
Halloween Fudge: Why to Enjoy
Ingredients for Creepy Halloween Fudge
Base Ingredients:Flavor and Color Enhancers:Decorative Toppings:Additional Preparation Item:Simple Steps to Make Halloween Fudge
Step 1: Prepare Baking Vessel
Line a square baking dish with parchment paper, ensuring the paper covers the bottom and sides completely for easy removal later.
Step 2: Melt Chocolate Base
Grab a microwave-safe bowl and combine chocolate chips with sweetened condensed milk.
Heat in short 30-second bursts, stirring gently between each interval, until the mixture transforms into a silky, glossy consistency.
Step 3: Add Flavor Enhancer
Introduce vanilla extract to the melted chocolate mixture, stirring until fully incorporated, which will deepen the rich chocolate flavor.
Step 4: Create Spooky Layers
Optionally, separate the fudge mixture into portions and experiment with Halloween-themed food coloring:Step 5: Pour and Spread
Transfer the fudge mixture into the prepared pan, using a spatula to spread it evenly and create a smooth surface.
Step 6: Decorate with Halloween Flair
Sprinkle the top with festive decorations like:Step 7: Chill and Set
Place the fudge in the refrigerator for at least two hours, allowing it to firm up completely and develop a perfect texture.
Step 8: Slice and Serve
Remove the fudge from the refrigerator, lift out using parchment paper, and slice into bite-sized squares ready for Halloween celebrations.
Secret Tips for Ultra-Smooth Halloween Fudge
Flavor Boosters for Your Halloween Fudge
Creative Ways to Serve Halloween Fudge
Storing Halloween Fudge for Best Results
FAQs
Yes, you can substitute semi-sweet, dark, or milk chocolate chips depending on your taste preference. Just ensure they’re good quality for the best flavor.
No, this recipe is microwave-based and doesn’t require a candy thermometer, making it super easy for beginners to create delicious fudge.
The key is not to overheat the chocolate and to follow the 30-second microwave intervals, stirring between each interval. This helps maintain the perfect creamy texture.
Absolutely! Kids can help with mixing, adding sprinkles, and choosing Halloween colors, making it a fun family activity with minimal complicated steps.
Print
Quick Halloween Fudge Recipe
- Total Time: 2 hours 20 minutes
- Yield: 24 1x
Description
Spooky halloween fudge delivers festive chocolate magic in minutes. Creamy layers of orange and black swirled chocolate create a playful seasonal treat you’ll want to share with friends and family.
Ingredients
Main Ingredients:
- 3 cups semi-sweet chocolate chips
- 1 can (14 ounces / 396 grams) sweetened condensed milk
Flavoring:
- 1 teaspoon vanilla extract
Decorative Ingredients:
- Halloween sprinkles or candy (for topping)
- Orange and black food coloring (optional)
Instructions
- Prepare an 8×8-inch baking dish by lining it completely with parchment paper, ensuring full coverage of the bottom and sides.
- Select a microwave-safe bowl and combine chocolate chips with sweetened condensed milk, microwaving in 30-second increments while stirring thoroughly between each interval until the mixture becomes completely smooth and uniform.
- Incorporate vanilla extract into the melted chocolate mixture, stirring until fully integrated and creating a rich, aromatic base.
- Optional: Separate the fudge mixture into portions and introduce vibrant food coloring to craft distinct Halloween-inspired layers with contrasting hues.
- Transfer the entire fudge mixture into the prepared pan, carefully spreading it with a spatula to create an even, consistent surface.
- Embellish the top of the fudge with festive Halloween sprinkles or themed candy pieces, pressing them gently to ensure they adhere to the surface.
- Chill the fudge in the refrigerator for a minimum of 2 hours, allowing it to set completely and develop a firm, sliceable texture.
- Once fully set, remove the fudge from the refrigerator and slice into neat, uniform squares using a sharp knife, creating perfect bite-sized Halloween treats.
Notes
- Customize fudge colors using gel food coloring for vibrant Halloween hues without affecting texture.
- Swap traditional chocolate chips with dark or white chocolate for varied flavor profiles and dietary preferences.
- Prevent sticky cutting by wiping knife with warm water between slices for clean, precise edges.
- Store fudge in airtight container between parchment layers to maintain freshness and prevent flavor absorption from other foods.
- Prep Time: 20 minutes
- Cook Time: 2 hours
- Category: Desserts, Snacks
- Method: Blending
- Cuisine: American
Nutrition
- Serving Size: 24
- Calories: 133
- Sugar: 15 g
- Sodium: 20 mg
- Fat: 7 g
- Saturated Fat: 4 g
- Unsaturated Fat: 3 g
- Trans Fat: 0 g
- Carbohydrates: 18 g
- Fiber: 1 g
- Protein: 1 g
- Cholesterol: 5 mg
John Conley
Founder & Culinary Storyteller
Expertise
Recipe Development, Culinary Writing, Home Cooking Techniques, Seasonal Ingredient Utilization
Education
Lane Community College, Eugene, OR
Certificate in Culinary Arts
Focused on foundational cooking techniques, kitchen safety, and menu planning.
Gotham Writers Workshop, New York, NY
Course in Food Writing
Explored the art of crafting engaging culinary narratives and recipe development.
John grew up where food meant connection: big bowls, warm kitchens, and meals that told a story. After earning his Certificate in Culinary Arts from Lane Community College and diving deep into food writing at Gotham Writers Workshop, he found his calling: turning everyday recipes into something worth savoring.
At The Liffey, John’s focus is all about crafting dishes that feel easy, honest, and full of heart.