
Quick & Dreamy Pumpkin Oreo Balls Recipe: Autumn’s Sweet Treat
Sweet memories of childhood collide with seasonal pumpkin oreo balls in this delightful no-bake treat.
Childhood comfort meets autumn magic through a simple blend of classic cookies and warm spices.
Cream cheese provides a smooth, rich foundation for these irresistible bite-sized delights.
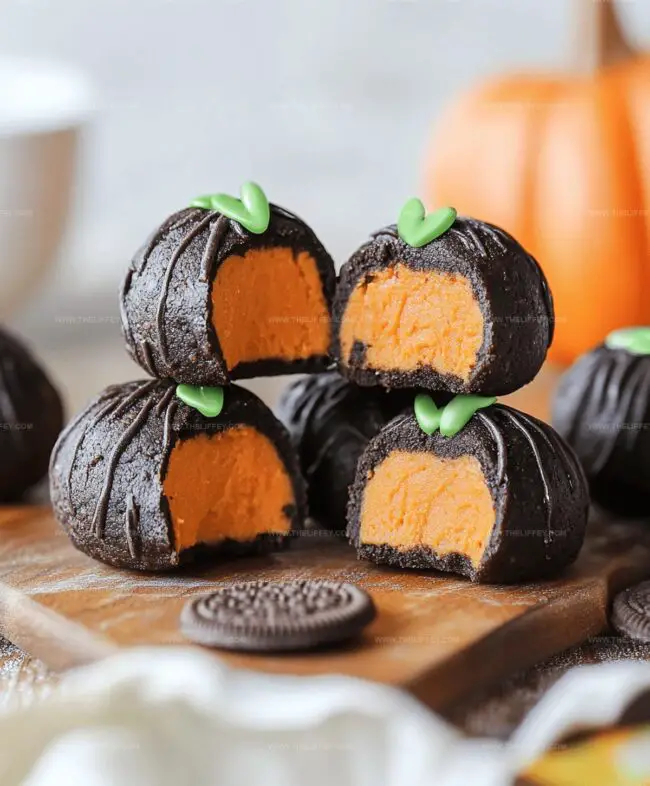
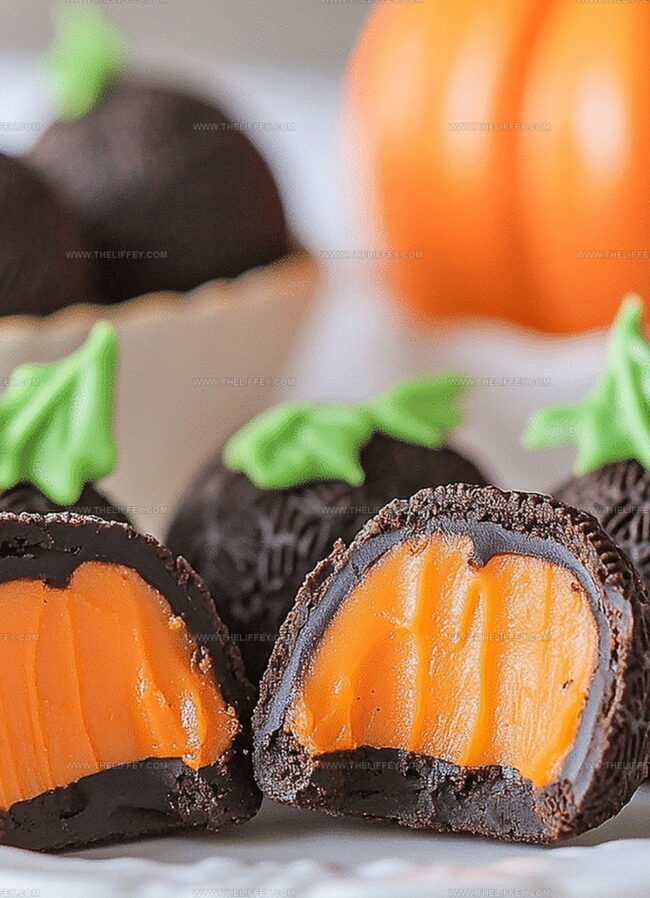
Crumbled oreos mingle with pumpkin puree, creating a decadent mixture that whispers of cozy evenings.
Rolled into perfect spheres and dusted with cinnamon, these little gems promise pure indulgence.
Chocolate drizzles add a luxurious finish that makes you want to savor every single bite.
Your taste buds will dance with joy from the first incredible mouthful.
Ready to transform ordinary ingredients into an extraordinary autumn dessert?
What Makes Pumpkin Oreo Balls So Addictive

Pumpkin Oreo Balls You’ll Need Ingredients For
Core Ingredients:Coating Ingredients:Decoration Ingredients:How to Craft Pumpkin Oreo Balls Perfectly
Step 1: Pulverize Oreo Cookies
Grab your food processor and transform the Oreo cookies into super fine crumbs, ensuring no large chunks remain.
Step 2: Create Creamy Pumpkin Mixture
In a mixing bowl, combine the crushed Oreos with:Blend everything until the mixture becomes completely smooth and well-incorporated.
Step 3: Shape Delightful Balls
Use your hands to roll the mixture into small, uniform spheres about the size of a golf ball.
Arrange these balls on a parchment-lined baking sheet.
Step 4: Chill and Firm
Place the baking sheet with the balls into the freezer for approximately 20 minutes.
This helps them maintain their shape during the coating process.
Step 5: Prepare Chocolate Coating
Melt white chocolate or candy melts using a double boiler or microwave, stirring occasionally to ensure a silky smooth consistency.
Step 6: Dunk and Coat
Carefully dip each frozen ball into the melted white chocolate, using a fork to help drain excess coating.
Ensure complete and even coverage.
Step 7: Decorate and Enhance
Return the chocolate-covered balls to the parchment paper.
For extra flair, drizzle with orange candy melts or sprinkle pumpkin spice on top.
Step 8: Set and Serve
Refrigerate the Oreo balls for about 15 minutes until the chocolate hardens completely.
Serve chilled and enjoy your festive treat!
Expert Tips to Nail Pumpkin Oreo Balls
Pumpkin Oreo Balls: Mix It Up with These Ideas
Serving Pumpkin Oreo Balls with Style
How to Keep Pumpkin Oreo Balls Fresh
FAQs
Yes, you can use regular Oreo cookies. Just add extra pumpkin pie spice to the mixture to get the seasonal flavor.
These pumpkin Oreo balls will stay fresh in an airtight container in the refrigerator for up to 5 days. You can also freeze them for up to 2 weeks.
If the mixture is too soft, refrigerate it for 15-20 minutes to help it firm up before rolling into balls. This will make it easier to shape and handle.
Print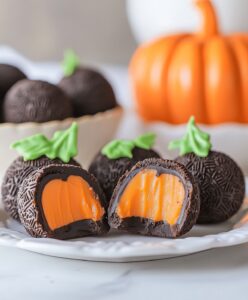
Pumpkin Oreo Balls Recipe
- Total Time: 35 minutes
- Yield: 36 1x
Description
Indulgent pumpkin oreo balls combine creamy autumn flavors with classic cookie crunch, creating a delightful seasonal treat. Sweet spheres of spiced pumpkin and crushed oreos deliver irresistible comfort that beckons you to savor each delectable bite.
Ingredients
Main Ingredients:
- 36 Oreo cookies (regular or pumpkin spice)
- 8 ounces (226 grams) cream cheese, softened
- 12 ounces (340 grams) white chocolate or white candy melts
Spice and Flavor:
- 1 teaspoon pumpkin pie spice
Decoration (Optional):
- Orange candy melts or sprinkles
Instructions
- Pulverize Oreo cookies into ultra-fine powder using a food processor, ensuring uniform texture.
- Blend crushed Oreos with room-temperature cream cheese and aromatic pumpkin pie spice until completely homogeneous.
- Craft uniform spherical morsels approximately one inch in diameter, positioning them carefully on parchment-lined tray.
- Chill the formed balls in freezer for 20 minutes to solidify structure and enhance handling.
- Gently liquify white chocolate or candy melts using double boiler or microwave method, stirring until silky smooth.
- Delicately submerge each chilled ball into melted chocolate, ensuring comprehensive and elegant coating.
- Return chocolate-enrobed spheres onto parchment paper, allowing excess coating to drip gracefully.
- For festive presentation, artfully drizzle vibrant orange candy melts or dust with additional pumpkin spice for visual intrigue.
- Refrigerate completed confections for approximately 15 minutes to set chocolate and enhance flavor melding.
Notes
- Customize the spice level by adjusting the amount of pumpkin pie spice to suit personal taste preferences.
- Use gluten-free Oreos and cream cheese for a celiac-friendly version of these delightful treats.
- Ensure cream cheese is completely softened to create a smooth, easy-to-mix consistency that prevents lumpy texture.
- Chill the mixture before rolling to make ball formation easier and prevent sticky hands during preparation.
- Prep Time: 20 minutes
- Cook Time: 15 minutes
- Category: Snacks, Desserts
- Method: Freezing
- Cuisine: American
Nutrition
- Serving Size: 36
- Calories: 143
- Sugar: 11 g
- Sodium: 81 mg
- Fat: 8 g
- Saturated Fat: 5 g
- Unsaturated Fat: 2 g
- Trans Fat: 0 g
- Carbohydrates: 18 g
- Fiber: 0.5 g
- Protein: 1 g
- Cholesterol: 13 mg
Amanda Bennett
Recipe Curator & Culinary Educator
Expertise
Baking and Pastry Arts, Recipe Testing and Development, Culinary Instruction, Food Styling and Photography
Education
Asheville-Buncombe Technical Community College, Asheville, NC
Diploma in Culinary Arts
Emphasized practical cooking skills, nutrition, and kitchen management.
Cambridge School of Culinary Arts, Cambridge, MA
Certificate in Professional Pastry Arts
Specialized in baking techniques, dessert presentation, and flavor profiling
Amanda’s roots run deep in the Southern hills, where every meal started fresh from the garden and every dessert came with a story. She trained at Asheville-Buncombe Technical Community College and sharpened her pastry skills at the Cambridge School of Culinary Arts, blending classic technique with everyday charm.
At The Liffey, Amanda’s passion is making baking and home cooking feel natural and joyful. She’s all about single recipes that are simple enough for a busy afternoon, but special enough to make someone’s day a little sweeter.