
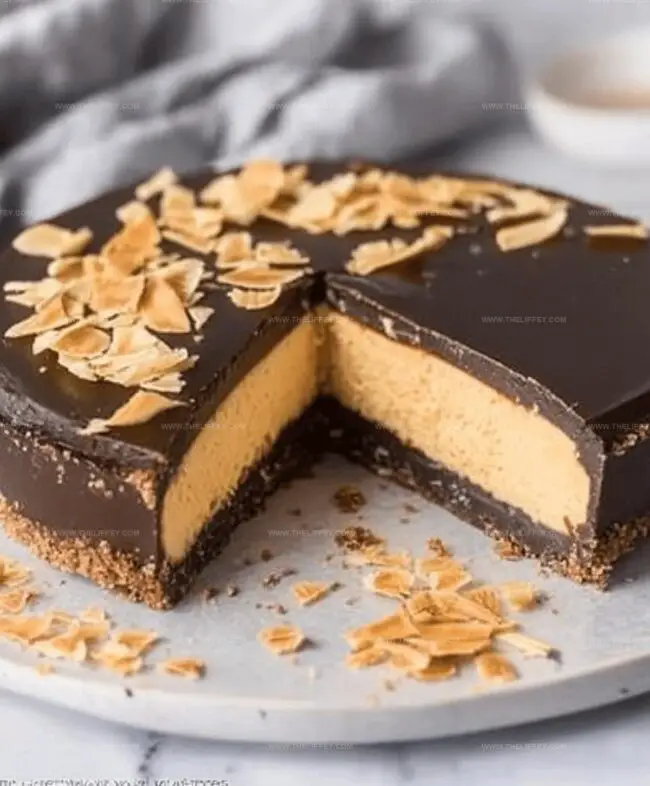
Heavenly No Bake Nanaimo Bar Cheesecake Recipe for Sweet Lovers
Sweet dreams come true with this decadent Nanaimo bar cheesecake that blends classic Canadian dessert magic into a no-bake wonder.
Layers of creamy goodness merge chocolate, custard, and cheesecake textures into one irresistible treat.
Chocolate lovers will swoon over the rich base and silky smooth filling.
Zero baking skills required means anyone can master this impressive dessert.
Crumbly graham and coconut create a delightful foundation that supports each delectable bite.
Cool and refreshing, this cheesecake captures the essence of indulgence without turning on the oven.
You’ll want to savor every single heavenly spoonful of this Canadian-inspired masterpiece.
No Bake Nanaimo Bar Cheesecake Fun
Ingredients For Nanaimo Bar Cheesecake
Base Ingredients:Filling Ingredients:Chocolate Topping Ingredients:How To Make No Bake Nanaimo Cheesecake
Step 1: Crush And Combine Base Ingredients
Smash graham crackers into fine crumbs. Mix these crumbs with:Press the mixture firmly into the bottom of a springform pan.
Pop the pan into the refrigerator to set the base solid and cool.
Step 2: Whip Up Creamy Filling
In a mixing bowl, blend softened cream cheese until super smooth.
Add:Beat these ingredients until they become light and fluffy. Gently fold in freshly whipped cream to create an airy, rich texture.
Spread this delightful mixture evenly over the chilled crust. Return the pan to the refrigerator to firm up.
Step 3: Drizzle Decadent Chocolate Topping
Melt high-quality chocolate with heavy cream in a double boiler or microwave. Stir until the mixture becomes glossy and silky.
Pour the chocolate over the custard layer, using a spatula to create an even, beautiful surface. Chill the entire dessert until the chocolate sets completely.
Step 4: Slice And Serve Deliciousness
Remove the cheesecake from the refrigerator. Release the springform pan sides.
Cut into clean, precise slices. Serve chilled and watch everyone’s eyes light up with pure dessert joy.
Tips For Nanaimo Bar Cheesecake
Different Versions Of Nanaimo Cheesecake
What Goes Well With Nanaimo Cheesecake
Keeping Nanaimo Cheesecake Fresh
FAQs
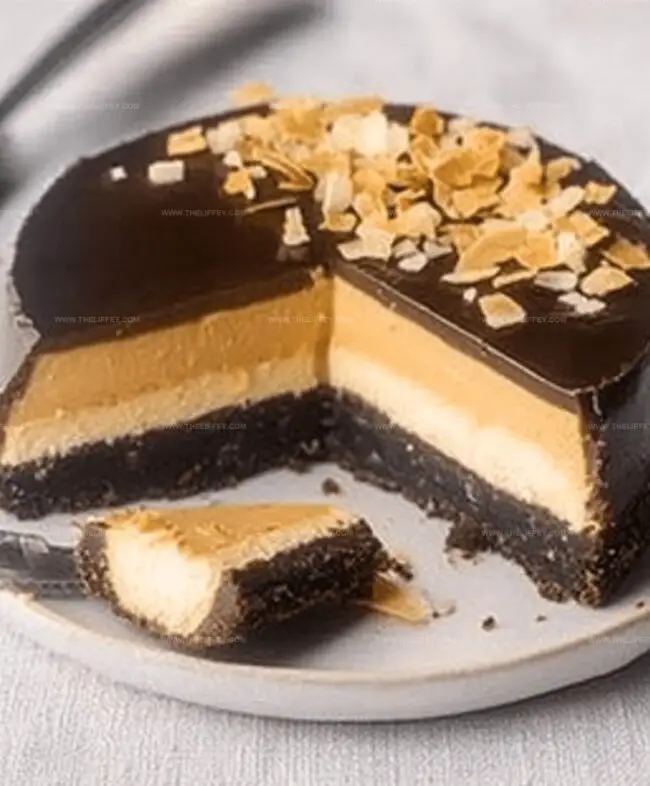
Nanaimo bars are a classic Canadian dessert originating from Nanaimo, British Columbia, featuring three distinct layers: a chocolate-coconut graham cracker base, a creamy custard middle layer, and a chocolate topping.
Yes, this no-bake cheesecake is perfect for preparing in advance. You can make it 1-2 days before serving and keep it refrigerated until ready to enjoy.
You’ll need a springform pan, electric mixer, and basic kitchen tools like mixing bowls and a spatula. No baking equipment is required for this no-bake recipe.
Print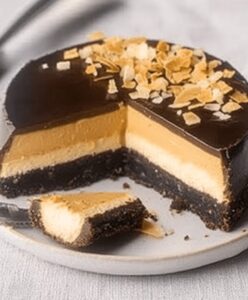
Perfect No Bake Nanaimo Bar Cheesecake Recipe
- Total Time: 20 minutes
- Yield: 12 1x
Description
Nanaimo bar cheesecake blends Canadian dessert traditions into a creamy no-bake masterpiece. Chocolate, custard, and graham cracker layers create a luxurious treat you’ll savor with pure delight.
Ingredients
Main Ingredients:
- 2 cups graham cracker crumbs
- 1 cup shredded coconut
- 1/4 cup cocoa powder
- 1/2 cup (1 stick) unsalted butter
Instructions
- Craft a rich base by combining graham cracker crumbs with cocoa, coconut, and melted butter, pressing firmly into the bottom of a springform pan. Refrigerate for 15 minutes to set the foundation.
- Create a luxurious cream cheese filling by whipping together cream cheese, softened butter, custard powder, and powdered sugar until silky smooth. Gently fold in whipped cream to maintain airy texture.
- Carefully spread the cream cheese mixture over the chilled crust, ensuring an even layer. Return to refrigerator for 30 minutes to stabilize.
- Prepare the chocolate topping by gently melting chocolate with cream until glossy and perfectly blended. Allow mixture to cool slightly before pouring over the custard layer.
- Smooth the chocolate layer with a spatula, creating an elegant finish. Refrigerate for minimum 2 hours or overnight to allow complete setting.
- When ready to serve, release springform pan and slice into clean, precise portions. Garnish with additional coconut shavings or chocolate shards for extra visual appeal.
- Serve chilled, enjoying the decadent layers of chocolate, creamy filling, and crisp coconut crust in every delightful bite.
Notes
- Customize the crust by swapping graham crackers with gluten-free alternatives like almond flour or gluten-free cookie crumbs for those with dietary restrictions.
- Enhance the coconut flavor by toasting the shredded coconut before mixing into the crust, adding a deeper, nuttier dimension to the base.
- Use high-quality chocolate with at least 70% cocoa content for a richer, more intense chocolate topping that elevates the entire dessert.
- Experiment with flavor variations by adding a splash of liqueur to the custard layer or incorporating different extracts like vanilla or almond to personalize the cheesecake.
- Prep Time: 20 minutes
- Cook Time: 0 minutes
- Category: Desserts
- Method: Chilling
- Cuisine: Canadian
Nutrition
- Serving Size: 12
- Calories: 250 kcal
- Sugar: 18 g
- Sodium: 90 mg
- Fat: 15 g
- Saturated Fat: 10 g
- Unsaturated Fat: 4 g
- Trans Fat: 0.2 g
- Carbohydrates: 28 g
- Fiber: 2 g
- Protein: 3 g
- Cholesterol: 30 mg
John Conley
Founder & Culinary Storyteller
Expertise
Recipe Development, Culinary Writing, Home Cooking Techniques, Seasonal Ingredient Utilization
Education
Lane Community College, Eugene, OR
Certificate in Culinary Arts
Focused on foundational cooking techniques, kitchen safety, and menu planning.
Gotham Writers Workshop, New York, NY
Course in Food Writing
Explored the art of crafting engaging culinary narratives and recipe development.
John grew up where food meant connection: big bowls, warm kitchens, and meals that told a story. After earning his Certificate in Culinary Arts from Lane Community College and diving deep into food writing at Gotham Writers Workshop, he found his calling: turning everyday recipes into something worth savoring.
At The Liffey, John’s focus is all about crafting dishes that feel easy, honest, and full of heart.