Quick & Fluffy Cheesecake Crescent Rolls Casserole Recipe
Sweet dreams come true with this dreamy cheesecake crescent rolls casserole that melts hearts faster than butter on a warm skillet.
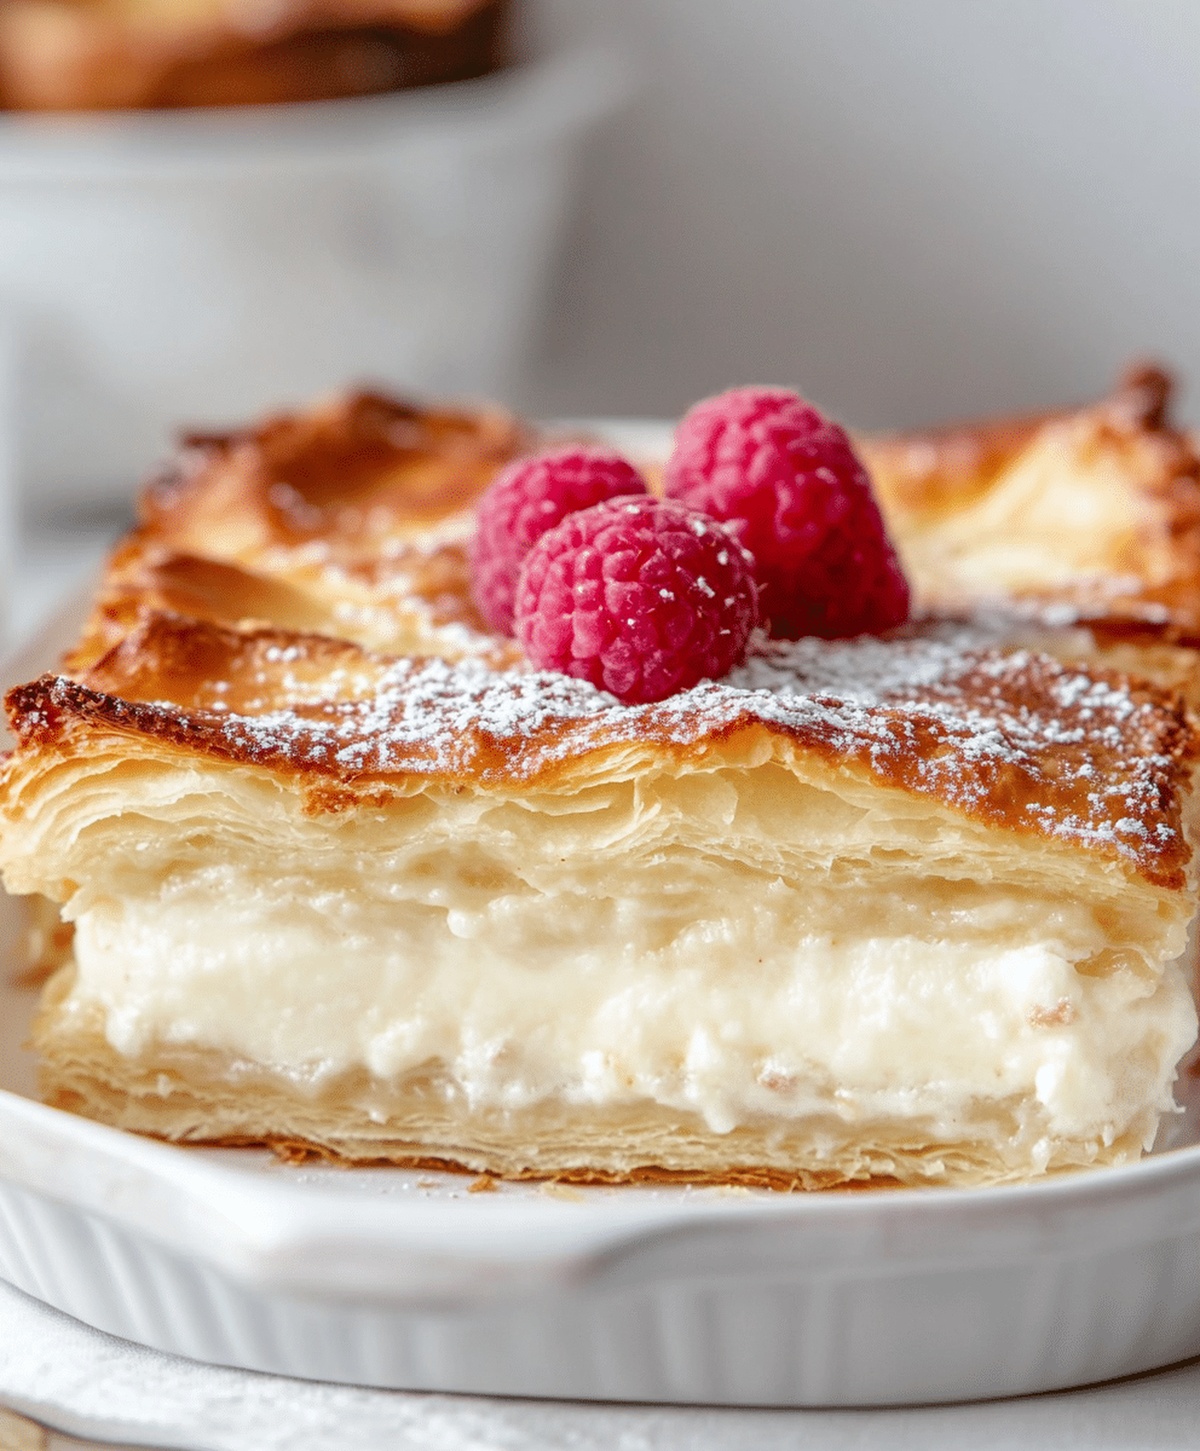
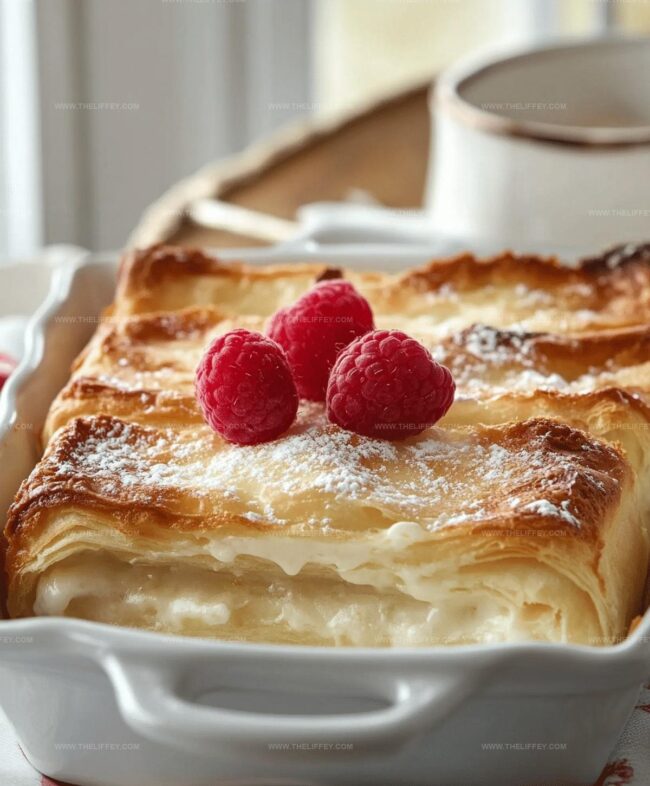
Pillowy pastry wraps around creamy filling, creating magic in every single bite.
Comfort meets indulgence through layers of rich, silky goodness.
Bakers of all skill levels can nail this delectable treat without breaking a sweat.
Each forkful promises a symphony of textures and flavors that dance across your palate.
Soft, golden crescents cradle a luscious cheesecake center that whispers pure deliciousness.
Warm this masterpiece straight from the oven and watch smiles spread like wildfire.
Dig in and savor every incredible moment of culinary bliss!
Why Cheesecake Crescent Rolls Casserole Is A Winner

Ingredients For Cheesecake Crescent Rolls Casserole
Main Ingredients:Sweeteners and Flavor Enhancers:Binding and Finishing Ingredients:How To Bake Cheesecake Crescent Rolls Casserole
Step 1: Prepare Baking Station
Warm up your oven to 350F (175C). Generously coat a 9×13-inch baking dish with cooking spray or butter to prevent sticking.
Step 2: Create First Pastry Layer
Carefully unroll the first crescent roll package. Gently press the dough into the bottom of the prepared baking dish, making sure to pinch together any open seams to create a smooth base.
Step 3: Whip Creamy Filling
In a mixing bowl, blend together:Whisk until the mixture becomes silky smooth and completely combined. Spread this luscious mixture evenly across the first pastry layer.
Step 4: Add Top Pastry Layer
Open the second crescent roll package and delicately place the dough over the cream cheese filling. Carefully seal all the seams to create a complete top layer.
Step 5: Add Final Touches
Melt butter and lovingly brush it across the entire top surface of the pastry. If desired, sprinkle a generous dusting of cinnamon sugar for extra sweetness and flavor.
Step 6: Bake to Golden Perfection
Slide the baking dish into the preheated oven. Bake for approximately 30 minutes or until the top turns a beautiful golden brown color.
Remove from oven and allow to cool slightly.
Step 7: Slice and Serve
Once cooled, cut into squares and serve.
Enjoy this delightful dessert that combines the flakiness of crescent rolls with the creamy richness of cheesecake.
Tips For Cheesecake Crescent Rolls Casserole

Flavorful Twists For Cheesecake Crescent Rolls Casserole

What To Serve With Cheesecake Crescent Rolls Casserole
How To Keep Cheesecake Crescent Rolls Casserole Fresh
FAQs
Yes, you can substitute regular cream cheese with low-fat cream cheese for a lighter version of the dessert without significantly changing the overall taste and texture.
Generously grease the baking dish with butter or cooking spray before laying down the first layer of crescent rolls to ensure easy removal and prevent sticking.
You can use gluten-free crescent roll dough available in many grocery stores to create a gluten-free version of this dessert.
You can assemble the casserole up to a day in advance and store it covered in the refrigerator, then bake it just before serving for maximum freshness.
Print
Perfect Cheesecake Crescent Rolls Casserole Recipe
- Total Time: 45 minutes
- Yield: 8 1x
Description
Decadent cheesecake crescent rolls casserole offers a delightful fusion of sweet and creamy flavors. Comfort meets indulgence in this irresistible dessert that brings warmth and satisfaction to the table.
Ingredients
Dairy and Cheese:
- 2 (8 ounces/226 grams) packages cream cheese, softened
- 1/4 cup (57 grams) butter, melted
Bread Base:
- 2 cans refrigerated crescent rolls
Sweeteners and Flavoring:
- 1 cup (200 grams) sugar
- 1 teaspoon vanilla extract
Topping (Optional):
- 1/4 cup cinnamon sugar
Instructions
- Prepare the oven by heating to 350°F and coating a 9×13-inch baking dish with cooking spray or butter.
- Carefully unfurl the first crescent roll package, spreading the dough evenly across the bottom of the dish and pressing to seal all seam lines completely.
- Combine cream cheese with sugar and vanilla in a mixing bowl, whipping until the mixture achieves a silky, uniform consistency.
- Distribute the cream cheese blend smoothly and uniformly over the initial crescent roll layer, ensuring complete and even coverage.
- Gently unroll the second crescent roll package, laying the dough carefully atop the cream cheese layer and meticulously sealing all connecting seams.
- Drizzle melted butter across the top surface, creating a rich golden finish.
- Optional: Dust the buttered surface with a delicate sprinkle of cinnamon sugar for enhanced flavor and visual appeal.
- Transfer the prepared casserole to the preheated oven and bake for approximately 30 minutes, watching for a golden-brown coloration.
- Remove from oven and allow to cool for 10-15 minutes before cutting into serving portions.
- Slice into squares and serve at room temperature for optimal taste and texture.
Notes
- Experiment with different cream cheese flavors like strawberry or chocolate to add a unique twist to the classic recipe.
- For a lighter version, use low-fat cream cheese and reduced-sugar alternatives to make the dessert more diet-friendly.
- Create individual servings by using a muffin tin instead of a large baking dish, perfect for portion control and easy sharing.
- Add fresh berries or fruit compote on top for extra freshness and a burst of natural sweetness that complements the rich cream cheese filling.
- Prep Time: 15 minutes
- Cook Time: 30 minutes
- Category: Breakfast, Desserts
- Method: Baking
- Cuisine: American
Nutrition
- Serving Size: 8
- Calories: 455
- Sugar: 28 g
- Sodium: 313 mg
- Fat: 30 g
- Saturated Fat: 18 g
- Unsaturated Fat: 10 g
- Trans Fat: 1 g
- Carbohydrates: 38 g
- Fiber: 0.5 g
- Protein: 6 g
- Cholesterol: 75 mg
John Conley
Founder & Culinary Storyteller
Expertise
Recipe Development, Culinary Writing, Home Cooking Techniques, Seasonal Ingredient Utilization
Education
Lane Community College, Eugene, OR
Certificate in Culinary Arts
Focused on foundational cooking techniques, kitchen safety, and menu planning.
Gotham Writers Workshop, New York, NY
Course in Food Writing
Explored the art of crafting engaging culinary narratives and recipe development.
John grew up where food meant connection: big bowls, warm kitchens, and meals that told a story. After earning his Certificate in Culinary Arts from Lane Community College and diving deep into food writing at Gotham Writers Workshop, he found his calling: turning everyday recipes into something worth savoring.
At The Liffey, John’s focus is all about crafting dishes that feel easy, honest, and full of heart.