Nostalgic Lunchroom Ladies Brownies Recipe: Chocolatey Bliss
School cafeterias have a magical way of creating these legendary lunchroom ladies brownies that spark childhood memories.
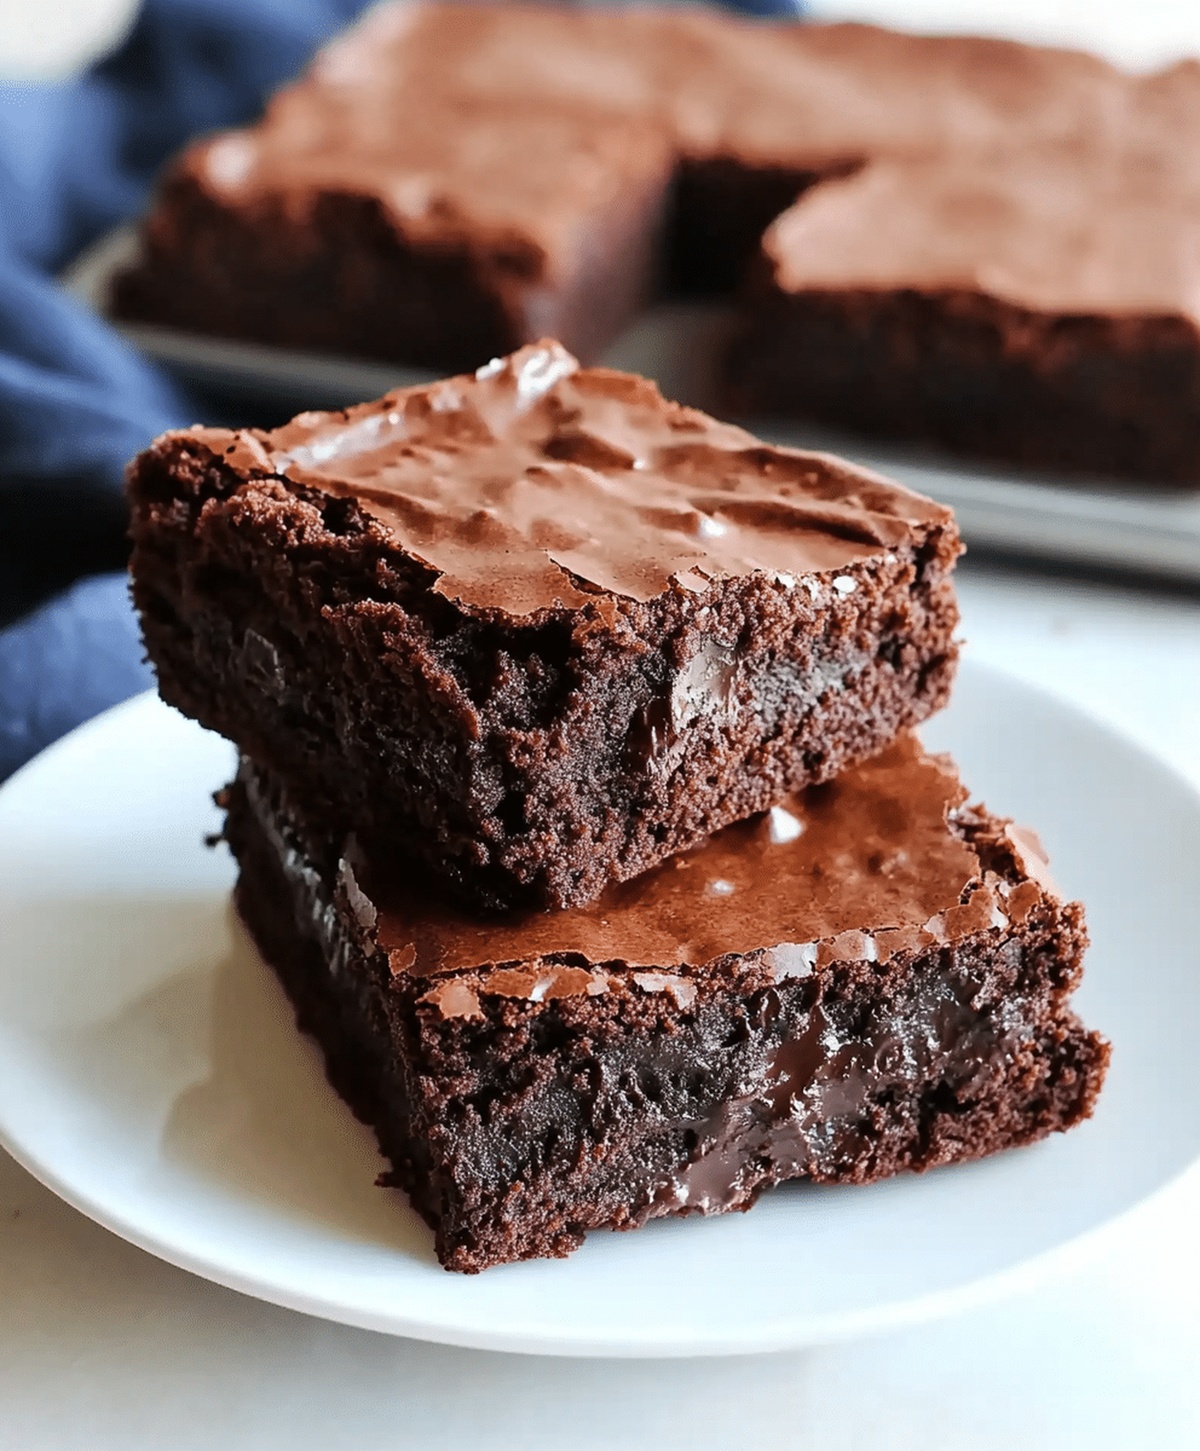
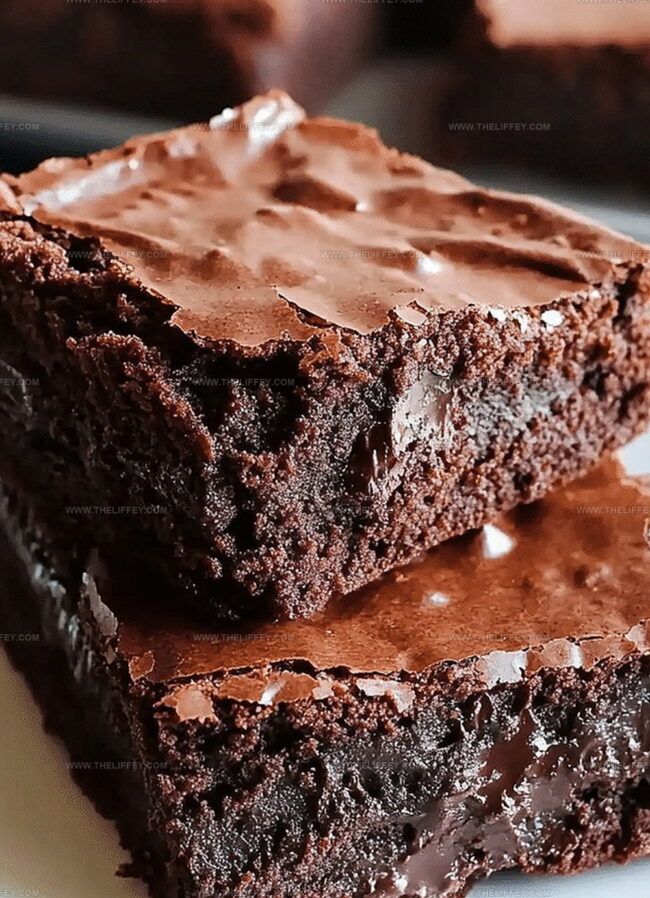
Nostalgic chocolate squares bring instant comfort and joy to anyone who remembers their first bite.
Soft, rich, and incredibly decadent, these brownies transcend typical dessert expectations.
Cafeteria workers somehow mastered a recipe that feels like a warm hug from the past.
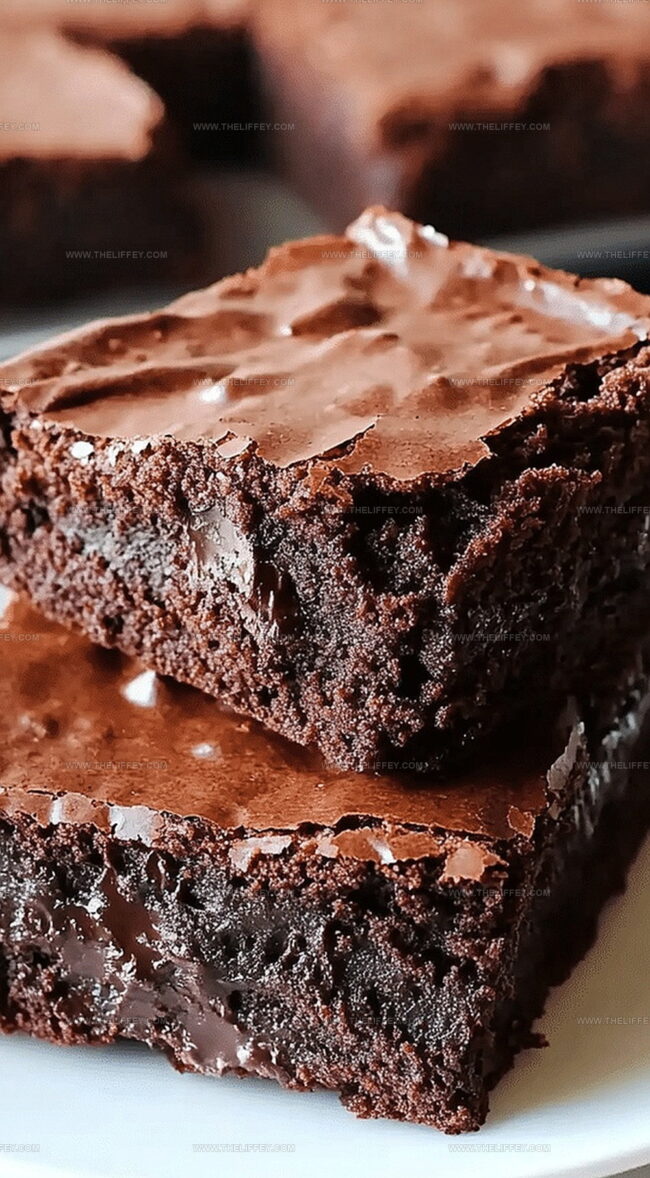
Each square promises a delightful blend of fudgy texture and deep chocolate intensity.
Sweet memories will flood back with every single crumb you taste.
Let’s uncover the secret behind these irresistible brownies that defined countless school lunch experiences.
Classic Lunchroom Ladies Brownies
Ingredients for Lunchroom Ladies Brownies
Base Ingredients:Dry Ingredients:Frosting Ingredients:Baking Instructions for Lunchroom Ladies Brownies
Step 1: Prepare Baking Setup
Grab your baking pan and grease it thoroughly. Preheat the oven to a toasty 350F (175C).
This ensures your brownies will bake evenly and come out perfectly.
Step 2: Create Chocolate Base
In a spacious mixing bowl, combine melted butter and cocoa powder.
Whisk them together until you achieve a silky, smooth mixture that looks rich and inviting.
Step 3: Build Brownie Batter Foundation
Add these ingredients to your chocolate base:Stir everything together until well blended, creating a luxurious and glossy batter.
Step 4: Incorporate Dry Ingredients
Gently fold in flour and salt. Mix just until combined – avoid overmixing to keep your brownies tender and fudgy.
Step 5: Bake to Perfection
Pour the batter into your prepared pan. Slide into the preheated oven and bake for 25-30 minutes.
Check doneness by inserting a toothpick – it should come out with a few moist crumbs.
Step 6: Craft Decadent Frosting
While brownies are baking, whip up the frosting by mixing:Blend until smooth and creamy.
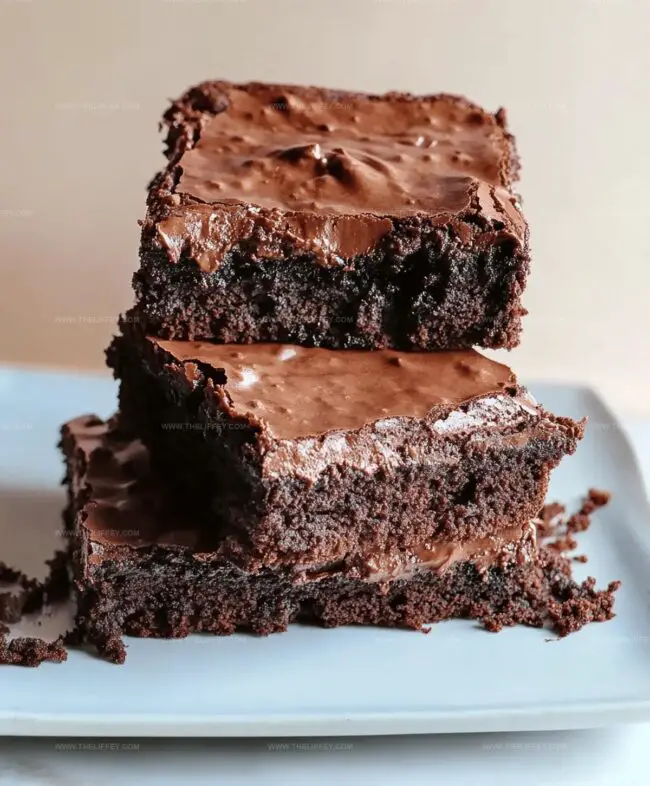
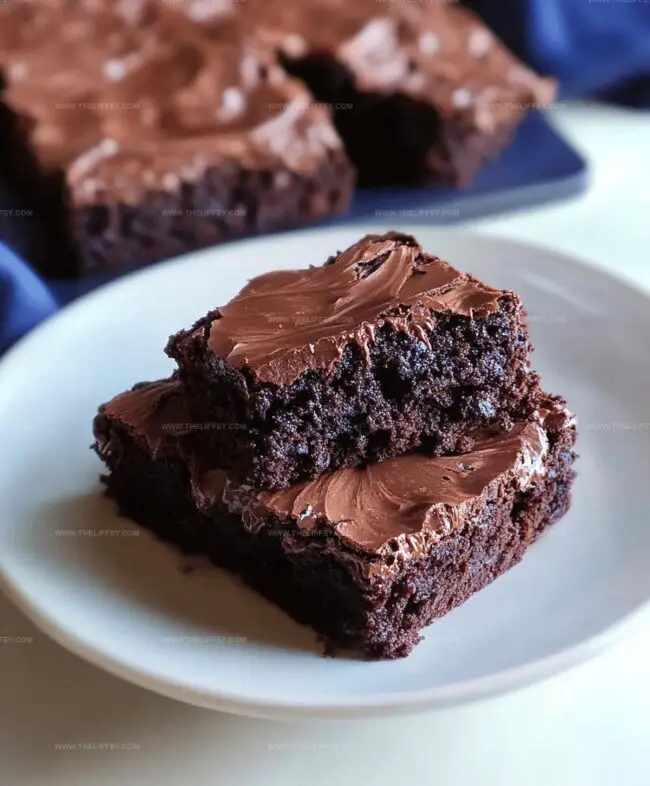
Step 7: Finish and Frost
Spread the luscious frosting over warm brownies. Allow to cool completely before slicing into delectable squares.
Enjoy your nostalgic treat!
Key Pointers on Lunchroom Ladies Brownies
Creative Spins on Lunchroom Ladies Brownies
Pairing Suggestions for Lunchroom Ladies Brownies
Storage Tips for Lunchroom Ladies Brownies
FAQs
Yes, these brownies are an authentic recipe originally created by school lunchroom staff, known for their simple yet delicious chocolate flavor that became a nostalgic favorite for many students.
Absolutely! This recipe can be easily mixed by hand using a whisk or wooden spoon, making it very beginner-friendly and requiring minimal kitchen equipment.
Insert a toothpick in the center – if it comes out with a few moist crumbs but no wet batter, the brownies are done. Avoid overbaking to maintain their classic soft texture.
Print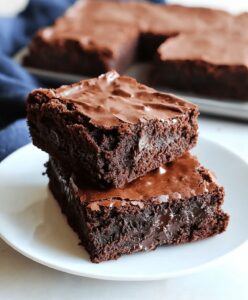
Nostalgic Lunchroom Ladies Brownies Recipe
- Total Time: 50 minutes
- Yield: 16 1x
Description
Lunchroom ladies brownies deliver nostalgic chocolate comfort straight from school cafeteria memories. Rich chocolate squares promise delightful sweetness that connects generations with simple, classic dessert magic.
Ingredients
Main Ingredients:
- 4 large eggs
- 2 cups all-purpose flour
- 1 cup butter, melted
- 2 cups granulated sugar
- 1/2 cup unsweetened cocoa powder
Flavor Enhancers:
- 4 teaspoons vanilla extract
Seasoning:
- 1/2 teaspoon salt
Instructions
- Warm the oven to 350F and coat a rectangular baking dish with cooking spray or butter.
- Create a rich chocolate base by blending melted butter and cocoa powder until completely integrated and glossy.
- Incorporate granulated sugar, eggs, and pure vanilla extract, whisking thoroughly to develop a smooth, consistent mixture.
- Gently fold in all-purpose flour and salt, stirring minimally to prevent overmixing and maintain a tender texture.
- Transfer the velvety batter into the prepared pan, ensuring even distribution across the surface.
- Bake for 25-30 minutes, monitoring closely and testing doneness with a clean toothpick inserted into the center.
- During baking, craft a decadent chocolate frosting by combining softened butter, milk, cocoa powder, and powdered sugar until silky and spreadable.
- Once brownies emerge from the oven, immediately blanket the warm surface with the luxurious frosting.
- Allow the frosted brownies to cool completely at room temperature before slicing into squares for serving.
Notes
- Experiment with using dark cocoa powder for a more intense, rich chocolate flavor that elevates the classic brownie taste.
- Ensure butter is completely melted and cooled slightly to prevent scrambling the eggs when mixing ingredients.
- For gluten-free variation, swap regular flour with a 1:1 gluten-free baking blend, maintaining the same measurements and texture.
- Create a healthier version by reducing sugar by 1/4 cup and adding mashed ripe bananas or applesauce for natural sweetness and moisture.
- Prep Time: 20 minutes
- Cook Time: 30 minutes
- Category: Desserts, Snacks
- Method: Baking
- Cuisine: American
Nutrition
- Serving Size: 16
- Calories: 225 kcal
- Sugar: 18 g
- Sodium: 68 mg
- Fat: 12 g
- Saturated Fat: 7 g
- Unsaturated Fat: 5 g
- Trans Fat: 0.2 g
- Carbohydrates: 29 g
- Fiber: 2 g
- Protein: 3 g
- Cholesterol: 55 mg
John Conley
Founder & Culinary Storyteller
Expertise
Recipe Development, Culinary Writing, Home Cooking Techniques, Seasonal Ingredient Utilization
Education
Lane Community College, Eugene, OR
Certificate in Culinary Arts
Focused on foundational cooking techniques, kitchen safety, and menu planning.
Gotham Writers Workshop, New York, NY
Course in Food Writing
Explored the art of crafting engaging culinary narratives and recipe development.
John grew up where food meant connection: big bowls, warm kitchens, and meals that told a story. After earning his Certificate in Culinary Arts from Lane Community College and diving deep into food writing at Gotham Writers Workshop, he found his calling: turning everyday recipes into something worth savoring.
At The Liffey, John’s focus is all about crafting dishes that feel easy, honest, and full of heart.