
Easy Mini Sliders Recipe: Bite-Sized Burgers for Fun Gatherings
Crafting the perfect mini sliders demands creativity and a playful culinary spirit.
Miniature burgers pack incredible flavor into bite-sized delights that spark instant excitement.
Compact and adorable, these tiny sandwiches transform ordinary meals into memorable experiences.
Backyard gatherings or game nights become extraordinary when you serve these delectable morsels.
Juicy meat nestled between soft rolls creates an irresistible combination that everyone will love.
Small yet mighty, mini sliders represent comfort food in its most charming form.
Prepare to become the ultimate party hero with this crowd-pleasing recipe that guarantees smiles and satisfied appetites.
Why Mini Sliders Are a Perfect Snack
Ingredients for Mini Sliders Recipe
Meat Base:Bun Ingredients:Toppings and Seasonings:How to Prepare Mini Sliders Step-by-Step
Step 1: Fire Up The Cooking Surface
Ignite your grill or warm up a stovetop skillet to a medium heat setting.
The goal is creating an even, sizzling cooking environment for your mini burgers.
Step 2: Craft Tasty Burger Patties
Mix ground beef with these delightful seasonings:Gently shape the seasoned meat into small, compact burger rounds.
Ensure each patty is uniformly sized for consistent cooking.
Step 3: Sear The Mini Burgers
Place burger patties onto the heated surface.
Cook each side for approximately 3-4 minutes.
Watch for a beautiful golden-brown exterior and reach your preferred level of doneness.
Pro tip: Avoid pressing down on patties to maintain juiciness.
Step 4: Prepare Slider Buns
Lightly toast slider buns on the same cooking surface.
This step adds a delicious crispy texture and warmth to your bread.
Step 5: Build Delicious Mini Burgers
Assemble your sliders with these mouthwatering toppings:Step 6: Serve And Savor
Plate your mini sliders immediately while hot and enjoy the delectable flavors with friends and family.
Tips for Great Mini Sliders Every Time
Mini Slider Flavor Variations to Try
What Goes Well With Mini Sliders Recipe
Best Storage for Mini Sliders After Serving
FAQs
Yes, sliders are super simple to prepare. They require basic cooking skills, minimal ingredients, and take less than 30 minutes from start to finish.
Absolutely! You can substitute ground beef with ground turkey, chicken, lamb, or even plant-based meat alternatives. Each meat brings a unique flavor profile to your sliders.
Cheddar, American, Swiss, and pepper jack work wonderfully. Choose a cheese that melts easily and complements your meat selection.
Print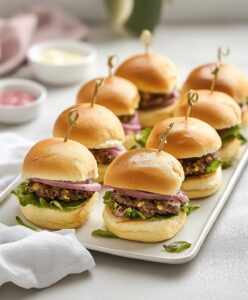
Mini Sliders Recipe
- Total Time: 18 minutes
- Yield: 4 1x
Description
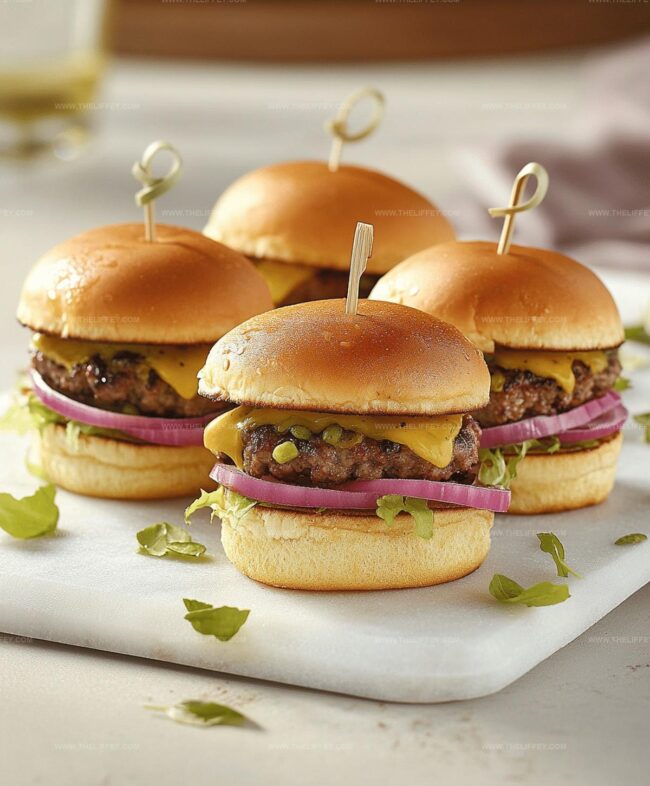
Classic mini sliders combine juicy beef patties with melted cheese and fresh toppings, creating a crowd-pleasing appetizer. Guests will savor these bite-sized burgers that deliver maximum flavor in small, irresistible packages.
Ingredients
Main Protein:
- 1 pound ground beef (or alternative like turkey or plant-based meat)
Bun and Toppings:
- 12 mini slider buns
- 4 slices cheese (optional)
- 1 cup lettuce, chopped
- 2 tomato slices
- 4 pickle slices
Seasonings and Condiments:
- 1 teaspoon salt
- 1/2 teaspoon ground black pepper
- 1 tablespoon seasoning of choice
- 2 tablespoons ketchup
- 1 tablespoon mustard
- 1 tablespoon mayonnaise
Instructions
- Prepare a cooking surface at medium heat using a grill or skillet to ensure even cooking of mini burger patties.
- Mix ground beef with seasonings, gently combining salt, pepper, and preferred spice blend to enhance flavor without overworking the meat.
- Form compact, uniform patties approximately 2-3 inches in diameter, creating consistent thickness for balanced cooking.
- Place patties on heated surface, cooking 3-4 minutes per side until internal temperature reaches 160°F for medium doneness.
- Simultaneously warm slider buns on the same cooking surface, lightly toasting edges for a crisp texture and golden appearance.
- Melt cheese directly onto hot patties during final minute of cooking to create a smooth, creamy layer.
- Layer assembled sliders with fresh lettuce, tomato slices, crisp pickle rounds, and preferred condiments for added complexity and freshness.
- Plate immediately while patties remain hot, ensuring optimal temperature and flavor integrity for serving.
Notes
- Customize patty seasoning with garlic powder, onion powder, or Worcestershire sauce for extra flavor depth.
- Prevent burger shrinkage by making a small dimple in the center of each patty before cooking to help maintain even shape.
- Use lean ground beef (80/20 mix) for juicy sliders that won’t dry out during grilling or cooking.
- Experiment with alternative protein options like ground turkey, plant-based patties, or chicken for dietary variations and healthier alternatives.
- Prep Time: 10 minutes
- Cook Time: 8 minutes
- Category: Lunch, Dinner, Appetizer, Snacks
- Method: Grilling
- Cuisine: American
Nutrition
- Serving Size: 4
- Calories: 300 kcal
- Sugar: 4 g
- Sodium: 550 mg
- Fat: 18 g
- Saturated Fat: 7 g
- Unsaturated Fat: 9 g
- Trans Fat: 0.5 g
- Carbohydrates: 22 g
- Fiber: 2 g
- Protein: 15 g
- Cholesterol: 50 mg
Amanda Bennett
Recipe Curator & Culinary Educator
Expertise
Baking and Pastry Arts, Recipe Testing and Development, Culinary Instruction, Food Styling and Photography
Education
Asheville-Buncombe Technical Community College, Asheville, NC
Diploma in Culinary Arts
Emphasized practical cooking skills, nutrition, and kitchen management.
Cambridge School of Culinary Arts, Cambridge, MA
Certificate in Professional Pastry Arts
Specialized in baking techniques, dessert presentation, and flavor profiling
Amanda’s roots run deep in the Southern hills, where every meal started fresh from the garden and every dessert came with a story. She trained at Asheville-Buncombe Technical Community College and sharpened her pastry skills at the Cambridge School of Culinary Arts, blending classic technique with everyday charm.
At The Liffey, Amanda’s passion is making baking and home cooking feel natural and joyful. She’s all about single recipes that are simple enough for a busy afternoon, but special enough to make someone’s day a little sweeter.