The Best Lunchroom Ladies Brownies – Nostalgic Old School Recipe
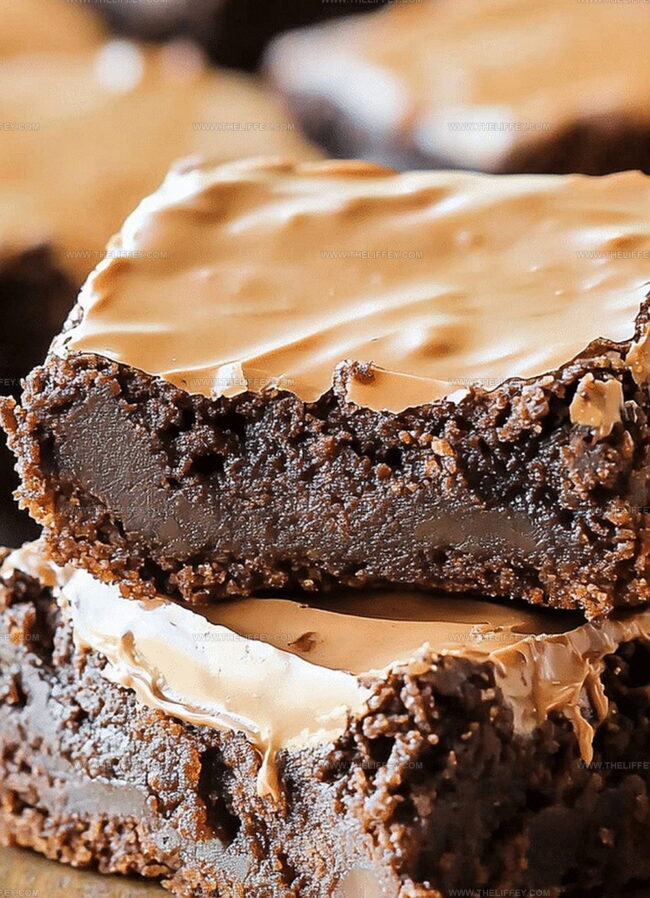
Nostalgic Lunchroom Ladies brownies transport you back to childhood cafeteria memories with their rich, fudgy goodness.
School memories flood back when chocolate squares hit the plate.
Decades-old recipes carry magic from simpler times.
Generations have savored these classic treats passed down through kitchens across America.
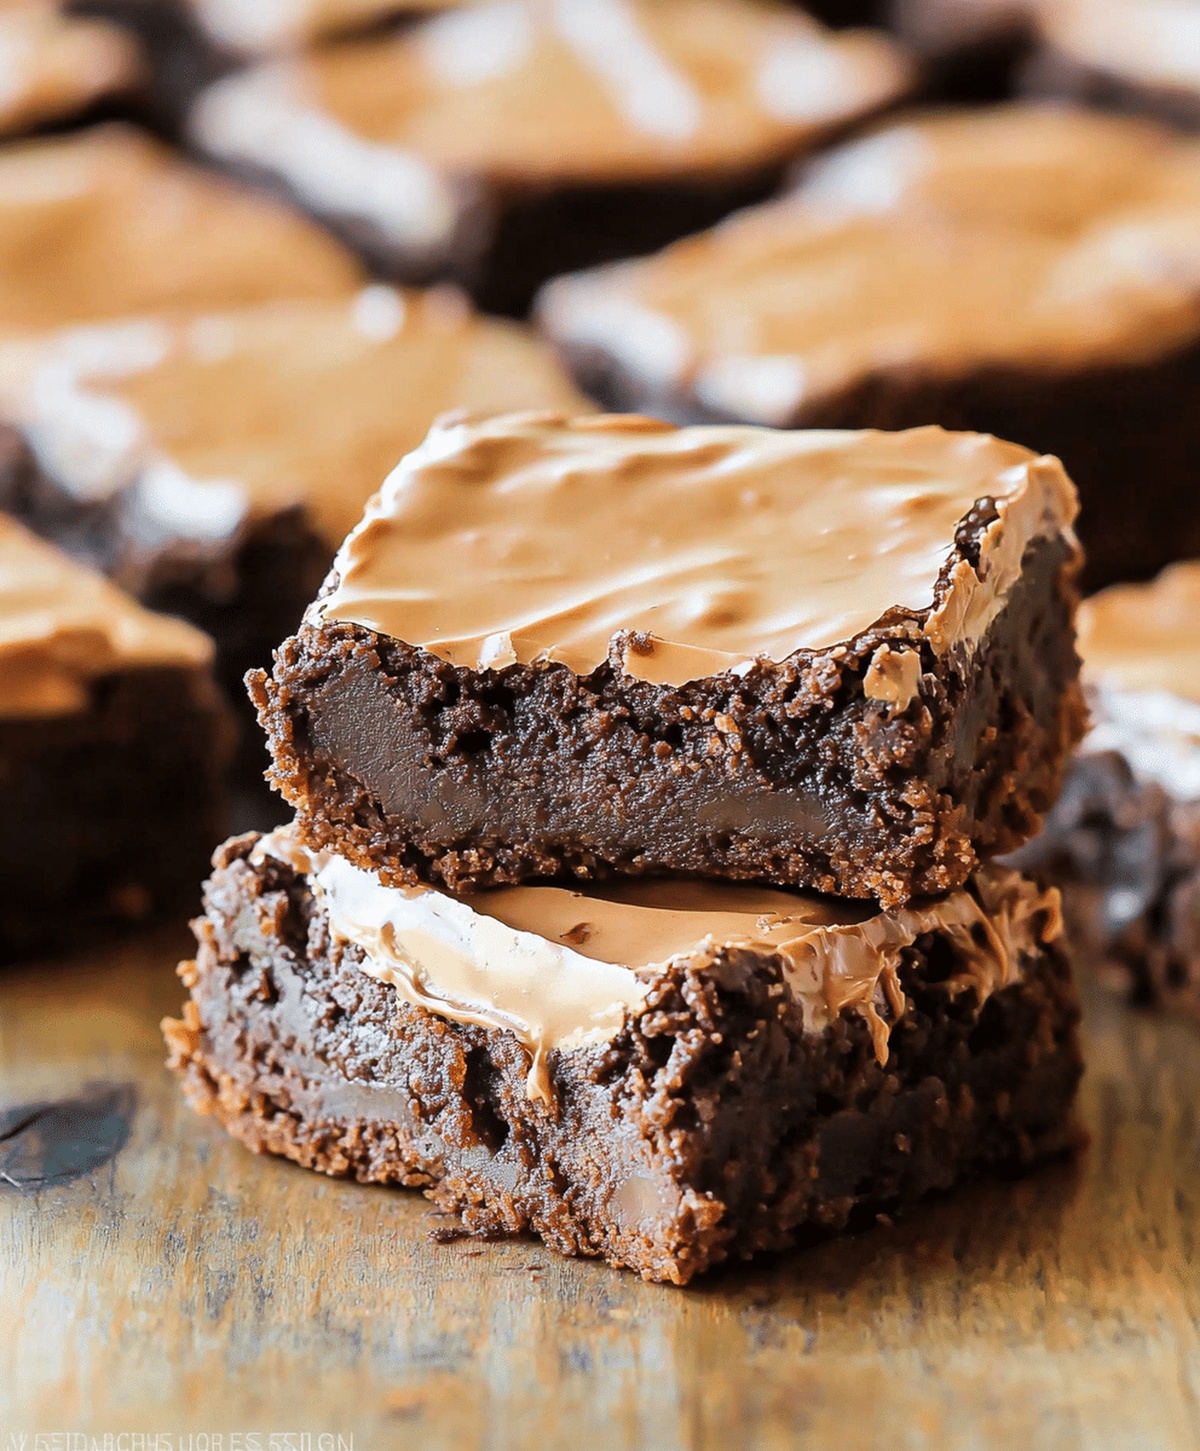
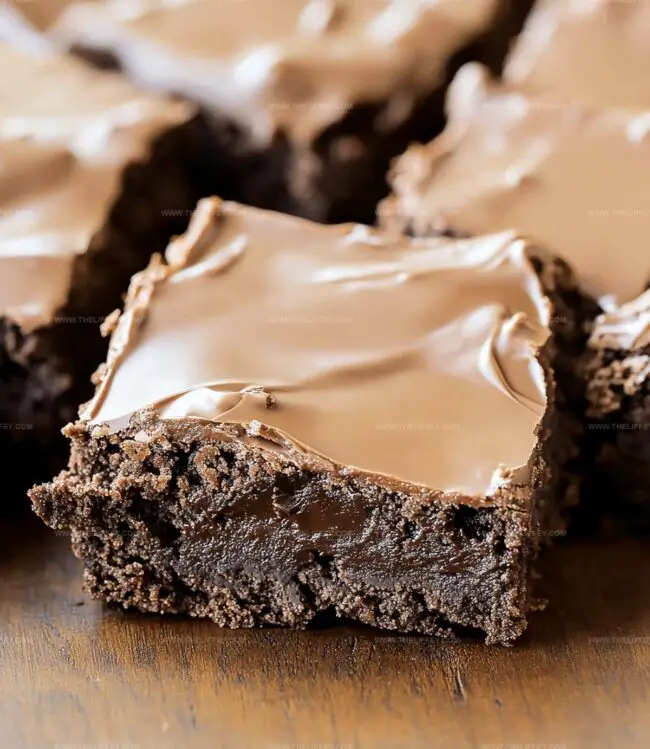
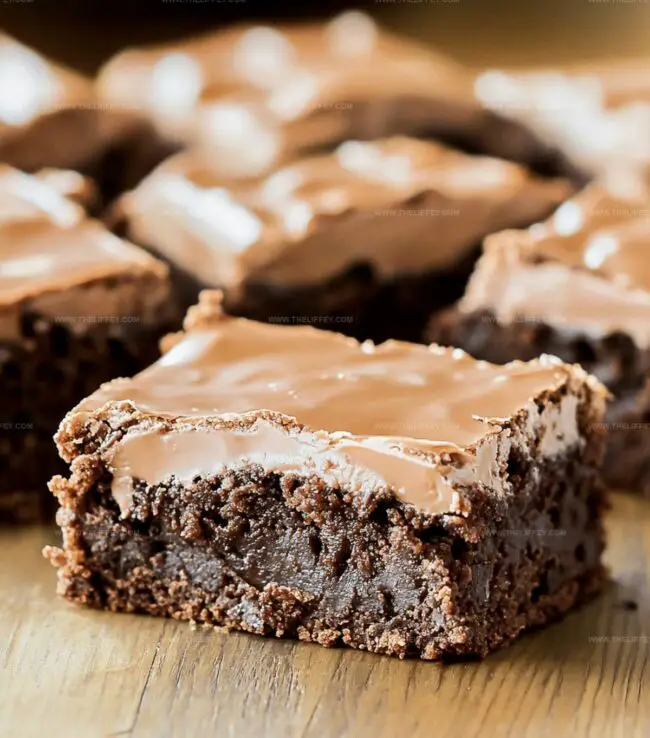
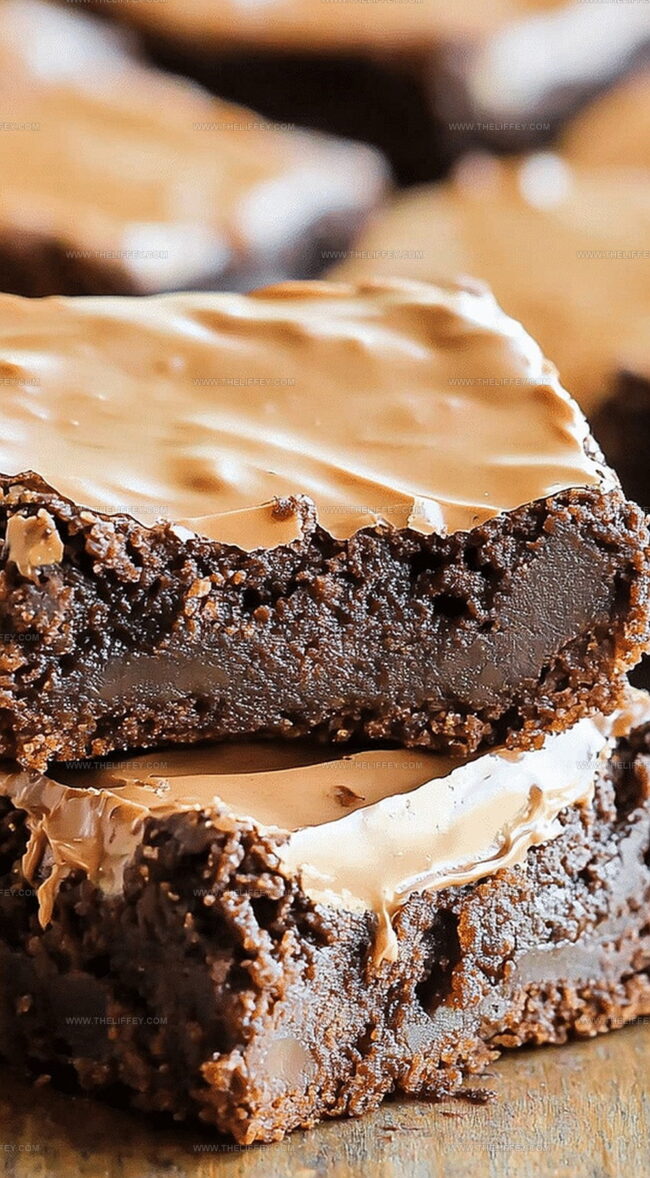
Thick, dense chocolate squares promise pure comfort and sweet indulgence.
Generations of students knew these brownies as the highlight of their school lunch.
Minimal ingredients create maximum flavor in this timeless dessert.
You won’t believe how simple yet incredible these brownies can be.
Why These Brownies Are a Classic
Ingredients for 50-Year-Old Brownies
Base Ingredients:Dry Ingredients:Optional Add-In:Frosting Ingredients:Making Lunchroom Brownies Step-by-Step
Step 1: Fire Up the Oven
Crank the oven to a toasty 350°F (175°C).
Grab your 9×13-inch baking dish and give it a generous coating of grease to prevent any sticky situations.
Step 2: Create Chocolate Base
In a large mixing bowl, combine melted butter and cocoa powder.
Whisk until the mixture looks silky smooth and chocolatey.
Step 3: Build the Brownie Batter
Add these ingredients to your chocolate base:Beat everything together until well combined and looking luscious.
Step 4: Introduce Flour Power
Gently fold in flour, stirring just until everything comes together.
If you’re feeling nutty, this is the moment to sprinkle in some chopped nuts.
Step 5: Bake to Perfection
Pour the rich batter into your prepared baking dish.
Slide it into the preheated oven and bake for 25-30 minutes.
You’ll know it’s done when a toothpick comes out with a few moist crumbs clinging to it.
Step 6: Whip Up Decadent Frosting
While brownies are baking, craft the creamy topping by mixing:Blend until the frosting is smooth and glossy.
Step 7: Frost and Chill
Spread the luscious frosting over the warm brownies.
Let them cool completely before cutting into delectable squares.
Helpful Tips for Classic Brownies
Variants of These Classic Brownies
Brownie Pairings That Hit the Mark
Keeping Old-School Brownies Fresh
FAQs
These brownies are a nostalgic school cafeteria recipe that’s been loved for 50 years, featuring a simple homemade approach with classic ingredients and a rich chocolate frosting.
Yes, absolutely! The nuts are optional, so you can easily skip them if you prefer a nut-free brownie or have allergies.
Look for a toothpick with a few moist crumbs when inserted – this indicates the brownies are done but still deliciously fudgy and not overbaked.
While the frosting is traditional and adds extra sweetness, you can skip it if you prefer a less sweet brownie or want to reduce calories.
Print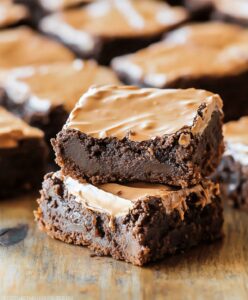
Lunchroom Ladies Brownies-50 Year Old Recipe
- Total Time: 50 minutes
- Yield: 16 1x
Description
Lunchroom ladies brownies, a nostalgic chocolate delight from school cafeterias, bring back memories of childhood comfort. Generations of students have savored these rich, classic brownies that blend simple ingredients with timeless flavor.
Ingredients
Main Ingredients:
- 2 cups all-purpose flour
- 2 cups granulated sugar
- 4 large eggs
- 1 cup butter, melted
Chocolate and Flavor Enhancers:
- 1/2 cup unsweetened cocoa powder
- 4 teaspoons vanilla extract
Optional Add-ins:
- 1 cup chopped nuts
Instructions
- Preheat the oven to 350°F and thoroughly coat a 9×13-inch baking pan with cooking spray or butter.
- Combine melted butter and cocoa powder in a large mixing bowl, whisking until the mixture becomes glossy and uniform.
- Incorporate sugar, eggs, and vanilla extract, blending vigorously until the ingredients are completely integrated and the mixture looks glossy.
- Gently fold flour into the wet ingredients, stirring minimally to prevent overmixing. If desired, fold in chopped nuts for added texture.
- Transfer the batter evenly into the prepared baking pan, ensuring a smooth surface for consistent baking.
- Bake for 25-30 minutes, rotating the pan halfway through cooking time. Check doneness by inserting a toothpick – it should emerge with a few moist crumbs, indicating perfect brownie consistency.
- While brownies are still warm, prepare the frosting by whisking butter, cocoa powder, milk, and powdered sugar until silky and spreadable.
- Immediately spread the frosting over the warm brownies, allowing it to slightly melt into the surface for maximum flavor integration.
- Allow brownies to cool completely at room temperature before cutting into squares for clean, precise edges.
Notes
- Ensure butter is fully melted and at room temperature for smooth batter consistency.
- Toast chopped nuts briefly before adding to enhance their nutty flavor and prevent sinking in the batter.
- For gluten-free option, substitute all-purpose flour with almond or gluten-free blend, keeping same measurement.
- Create a clean cut by using a warm, wet knife when slicing brownies for perfectly smooth edges.
- Prep Time: 20 minutes
- Cook Time: 30 minutes
- Category: Desserts, Snacks
- Method: Baking
- Cuisine: American
Nutrition
- Serving Size: 16
- Calories: 250 kcal
- Sugar: 20 g
- Sodium: 30 mg
- Fat: 15 g
- Saturated Fat: 9 g
- Unsaturated Fat: 6 g
- Trans Fat: 0.5 g
- Carbohydrates: 28 g
- Fiber: 3 g
- Protein: 4 g
- Cholesterol: 55 mg
Amanda Bennett
Recipe Curator & Culinary Educator
Expertise
Baking and Pastry Arts, Recipe Testing and Development, Culinary Instruction, Food Styling and Photography
Education
Asheville-Buncombe Technical Community College, Asheville, NC
Diploma in Culinary Arts
Emphasized practical cooking skills, nutrition, and kitchen management.
Cambridge School of Culinary Arts, Cambridge, MA
Certificate in Professional Pastry Arts
Specialized in baking techniques, dessert presentation, and flavor profiling
Amanda’s roots run deep in the Southern hills, where every meal started fresh from the garden and every dessert came with a story. She trained at Asheville-Buncombe Technical Community College and sharpened her pastry skills at the Cambridge School of Culinary Arts, blending classic technique with everyday charm.
At The Liffey, Amanda’s passion is making baking and home cooking feel natural and joyful. She’s all about single recipes that are simple enough for a busy afternoon, but special enough to make someone’s day a little sweeter.