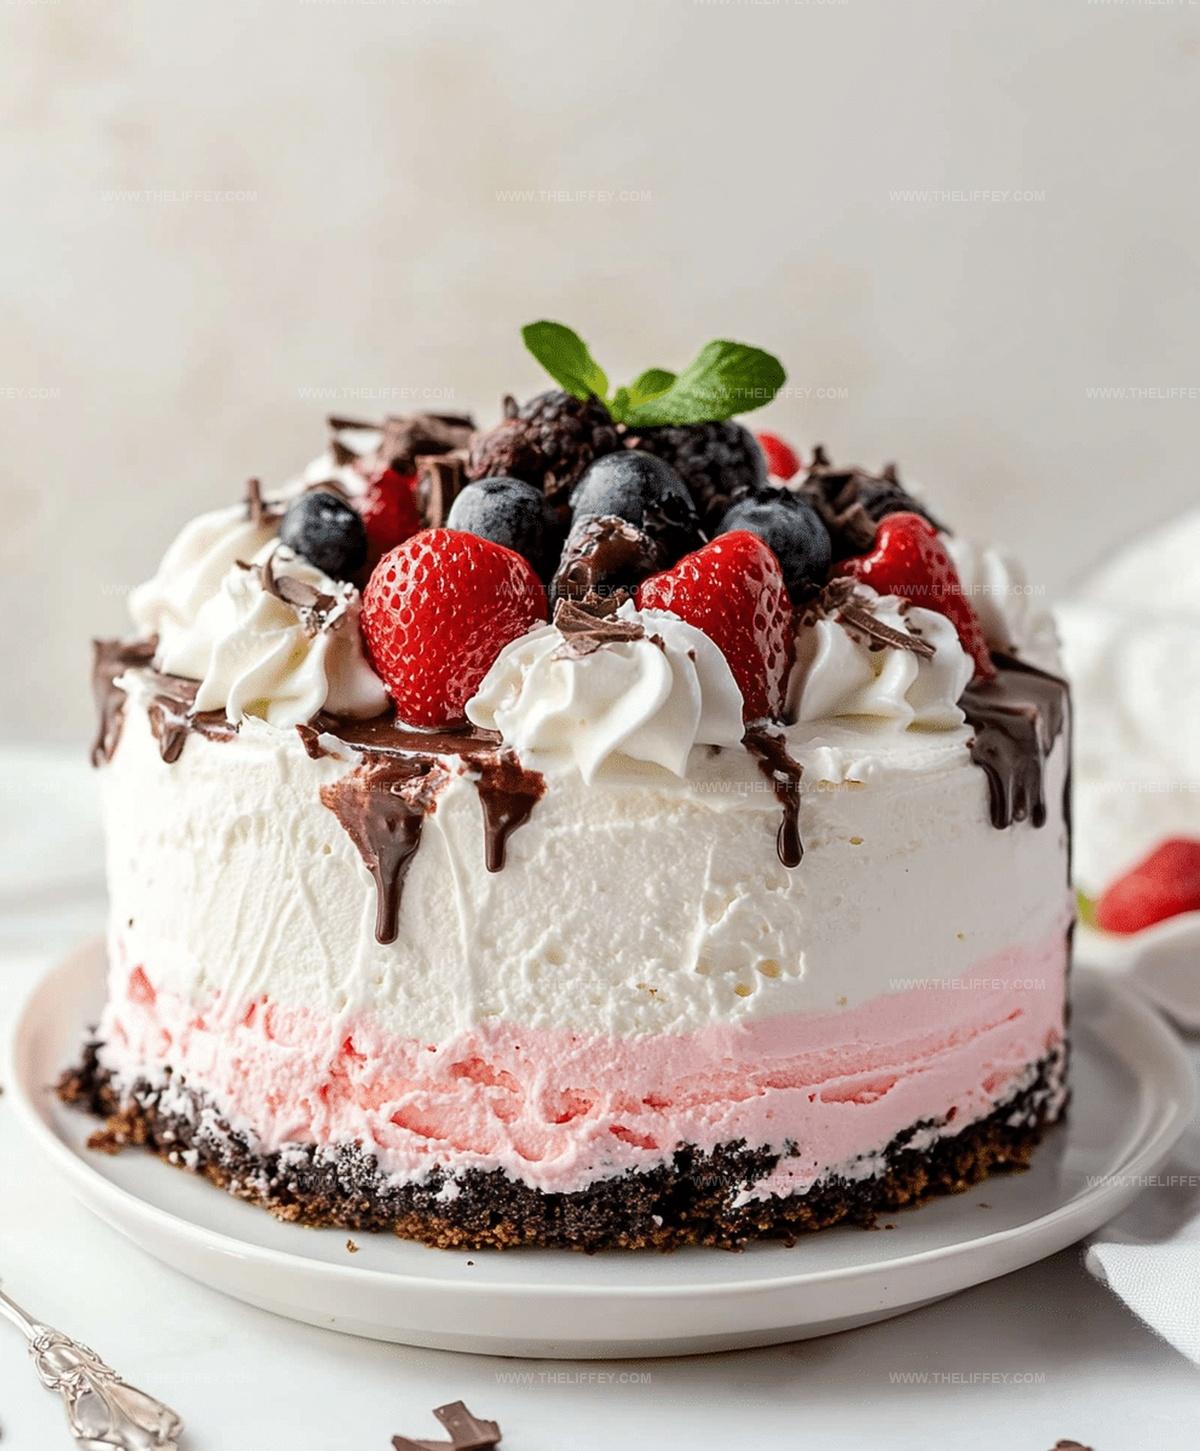
Dreamy Homemade Ice Cream Cake Recipe for Sweet Celebrations
Crafting a delectable ice cream cake recipe brings pure joy to summer celebrations.
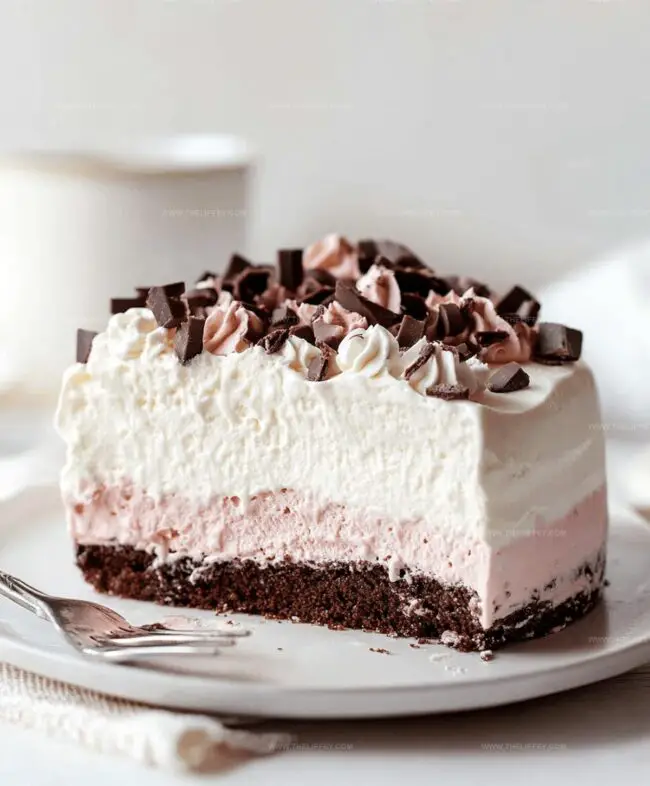
Layers of creamy goodness melt together in a stunning dessert that surprises everyone.
Sweet dreams become reality with this simple yet impressive treat.
Smooth textures and rich flavors dance across your palate in each delightful bite.
Cool ingredients combine effortlessly to create a showstopping masterpiece that looks professionally made.
Guests will marvel at your culinary skills when you present this crowd-pleasing dessert.
You can definitely become the star baker with this incredible confection that promises delicious memories.
Ice Cream Cake That Will Wow Your Guests
Ingredients for Making Ice Cream Cake
Cake Base:Frozen Cream Layer:Toppings and Additions:Garnish and Decorations:Instructions to Create Ice Cream Cake Perfection
Step 1: Create Cake Foundation
Select a delicious cake flavor of your choice.
Carefully place the cake layer onto the bottom of a springform pan, ensuring it covers the entire base evenly.
Step 2: Prepare Creamy Ice Cream Layer
Remove ice cream from the freezer and let it soften naturally at room temperature for about 10-15 minutes.
The ice cream should be spreadable but not completely melted.
Step 3: Spread Smooth Ice Cream
Gently spread the softened ice cream over the cake layer using a spatula.
Aim for an even, thick coating that covers the entire cake surface.
Step 4: Add Crunchy Cookie Texture
Crush your favorite cookies into small, delightful crumbs.
Sprinkle the cookie pieces generously across the ice cream layer, creating a delicious crunch.
Step 5: Drizzle Chocolate Goodness
Warm the chocolate fudge sauce slightly to create a smooth consistency.
Drizzle the rich chocolate sauce in artistic swirls over the cookie crumb layer.
Step 6: Create Additional Layers (Optional)
If desired, repeat the ice cream and cookie layer process.
You can alternate different ice cream flavors for an exciting taste experience.
Step 7: Freeze and Set
Place the cake in the freezer for 4-6 hours or overnight.
This helps the layers solidify and creates a perfect dessert texture.
Step 8: Decorate with Flair
Remove the cake from the freezer.
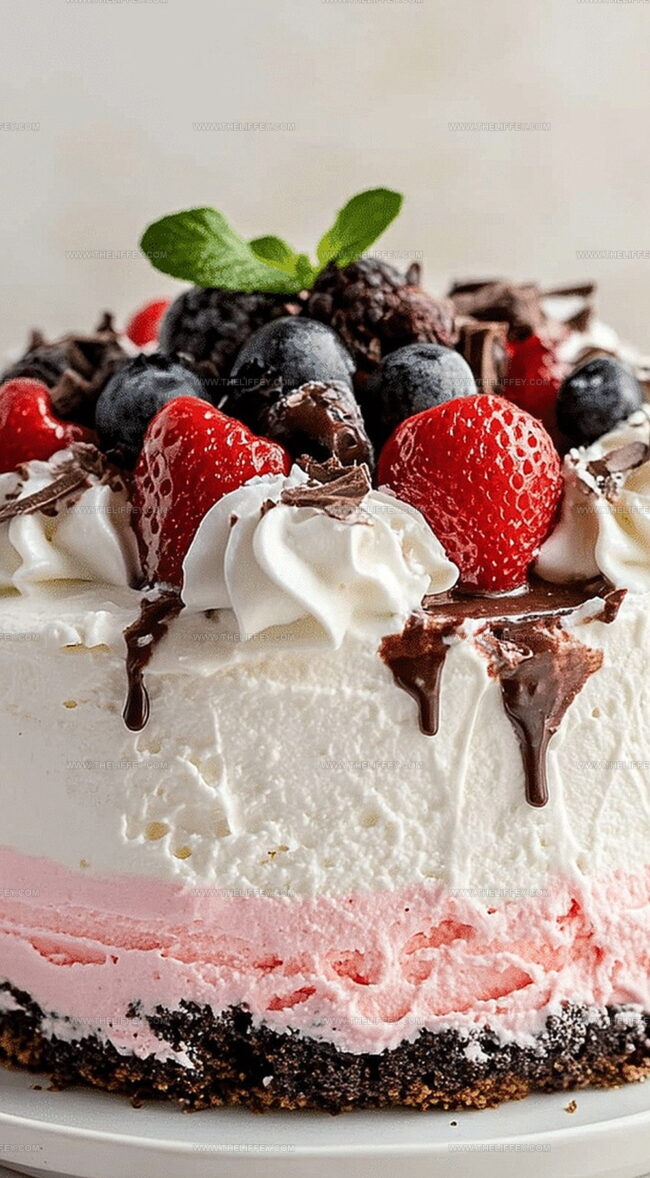
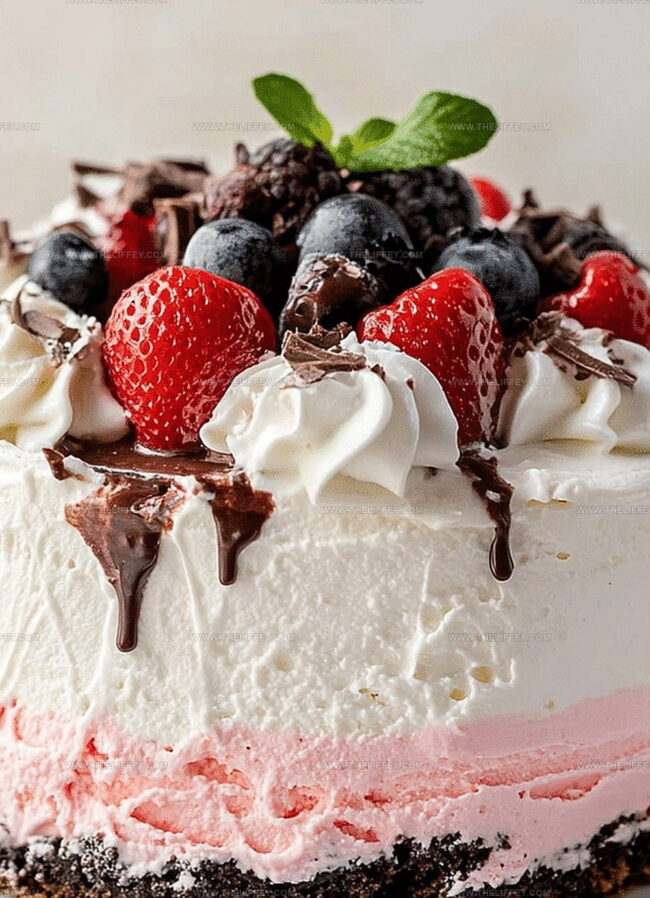
Top with fluffy whipped cream, and add exciting garnishes like:Step 9: Slice and Celebrate
Remove the cake from the springform pan.
Cut into beautiful slices and serve immediately for a delightful dessert experience.
Pro Tips to Assemble Ice Cream Cake Smoothly
Variations to Personalize Your Ice Cream Cake
How to Serve Ice Cream Cake with Style
Storing Ice Cream Cake for Optimal Texture
FAQs
Yes, you can use a pre-baked cake from the bakery or grocery store to save time and effort.
Chocolate sandwich cookies, graham crackers, or chocolate chip cookies are excellent choices that add great texture and flavor.
The cake can be stored in the freezer for up to one week if properly wrapped in plastic wrap or placed in an airtight container.
A springform pan works best, but you can also use a regular cake pan lined with parchment paper for easy removal.
Print
Ice Cream Cake Recipe
- Total Time: 20 minutes
- Yield: 8 1x
Description
Creamy layers of Ice Cream Cake blend classic dessert elements with nostalgic charm. Chocolate cookie crust and velvety ice cream create a delightful celebration centerpiece you’ll savor to the last delicious bite.
Ingredients
Main Ingredients:
- 1 cake layer (any flavor)
- 2–3 pints (0.95–1.4 liters) ice cream
- 1 cup (240 milliliters) cookie crumbles
Flavor Enhancers:
- 1 cup (240 milliliters) chocolate fudge sauce
Topping and Decoration:
- 2 cups (480 milliliters) whipped cream
Instructions
- Prepare a sturdy cake foundation by positioning a pre-baked or freshly made cake layer securely in a springform pan, ensuring complete base coverage.
- Extract ice cream from the freezer and allow gentle softening at room temperature for approximately 10-15 minutes, creating a spreadable consistency.
- Carefully distribute the softened ice cream across the cake layer, creating an even, smooth surface with a consistent thickness of about 1-2 inches.
- Crush cookies into fine, uniform crumbles and generously scatter them across the ice cream layer, ensuring comprehensive and balanced coverage.
- Gently drizzle chocolate fudge sauce in artistic, zigzag patterns over the cookie crumble layer, enhancing visual appeal and flavor complexity.
- Optional: Add an additional ice cream layer for increased richness and depth, maintaining consistent spreading technique.
- Transfer the assembled dessert into the freezer, maintaining a stable temperature of 0°F, and allow thorough solidification for 4-6 hours or overnight.
- Remove from freezer and embellish with delicate whipped cream piping, complemented by decorative elements like colorful sprinkles, luxurious caramel threads, or fresh fruit garnishes.
- Allow minimal thawing for 3-5 minutes before slicing to ensure clean, precise cuts and optimal serving presentation.
Notes
- Choose a sturdy cake base like chocolate or vanilla sponge that won’t become soggy when frozen.
- Work quickly when layering to prevent ice cream from melting too much during assembly.
- Let ice cream soften for 5-10 minutes at room temperature for easy spreading without becoming too runny.
- Use a hot knife when cutting layers to get clean, smooth slices through frozen cake.
- Swap traditional cookies with gluten-free alternatives for celiac-friendly version.
- Experiment with different ice cream flavors like salted caramel, mint chocolate chip, or strawberry for unique combinations.
- Wrap cake tightly in plastic wrap before final freezing to prevent freezer burn and preserve flavor.
- Prep Time: 20 minutes
- Cook Time: 0 minutes
- Category: Desserts
- Method: Freezing
- Cuisine: American
Nutrition
- Serving Size: 8
- Calories: 450 kcal
- Sugar: 45 g
- Sodium: 200 mg
- Fat: 25 g
- Saturated Fat: 15 g
- Unsaturated Fat: 7 g
- Trans Fat: 1 g
- Carbohydrates: 55 g
- Fiber: 2 g
- Protein: 5 g
- Cholesterol: 60 mg
Amanda Bennett
Recipe Curator & Culinary Educator
Expertise
Baking and Pastry Arts, Recipe Testing and Development, Culinary Instruction, Food Styling and Photography
Education
Asheville-Buncombe Technical Community College, Asheville, NC
Diploma in Culinary Arts
Emphasized practical cooking skills, nutrition, and kitchen management.
Cambridge School of Culinary Arts, Cambridge, MA
Certificate in Professional Pastry Arts
Specialized in baking techniques, dessert presentation, and flavor profiling
Amanda’s roots run deep in the Southern hills, where every meal started fresh from the garden and every dessert came with a story. She trained at Asheville-Buncombe Technical Community College and sharpened her pastry skills at the Cambridge School of Culinary Arts, blending classic technique with everyday charm.
At The Liffey, Amanda’s passion is making baking and home cooking feel natural and joyful. She’s all about single recipes that are simple enough for a busy afternoon, but special enough to make someone’s day a little sweeter.