Sizzling Homemade Grilled Pizza Recipe: Backyard Magic on a Plate
Pizza nights just got a delicious upgrade with this homemade grilled pizza that promises to revolutionize your summer cooking.
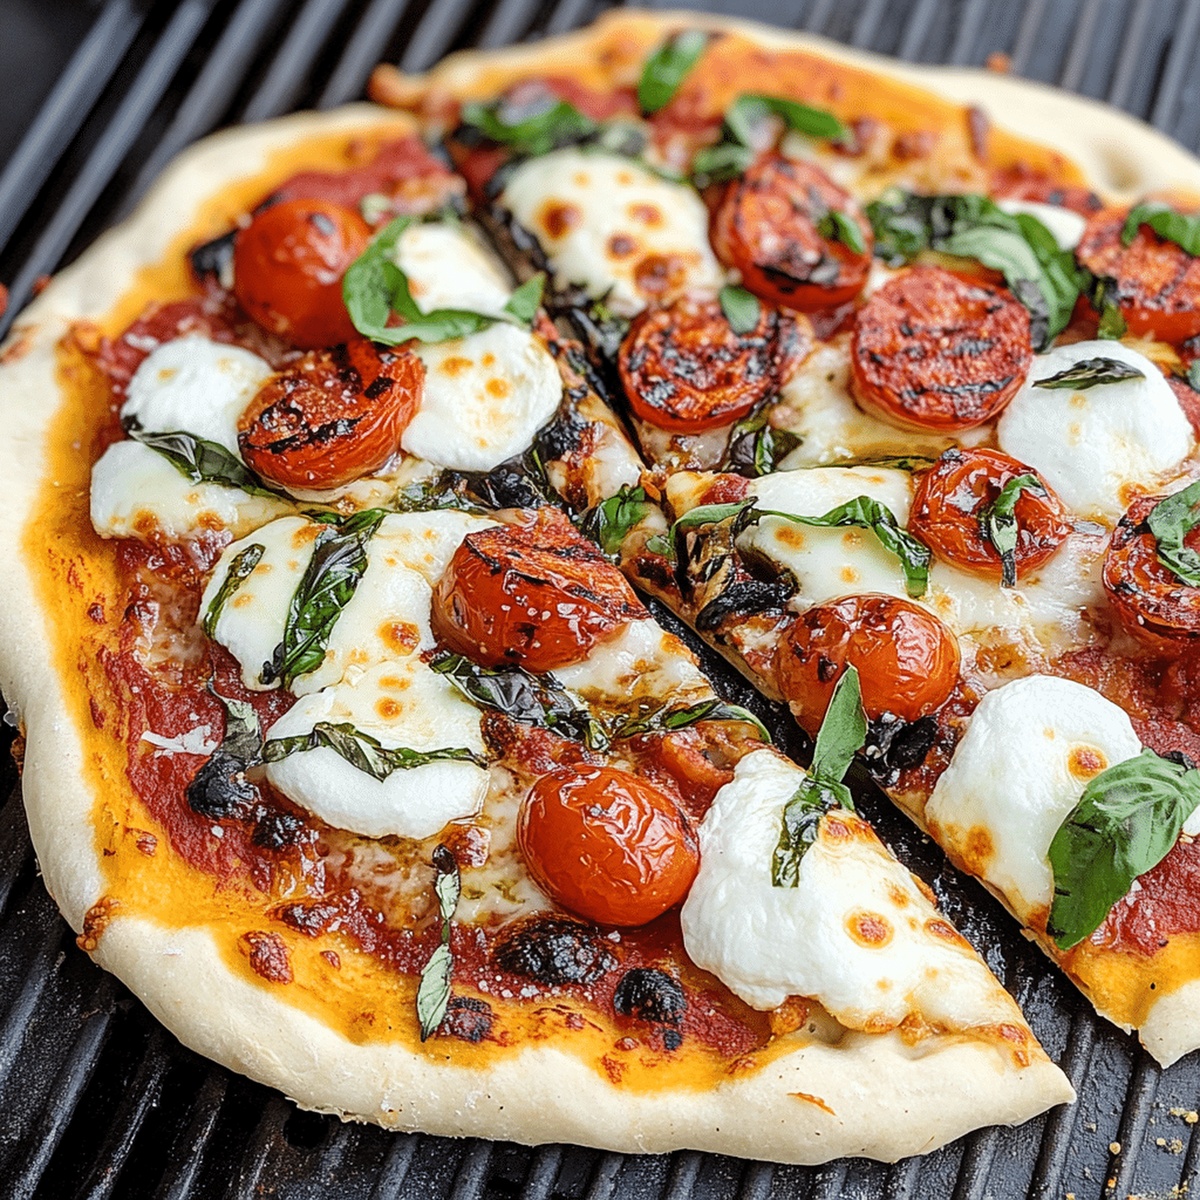
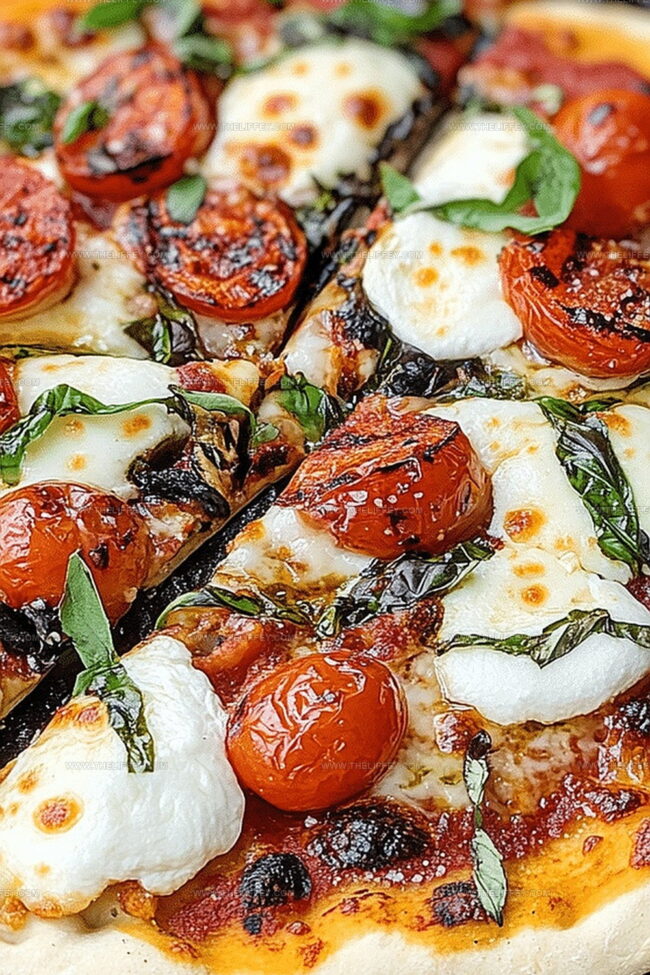
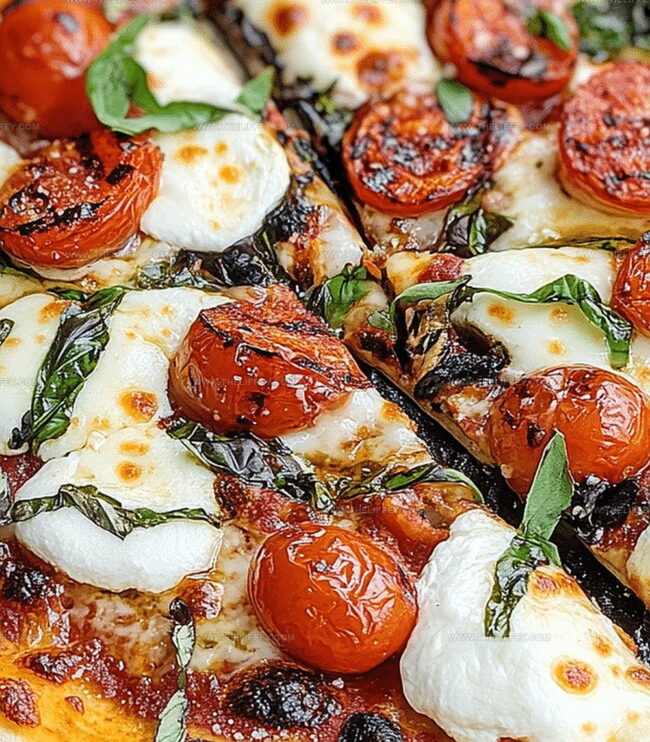
Crispy crusts and melted cheese await your culinary adventure.
Backyard barbecues never looked so appetizing with these perfectly charred slices.
Summer ingredients like fresh basil and ripe tomatoes add vibrant flavors to each bite.
Mastering the grill becomes an art form when you learn these simple techniques.
Surprising your dinner companions with restaurant-quality pizzas straight from your own grill feels incredibly satisfying.
You’ll want to fire up those coals and start experimenting right away.
Discover the Magic of Homemade Grilled Pizza
Ingredients You’ll Need for Grilled Pizza
Dough Ingredients:Sauce Ingredients:Topping Ingredients:Stepwise Instructions for Grilled Pizza Success
Step 1: Activate the Yeast
In a bowl, sprinkle yeast into warm water and let it bubble and wake up for 5 minutes.
This magical process helps the yeast come alive and start working its magic.
Step 2: Craft the Pizza Dough
Mix the activated yeast with:Knead the mixture thoroughly until a smooth, elastic dough forms.
Work those muscles and give the dough some love!
Let the dough rest and rise in a warm spot for 1-2 hours, allowing it to become puffy and soft.
Step 3: Simmer Tangy Tomato Sauce
Heat olive oil in a saucepan over medium flame.
Toss in minced garlic and let it dance and become fragrant.
Pour in crushed tomatoes and sprinkle with:Let the sauce simmer and develop rich flavors for 15 minutes.
Step 4: Fire Up the Grill
Preheat the grill to medium-high temperature, creating the perfect cooking environment.
Step 5: Shape Pizza Foundations
Divide the risen dough into portions and roll each piece into thin, round circles.
Make them as uniform or rustic as you prefer.
Step 6: Grill the Dough Base
Brush one side of each dough circle with olive oil.
Place the oiled side directly on the grill grates.
Cook for 2-3 minutes until beautiful golden marks appear.
Step 7: Layer Delicious Toppings
Remove the grilled dough, flip it over.
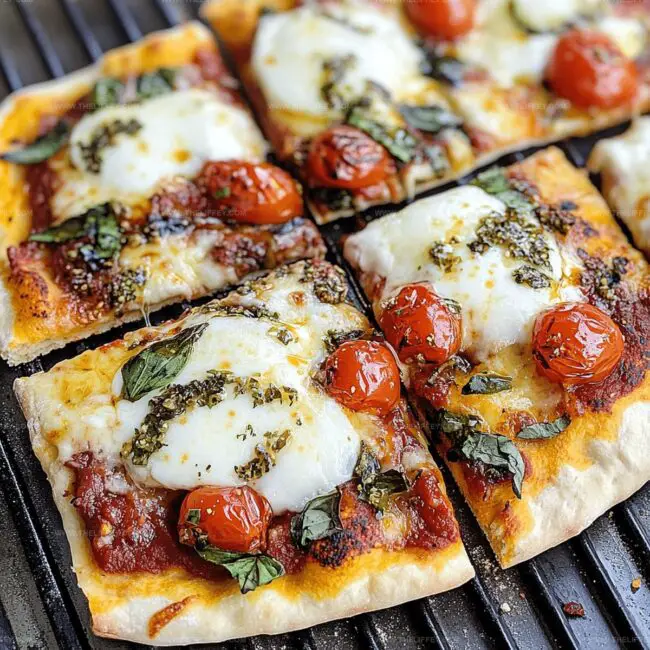
Spread tomato sauce, sprinkle cheese, and add your favorite toppings.
Return to the grill and cook for 5-7 minutes until cheese melts into gooey perfection.
Step 8: Serve and Enjoy
Pull the pizza off the grill, scatter fresh basil leaves on top.
Slice into wedges and serve piping hot.
Enjoy your homemade grilled pizza masterpiece!
Insider Tips to Nail Your Grilled Pizza Every Time
Flavor Variations to Try on Your Grilled Pizza
Serving Ideas for Grilled Pizza Gatherings
How to Store Leftover Grilled Pizza
FAQs
Active dry yeast or instant yeast are perfect. Both create great texture and help the dough rise consistently. Just ensure the yeast is fresh and not expired.
Yes, you can prepare the dough 1-2 days in advance. Store it in a sealed container in the refrigerator. Let it come to room temperature before rolling and grilling.
Aim for about 1/4 inch thickness. Thin dough ensures crispy edges and even cooking on the grill. Use a rolling pin and work from the center outwards for best results.
Print
Homemade Grilled Pizza Recipe
- Total Time: 1 hour 45 minutes
- Yield: 4 1x
Description
Homemade grilled pizza delivers a crispy crust with smoky flavors from Italian culinary traditions. Summer cookouts become more delicious when fresh ingredients and creative toppings bring friends together around the grill.
Ingredients
Main Ingredients (Dough Base):
- 3 1/2 to 4 cups all-purpose flour
- 1 1/2 cups warm water (110°F/45°C)
- 2 1/4 teaspoons active dry yeast
Liquid and Seasoning Ingredients:
- 2 tablespoons olive oil
- 1 teaspoon salt
- 1 teaspoon sugar
Instructions
- Activate the yeast by dissolving it in lukewarm water, allowing it to bloom and become frothy for approximately 5 minutes.
- Create a soft, elastic pizza dough by combining flour, olive oil, sugar, and salt, thoroughly mixing until a cohesive texture develops.
- Knead the dough vigorously for 10 minutes, then let it rest and rise in a warm environment for 1-2 hours until it doubles in volume.
- Craft the tomato sauce by sautéing minced garlic in olive oil until aromatic, releasing its essential flavors.
- Enhance the sauce with crushed tomatoes, incorporating oregano, basil, salt, and pepper, then simmer gently for 15 minutes to develop a rich, concentrated flavor.
- Heat the grill to medium-high temperature, ensuring an even cooking surface around 400-450°F.
- Portion the risen dough and roll into thin, uniform circular shapes, preparing them for grilling.
- Brush one side of each pizza dough with olive oil and carefully place the oiled side directly on the preheated grill grates.
- Grill the first side for 2-3 minutes until golden brown and light char marks appear.
- Flip the partially grilled dough, then immediately layer with prepared tomato sauce, cheese, and desired toppings.
- Return the topped pizza to the grill, cooking for an additional 5-7 minutes until the cheese melts completely and edges become crisp.
- Remove the grilled pizza, garnish with fresh basil leaves, slice into wedges, and serve immediately while piping hot.
Notes
- Flour your surface generously to prevent the dough from sticking and tearing when rolling out thin pizza bases.
- Keep all ingredients at room temperature to ensure even cooking and better dough elasticity.
- Use a pizza stone or heavy baking sheet on the grill to create a more even heat distribution and crispier crust.
- Experiment with alternative flours like whole wheat or gluten-free blends for dietary preferences without compromising texture.
- Prep Time: 1 hour 20 minutes
- Cook Time: 25 minutes
- Category: Lunch, Dinner, Snacks
- Method: Grilling
- Cuisine: Italian
Nutrition
- Serving Size: 4
- Calories: 170 kcal
- Sugar: 1 g
- Sodium: 300 mg
- Fat: 4 g
- Saturated Fat: 0.5 g
- Unsaturated Fat: 3.5 g
- Trans Fat: 0 g
- Carbohydrates: 34 g
- Fiber: 1.5 g
- Protein: 5 g
- Cholesterol: 0 mg
Amanda Bennett
Recipe Curator & Culinary Educator
Expertise
Baking and Pastry Arts, Recipe Testing and Development, Culinary Instruction, Food Styling and Photography
Education
Asheville-Buncombe Technical Community College, Asheville, NC
Diploma in Culinary Arts
Emphasized practical cooking skills, nutrition, and kitchen management.
Cambridge School of Culinary Arts, Cambridge, MA
Certificate in Professional Pastry Arts
Specialized in baking techniques, dessert presentation, and flavor profiling
Amanda’s roots run deep in the Southern hills, where every meal started fresh from the garden and every dessert came with a story. She trained at Asheville-Buncombe Technical Community College and sharpened her pastry skills at the Cambridge School of Culinary Arts, blending classic technique with everyday charm.
At The Liffey, Amanda’s passion is making baking and home cooking feel natural and joyful. She’s all about single recipes that are simple enough for a busy afternoon, but special enough to make someone’s day a little sweeter.