Grandma’s Magic Sour Cream Sugar Cookies Recipe: Family Joy
Grandma’s cherished sour cream sugar cookies dance between nostalgic comfort and sweet indulgence.
Memories of warm kitchen counters and flour-dusted hands come flooding back with each bite.
Soft, pillowy textures promise a delightful experience that whispers of home.
Generations have savored these delicate treats, passing down a recipe that speaks of love and tradition.
Simple ingredients blend into something magical, creating cookies that melt perfectly on your tongue.
Crisp edges and tender centers make these cookies irresistible for any gathering.
You’ll want to bake a batch and create your own sweet memories right now.
What Makes Grandma’s Sugar Cookies Special

Ingredients for Sour Cream Sugar Cookies
Dry Ingredients:Wet Ingredients:Optional Finishing Touches:How to Bake Grandma’s Sugar Cookies
Step 1: Warm Up the Oven
Crank up your oven to a toasty 375°F (190°C).
Grab some parchment paper and line your baking sheets, creating a perfect non-stick surface for these delightful cookies.
Step 2: Mix Dry Ingredients
Grab a mixing bowl and whisk together these dry ingredients:Set this fluffy mixture aside for now.
Step 3: Create a Creamy Base
In a separate large bowl, grab your electric mixer and blend softened butter and sugar until it becomes light and fluffy.
Introduce your egg, vanilla extract, and sour cream, mixing until everything is beautifully combined.
Step 4: Combine Wet and Dry Ingredients
Slowly fold your dry ingredient mixture into the wet ingredients.
Mix gently until everything just comes together – don’t overmix!
Step 5: Shape the Cookies
Roll the dough into cute little balls or use a cookie scoop.
Place them on your prepared baking sheets.
Gently flatten each cookie with the back of a spoon.
Step 6: Bake to Golden Perfection
Pop the cookies into the preheated oven.
Bake for 8-10 minutes until the edges turn a delicate golden color.
Let them cool completely on wire racks before enjoying these melt-in-your-mouth treats.
Pro Tips for Soft Sugar Cookies

Flavor Variations on Classic Sugar Cookies

Serving Suggestions for Sugar Cookies
Storage Advice for Sugar Cookies
FAQs
Sour cream adds moisture, tenderness, and a subtle tangy flavor that makes these cookies softer and more delicate compared to traditional sugar cookies.
While sour cream is key to the recipe’s unique texture, you can substitute with Greek yogurt or buttermilk, but the taste and texture might slightly change.
Look for lightly golden edges and a soft, slightly puffy center. They should look set but not dark brown, which indicates they’re done.
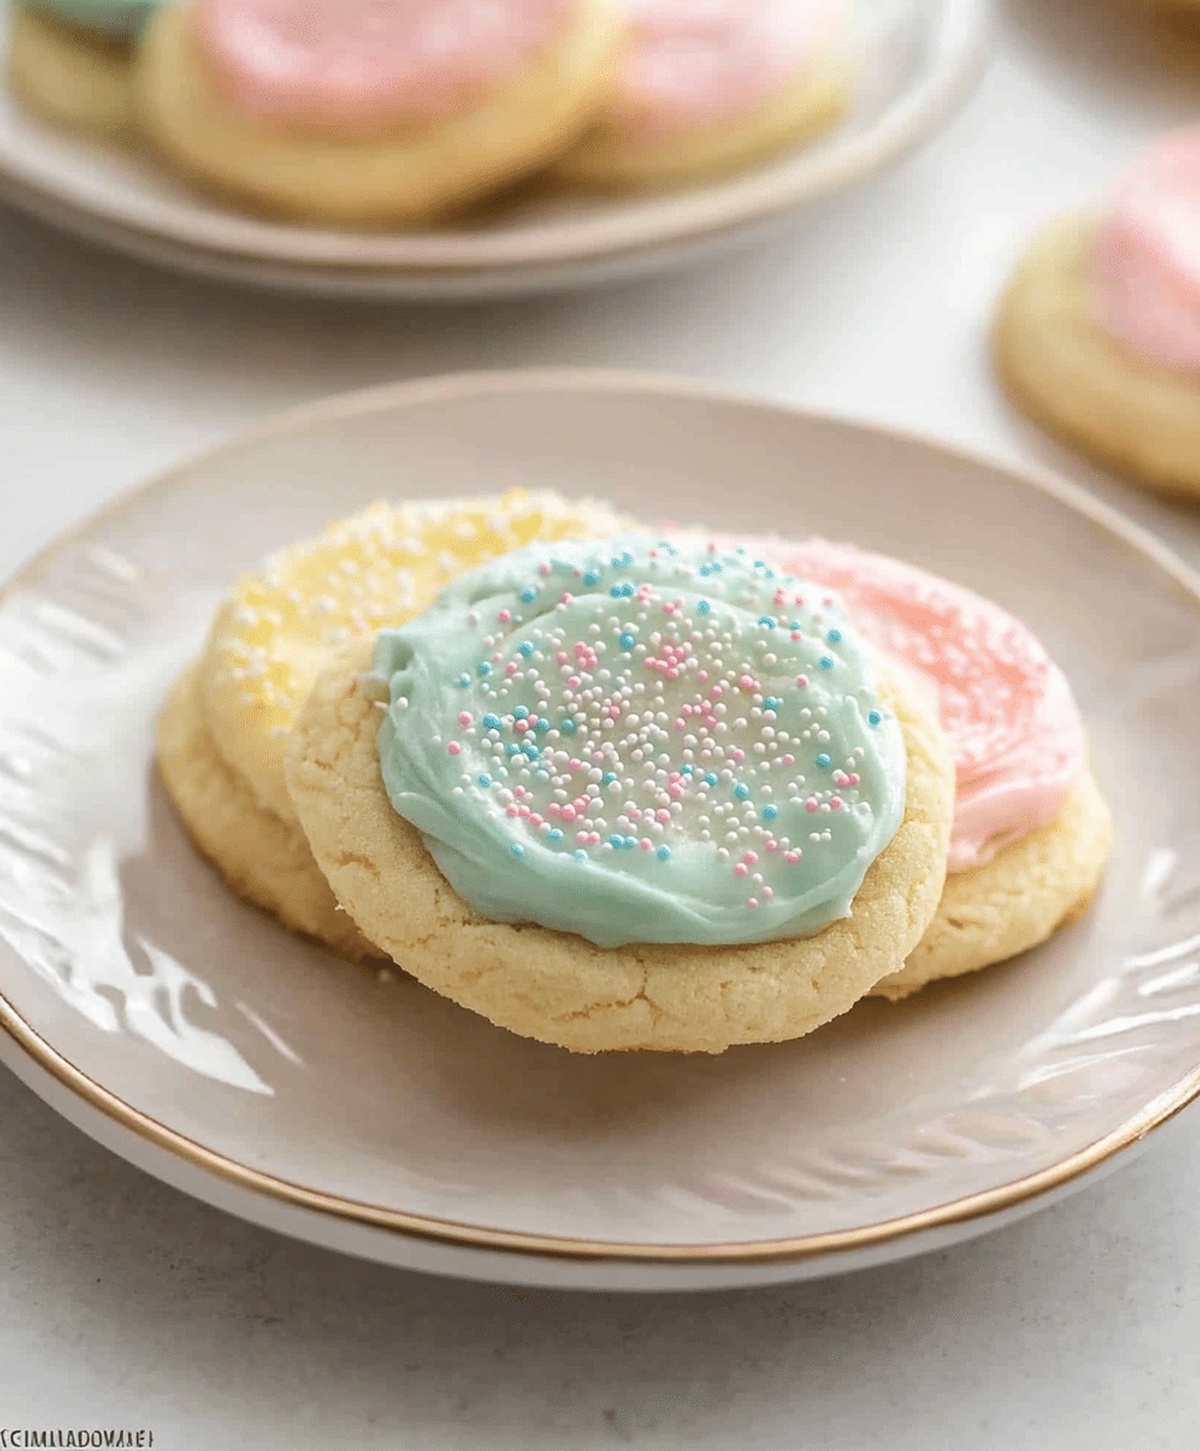
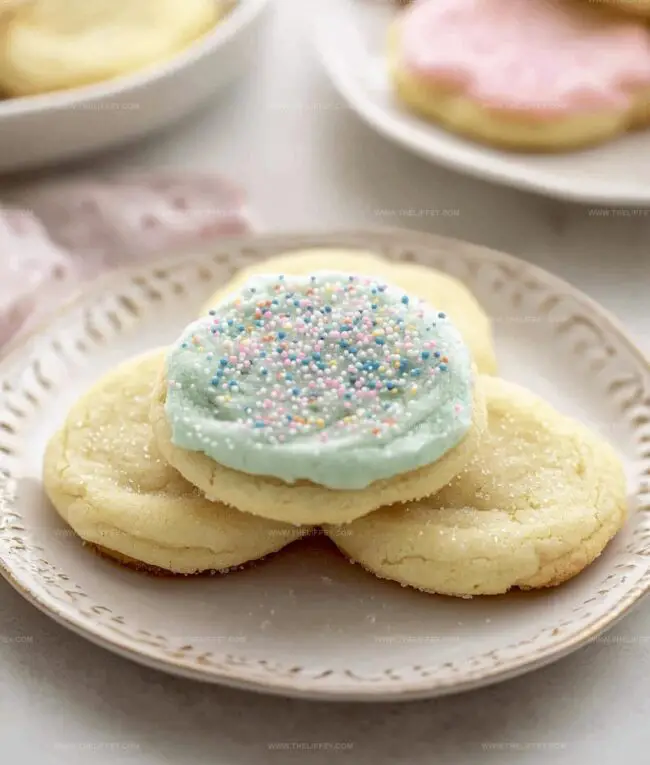
Yes! These cookies have a sturdy yet soft base that’s perfect for frosting, sprinkles, or simple sugar dusting, making them great for holidays or special occasions.
Print
Grandmas Sour Cream Sugar Cookies Recipe
- Total Time: 30 minutes
- Yield: 24 1x
Description
Grandma’s sour cream sugar cookies offer a nostalgic journey through family baking traditions. Sweet memories and simple ingredients combine to create a timeless treat you’ll cherish and share with loved ones.
Ingredients
Main Ingredients:
- 2.75 cups all-purpose flour
- 1 large egg
- 1/2 cup unsalted butter, softened
- 1 cup granulated sugar
- 1/2 cup sour cream
Leavening Agents:
- 1 teaspoon baking powder
- 1/2 teaspoon baking soda
Seasoning:
- 1/4 teaspoon salt
- 1 teaspoon vanilla extract
Instructions
- Warm the oven to 375F (190C) and prepare baking sheets with parchment paper for optimal cookie performance.
- Combine dry ingredients in a mixing bowl, thoroughly blending flour, baking powder, baking soda, and salt to ensure even distribution.
- Using an electric mixer, whip butter and sugar until light and airy, creating a smooth base for the cookie dough.
- Incorporate egg, vanilla extract, and sour cream into the butter mixture, mixing until the ingredients are fully integrated and uniform.
- Gently fold dry ingredients into the wet mixture, stirring carefully to avoid overmixing and maintain a tender cookie texture.
- Shape the dough into uniform balls or use a cookie scoop to create consistent portions, placing them evenly on the prepared baking sheets.
- Delicately flatten each cookie with the back of a spoon, creating a slightly rounded shape for even baking.
- Bake for 8-10 minutes, watching for a subtle golden edge that indicates perfect doneness.
- Transfer cookies to wire cooling racks, allowing them to reach room temperature before serving or storing.
Notes
- Chill the dough for 30 minutes before rolling to prevent spreading and create a more tender cookie texture.
- Substitute sour cream with Greek yogurt for a tangy alternative that maintains moisture and richness.
- Use a light hand when mixing dry ingredients to keep cookies soft and prevent tough, dense results.
- Customize cookies by adding zest from lemon or orange, or sprinkle with colored sugar before baking for festive flair.
- Prep Time: 20 minutes
- Cook Time: 10 minutes
- Category: Desserts, Snacks
- Method: Baking
- Cuisine: American
Nutrition
- Serving Size: 24
- Calories: 150 kcal
- Sugar: 8 g
- Sodium: 75 mg
- Fat: 8 g
- Saturated Fat: 5 g
- Unsaturated Fat: 3 g
- Trans Fat: 0.1 g
- Carbohydrates: 18 g
- Fiber: 0.5 g
- Protein: 2 g
- Cholesterol: 30 mg
Amanda Bennett
Recipe Curator & Culinary Educator
Expertise
Baking and Pastry Arts, Recipe Testing and Development, Culinary Instruction, Food Styling and Photography
Education
Asheville-Buncombe Technical Community College, Asheville, NC
Diploma in Culinary Arts
Emphasized practical cooking skills, nutrition, and kitchen management.
Cambridge School of Culinary Arts, Cambridge, MA
Certificate in Professional Pastry Arts
Specialized in baking techniques, dessert presentation, and flavor profiling
Amanda’s roots run deep in the Southern hills, where every meal started fresh from the garden and every dessert came with a story. She trained at Asheville-Buncombe Technical Community College and sharpened her pastry skills at the Cambridge School of Culinary Arts, blending classic technique with everyday charm.
At The Liffey, Amanda’s passion is making baking and home cooking feel natural and joyful. She’s all about single recipes that are simple enough for a busy afternoon, but special enough to make someone’s day a little sweeter.