
Spooky Sweet: The Magic Easy Halloween Fudge Recipe
Sweet tooths go crazy for this easy Halloween fudge that combines creepy charm with delectable indulgence.
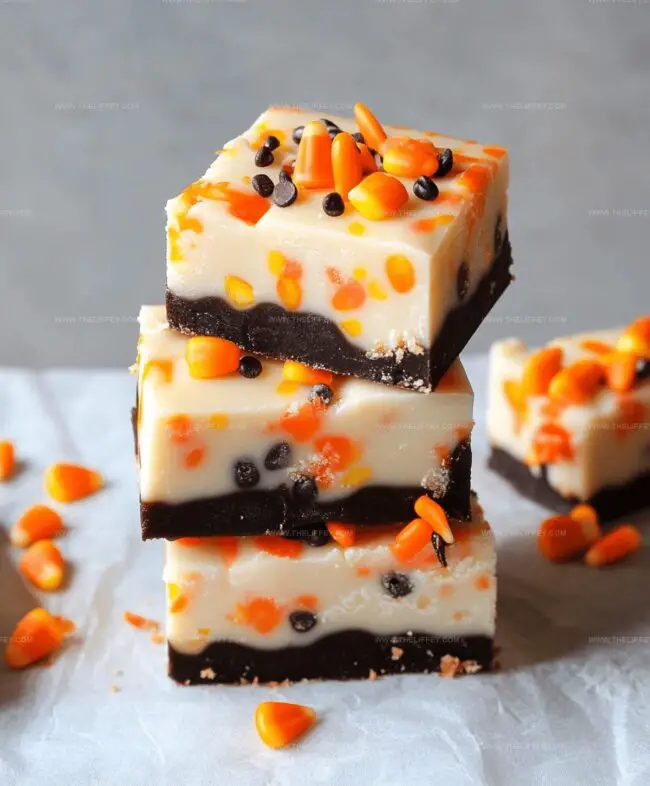
Candy corn and chocolate swirl together in a wickedly delightful treat perfect for seasonal celebrations.
Ghoulish decorations transform simple ingredients into a spectacular dessert everyone will adore.
Kids and adults alike will squeal with excitement over these spooky chocolate squares.
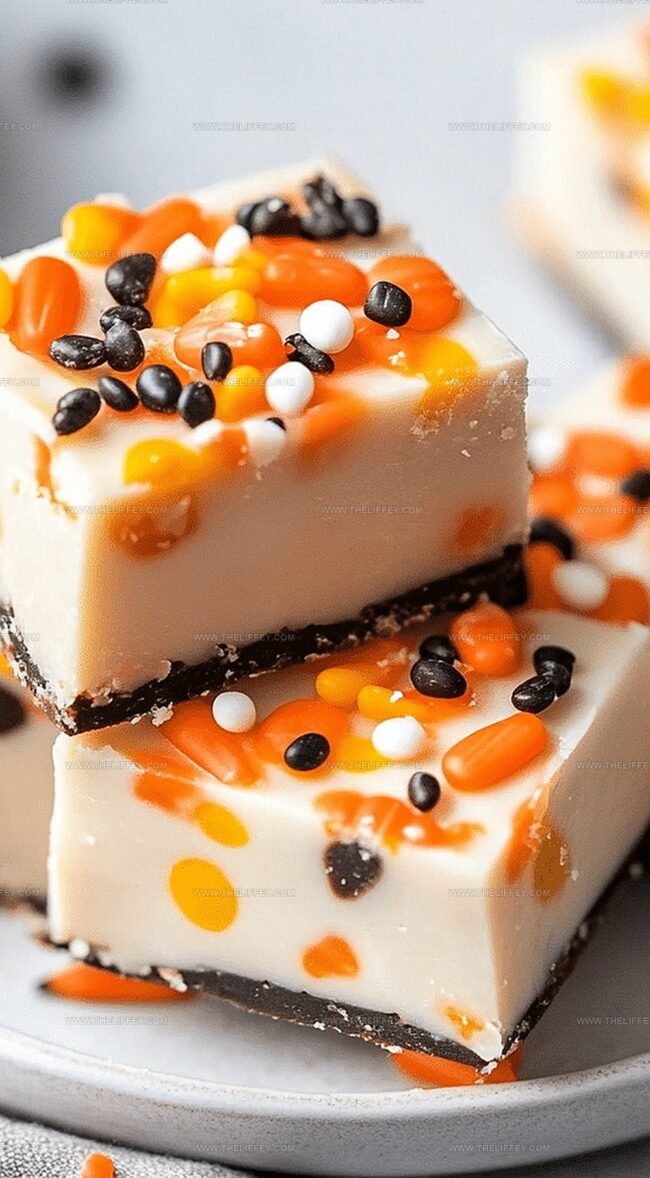
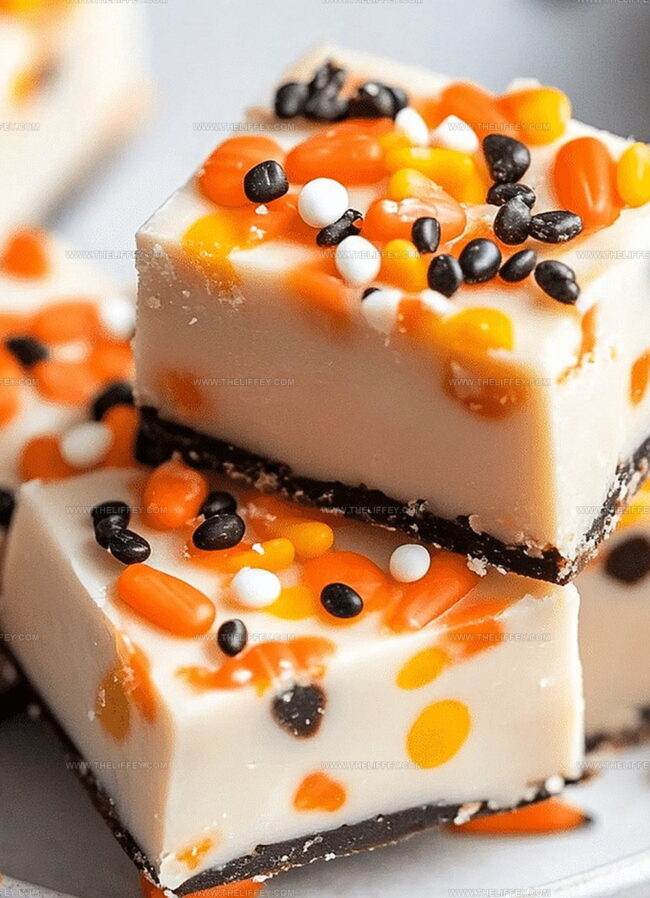
Dark and white chocolate layers create a mesmerizing marbled effect that looks complicated but requires minimal effort.
Minimal kitchen skills guarantee spectacular results that will impress party guests.
You can whip up this festive confection in under 30 minutes, making it the ultimate last-minute Halloween sensation.
Halloween Fudge: Sweet Treat for the Season
Ingredients Needed for Halloween Fudge
Base Ingredients:Flavoring Ingredient:Decorative Toppings:Preparation Ingredient:Instructions for Making Halloween Fudge
Step 1: Prepare Baking Pan
Line an 8×8 inch pan with parchment paper, ensuring the paper covers the bottom and sides completely for easy removal later.
Step 2: Melt Chocolate Base
Combine chocolate chips and sweetened condensed milk in a medium saucepan.
Heat on low, stirring continuously until the mixture becomes completely smooth and glossy.
Step 3: Add Flavor Enhancer
Remove the chocolate mixture from heat and gently stir in vanilla extract, blending thoroughly to distribute the rich flavor throughout the fudge.
Step 4: Transfer and Smooth
Pour the chocolate mixture into the prepared pan, using a spatula to spread it evenly across the surface, creating a perfectly flat layer.
Step 5: Decorate with Spooky Toppings
Quickly add Halloween-themed decorations like:Press the toppings lightly into the fudge surface to ensure they stick.
Step 6: Chill and Set
Refrigerate the fudge for 2 hours or until it becomes completely firm and solid.
Step 7: Slice and Serve
Remove the fudge from the refrigerator and lift out using the parchment paper.
Cut into square pieces and serve on a festive Halloween platter.
Tips for Perfect Halloween Fudge
Flavor Variations for Halloween Fudge
Serving Ideas for Halloween Fudge
Storage Advice for Halloween Fudge
FAQs
Halloween sprinkles, candy corn, orange and black M&Ms, and Halloween-themed candy decorations transform this basic fudge into a festive treat that captures the holiday’s playful mood.
Yes, you can swap chocolate chips with dark, milk, or white chocolate chips depending on your preference. Just ensure they melt smoothly and complement the sweetened condensed milk.
When stored in an airtight container in the refrigerator, the fudge will remain fresh for up to 7-10 days. Keep it cool to maintain its smooth texture and prevent melting.
Print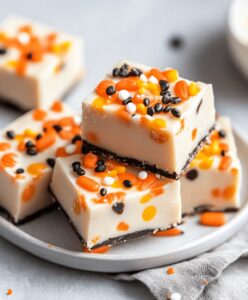
Easy Halloween Fudge Recipe
- Total Time: 2 hours 15 minutes
- Yield: 12 1x
Description
Halloween bark fudge combines spooky chocolate layers with festive sprinkles for a haunting dessert. Creamy white chocolate creates delightful candy patterns while colorful decorations make this sweet treat perfect for holiday celebrations.
Ingredients
Main Ingredients:
- 3 cups (360 grams) semi-sweet chocolate chips
- 1 can (14 ounces / 397 grams) sweetened condensed milk
Flavoring:
- 1 teaspoon vanilla extract
Decorative Toppings:
- Halloween-themed sprinkles
- Candy eyes
- Gummy worms
Instructions
- Prepare an 8×8 inch baking pan by lining it completely with parchment paper, ensuring smooth coverage for easy removal.
- Combine chocolate chips and sweetened condensed milk in a medium saucepan, melting them together over low heat while continuously stirring until achieving a silky, uniform consistency.
- Remove the chocolate mixture from heat and gently incorporate vanilla extract, stirring until fully integrated.
- Transfer the molten fudge into the prepared pan, using a spatula to distribute evenly and create a smooth surface.
- Immediately decorate the fudge with festive Halloween-themed toppings, delicately pressing them into the soft chocolate to ensure they adhere securely.
- Place the pan in the refrigerator and chill for approximately 2 hours, allowing the fudge to completely set and firm up.
- Once solidified, lift the fudge out using the parchment paper edges and slice into neat, bite-sized squares using a sharp knife.
- Arrange the Halloween fudge pieces on a serving platter and enjoy the spooky sweet treat.
Notes
- Invest in high-quality chocolate chips for richer, more decadent fudge that melts smoothly and creates a creamy texture.
- Use parchment paper with overhanging edges to easily lift and remove the entire fudge block from the pan without breaking.
- Customize toppings based on dietary needs by using dairy-free chocolate chips for vegan versions or sugar-free alternatives for low-sugar diets.
- Work quickly when adding Halloween decorations to ensure they stick properly into the soft fudge surface before it begins to set.
- Prep Time: 15 minutes
- Cook Time: 2 hours
- Category: Desserts, Snacks
- Method: Simmering
- Cuisine: American
Nutrition
- Serving Size: 12
- Calories: 213 kcal
- Sugar: 28 g
- Sodium: 33 mg
- Fat: 10 g
- Saturated Fat: 6 g
- Unsaturated Fat: 3 g
- Trans Fat: 0.1 g
- Carbohydrates: 29 g
- Fiber: 2 g
- Protein: 2 g
- Cholesterol: 10 mg
Amanda Bennett
Recipe Curator & Culinary Educator
Expertise
Baking and Pastry Arts, Recipe Testing and Development, Culinary Instruction, Food Styling and Photography
Education
Asheville-Buncombe Technical Community College, Asheville, NC
Diploma in Culinary Arts
Emphasized practical cooking skills, nutrition, and kitchen management.
Cambridge School of Culinary Arts, Cambridge, MA
Certificate in Professional Pastry Arts
Specialized in baking techniques, dessert presentation, and flavor profiling
Amanda’s roots run deep in the Southern hills, where every meal started fresh from the garden and every dessert came with a story. She trained at Asheville-Buncombe Technical Community College and sharpened her pastry skills at the Cambridge School of Culinary Arts, blending classic technique with everyday charm.
At The Liffey, Amanda’s passion is making baking and home cooking feel natural and joyful. She’s all about single recipes that are simple enough for a busy afternoon, but special enough to make someone’s day a little sweeter.