
Quick & Creamy Dirt Cake Recipe That Kids Adore
Whipping up a delightful dirt cake always brings childhood memories flooding back to me.
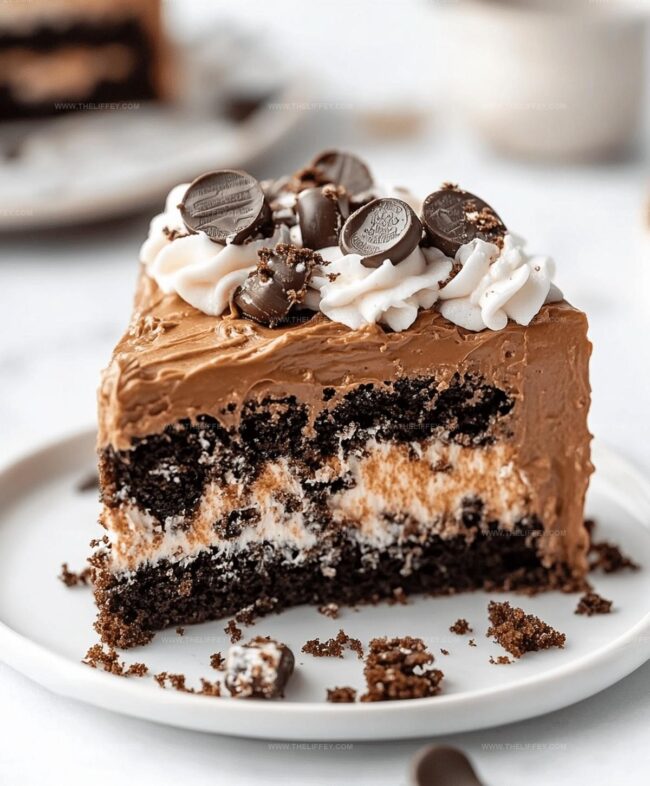
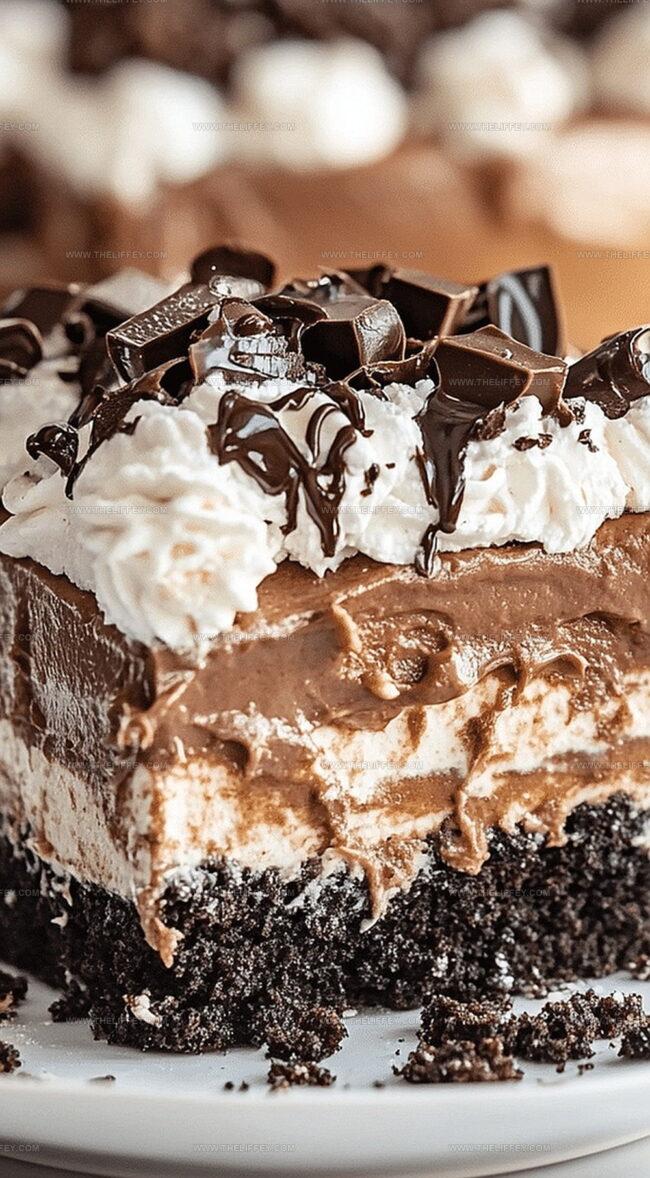
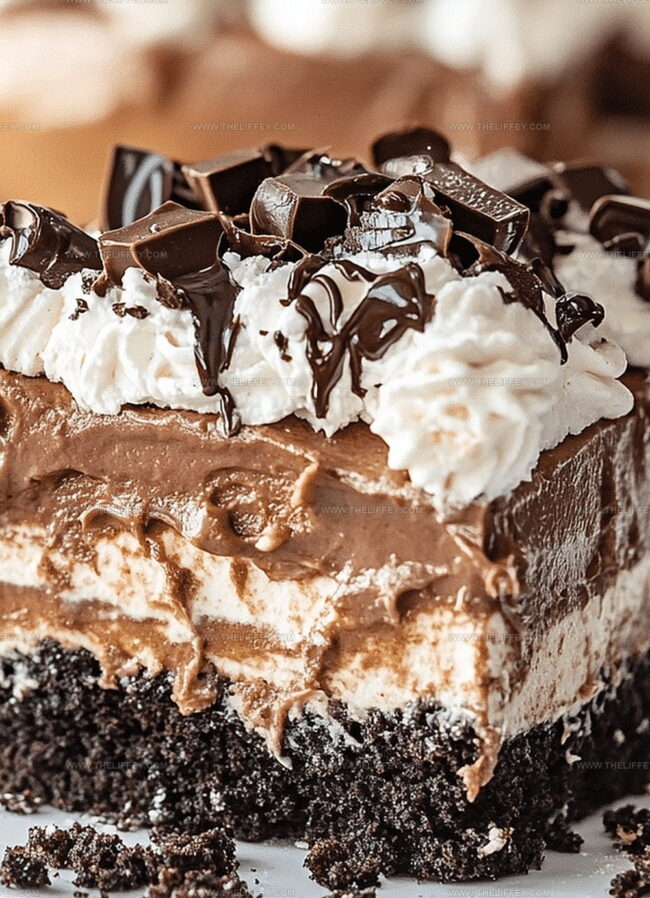
Layers of chocolatey goodness create a playful dessert that looks just like a miniature garden.
Crushed cookies mimic soil while creamy pudding and whipped cream add delicious texture.
Kids absolutely adore the whimsical presentation of this sweet treat.
Oreo cookies crumbled into fine “dirt” make the base irresistibly crunchy and fun.
Gummy worms peeking through the layers add a touch of mischievous charm.
You’ll want to dig into this nostalgic dessert that’s sure to spark joy and laughter at any gathering.
Why Dirt Cake Is Always a Hit

What You Need for Dirt Cake Recipe
Cookies and Crumbs:Dairy and Creamy Components:Sweeteners and Thickeners:How to Prepare the Dirt Cake Recipe
Step 1: Pulverize Chocolate Cookies
Grab your food processor and transform Oreo cookies into a crumbly, soil-like texture.
Pulse until the cookies resemble fine, dark granules that mimic dirt.
Set the cookie crumbs aside for later layering.
Step 2: Whip Creamy Base
In a spacious mixing bowl, blend cream cheese and softened butter until they become silky smooth.
Gradually introduce powdered sugar, whisking continuously to create a luxurious, velvety mixture that’s free of lumps.
Step 3: Create Pudding Mixture
Select a separate bowl and whisk milk with pudding mix.
Stir until the mixture thickens and becomes wonderfully smooth.
Gently fold in whipped topping, creating a light and airy consistency that will make your dessert irresistible.
Step 4: Combine Creamy Layers
Merge the cream cheese mixture with the pudding mixture, stirring until they blend perfectly into a harmonious, creamy concoction.
Ensure no streaks remain for a uniform texture.
Step 5: Build Delicious Layers
In a clear serving dish, begin layering your dessert:Step 6: Garnish and Chill
Optional but fun: Decorate the top with gummy worms to enhance the playful “dirt” theme.
Refrigerate for at least one hour to allow flavors to meld and texture to set.
Serve chilled and watch everyone’s eyes light up!
Dirt Cake Tips to Keep in Mind
Creative Takes on the Classic Dirt Cake
Dirt Cake Goes Great With These
Save and Store Your Dirt Cake Properly
FAQs
Oreo cookies, cream cheese, butter, powdered sugar, milk, instant pudding mix, and whipped topping are the main ingredients that create the unique texture and flavor of this dessert.
Yes, Dirt Cake is extremely popular with children because of its playful “dirt and worms” appearance and sweet, creamy taste. Kids love helping to crush cookies and arrange the layers.
Absolutely! Dirt Cake can be prepared a day in advance and refrigerated. In fact, letting it chill helps the flavors meld together and makes the dessert even more delicious.
Print
Dirt Cake Recipe
- Total Time: 1 hour 20 minutes
- Yield: 8 1x
Description
Rich chocolate dirt cake beckons with layers of creamy pudding, crushed cookies, and playful gummy worms nestled in a whimsical dessert. Chocolate lovers and party guests will delight in this nostalgic treat that brings childhood memories to life.
Ingredients
Main Ingredients:
- 3 cups milk
- 1 package (14.3 ounces / 405 grams) Oreo cookies
- 2 packages (3.4 ounces / 96 grams each) instant vanilla pudding mix
Dairy Ingredients:
- 8 ounces (226 grams) cream cheese, softened
- 1/2 cup (113 grams) unsalted butter, softened
- 12 ounces (340 grams) whipped topping (like Cool Whip)
Sweet and Decorative Ingredients:
- 1 cup (120 grams) powdered sugar
- Gummy worms (optional, for decoration)
Instructions
- Pulverize Oreo cookies in a food processor until they achieve a fine, soil-like texture, creating the foundational “dirt” layer for the dessert.
- Using an electric mixer, cream together softened cream cheese and butter until uniformly smooth and creamy.
- Gradually incorporate powdered sugar into the cream cheese mixture, blending thoroughly to ensure no sugar lumps remain.
- In a separate mixing bowl, whisk milk and instant pudding mix until the mixture thickens and becomes smooth, approximately 2 minutes.
- Gently fold whipped topping into the pudding mixture, creating a light and airy consistency.
- Carefully merge the cream cheese blend with the pudding mixture, stirring until completely integrated and uniform in color and texture.
- Select a clear serving dish to showcase the layered design, beginning with a generous base of crushed Oreo “dirt” crumbs.
- Alternate layers of the pudding mixture and cookie crumbs, ensuring each layer is evenly distributed and visually appealing.
- Complete the dessert with a final topping of cookie crumbs to simulate a realistic dirt appearance.
- Optional: Strategically place gummy worms on the surface for a playful, whimsical presentation.
- Refrigerate the dessert for a minimum of 1 hour to allow flavors to meld and texture to set, preferably 2-3 hours for optimal results.
Notes
- Crush Oreos finely to achieve an authentic dirt-like texture for maximum visual appeal.
- Use room temperature cream cheese and butter to ensure smooth, lump-free mixing.
- Opt for instant vanilla pudding mix for quicker preparation and consistent results.
- Customize by adding chocolate rocks or plant decorations for a more whimsical presentation.
- Prep Time: 20 minutes
- Cook Time: 1 hour
- Category: Desserts, Snacks
- Method: Blending
- Cuisine: American
Nutrition
- Serving Size: 8
- Calories: 372
- Sugar: 26 g
- Sodium: 195 mg
- Fat: 22 g
- Saturated Fat: 13 g
- Unsaturated Fat: 8 g
- Trans Fat: 0.5 g
- Carbohydrates: 38 g
- Fiber: 1.5 g
- Protein: 4 g
- Cholesterol: 35 mg
Amanda Bennett
Recipe Curator & Culinary Educator
Expertise
Baking and Pastry Arts, Recipe Testing and Development, Culinary Instruction, Food Styling and Photography
Education
Asheville-Buncombe Technical Community College, Asheville, NC
Diploma in Culinary Arts
Emphasized practical cooking skills, nutrition, and kitchen management.
Cambridge School of Culinary Arts, Cambridge, MA
Certificate in Professional Pastry Arts
Specialized in baking techniques, dessert presentation, and flavor profiling
Amanda’s roots run deep in the Southern hills, where every meal started fresh from the garden and every dessert came with a story. She trained at Asheville-Buncombe Technical Community College and sharpened her pastry skills at the Cambridge School of Culinary Arts, blending classic technique with everyday charm.
At The Liffey, Amanda’s passion is making baking and home cooking feel natural and joyful. She’s all about single recipes that are simple enough for a busy afternoon, but special enough to make someone’s day a little sweeter.