
The Perfect Crispy Chicken Sandwich Recipe for Homemade Joy
Crafting the ultimate crispy chicken sandwich requires more than just basic ingredients.
Layers of flavor and texture bring this classic dish to life.
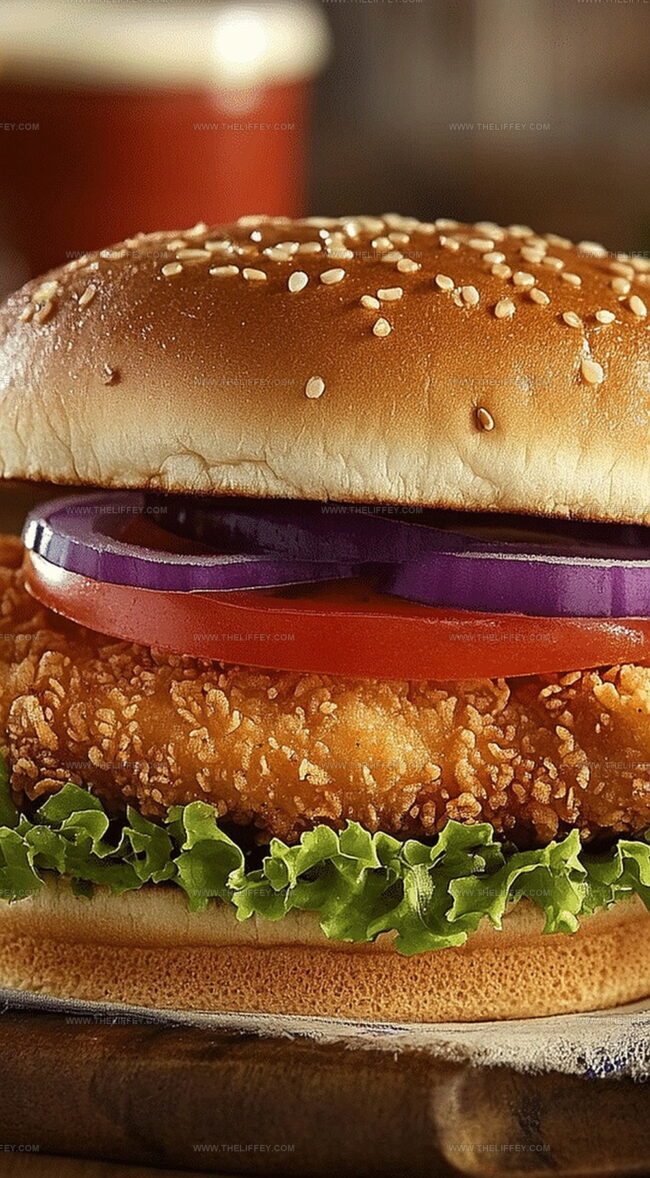
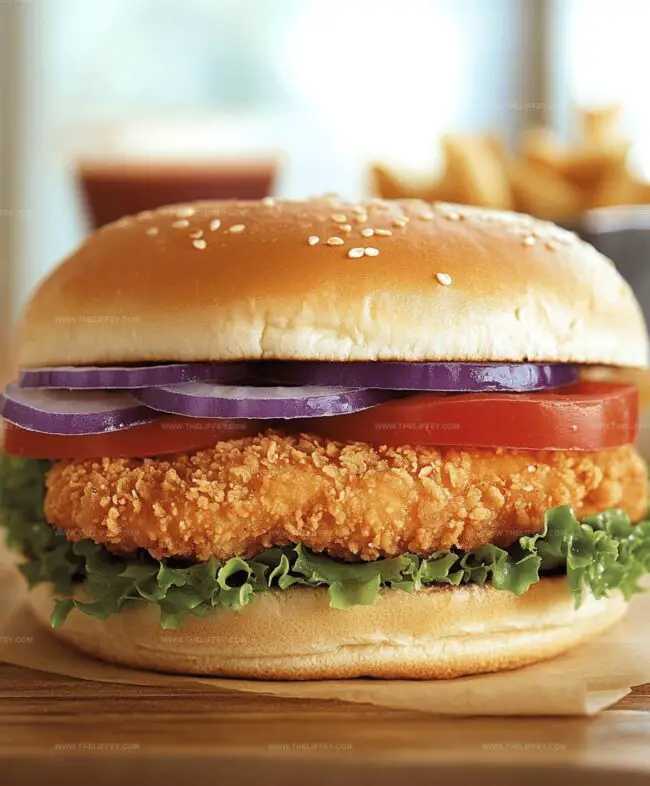
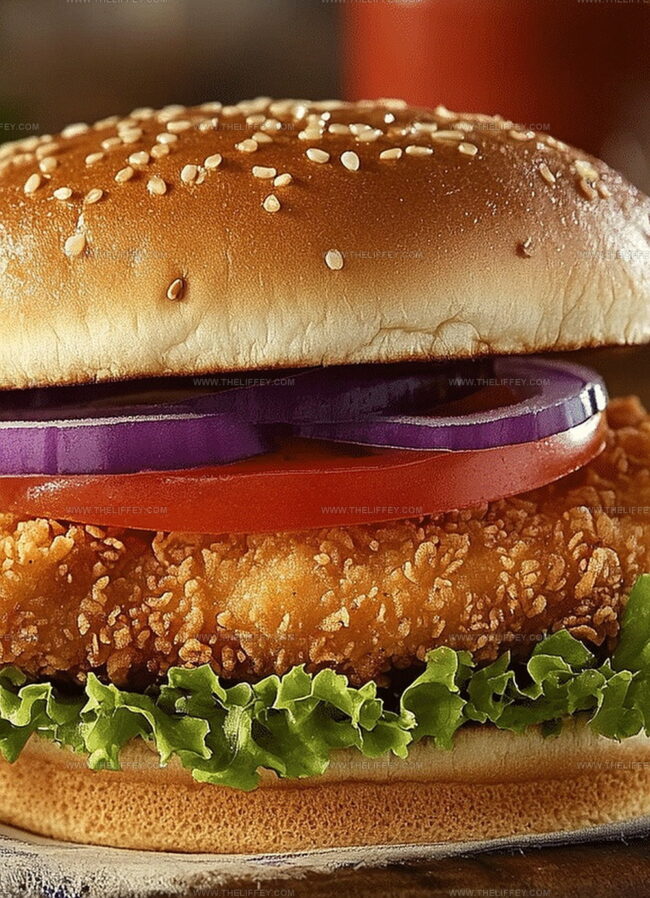
Juicy, tender meat nestled between perfectly toasted bread creates a mouthwatering experience.
Seasoned breading adds a delightful crunch that makes every bite memorable.
Crisp lettuce and tangy sauce complement the golden-brown exterior of the chicken.
Simple techniques can help you achieve restaurant-quality results at home.
You’ll want to bookmark this recipe for your next meal adventure.
Crispy Chicken Sandwich That Delights Every Bite
Ingredients To Make Crispy Chicken Sandwich
Chicken Base:Breading Components:Seasoning Blend:Sandwich Accessories:Frying Element:Step-By-Step Crispy Chicken Sandwich
Step 1: Tenderize Chicken Breasts
Gently pound chicken breasts with a meat mallet to create an even thickness. This helps the chicken cook uniformly and become tender.
Place the chicken between plastic wrap or parchment paper to prevent mess.
Step 2: Infuse Flavor with Seasoning
Sprinkle a delightful blend of seasonings over both sides of the chicken:Massage the spices into the meat to ensure deep flavor penetration.
Step 3: Create Crispy Coating Station
Set up three shallow dishes for the breading process:Arrange the dishes in order for smooth breading.
Step 4: Coat Chicken in Crunchy Layer
Dredge each chicken piece through the stations:Press breadcrumbs gently to ensure a thick, even coating.
Step 5: Sizzle to Golden Perfection
Heat vegetable oil in a heavy skillet over medium-high heat. Carefully place breaded chicken into hot oil.
Fry each side until deep golden brown and internal temperature reaches 165°F. Drain on wire rack to maintain crispiness.
Step 6: Build Mouthwatering Sandwich
Toast brioche or potato buns until edges are golden. Layer sandwich with:Step 7: Enhance with Signature Sauces
Spread your favorite condiments like:Serve immediately while chicken remains hot and crispy.
Tips For Extra Crispy And Juicy Chicken Sandwich
Flavor Variations To Enhance Crispy Chicken Sandwich
Serving Ideas For Crispy Chicken Sandwich
Storing Crispy Chicken Sandwich The Right Way
FAQs
Buttermilk helps tenderize the meat, making it juicy and soft while adding a subtle tangy flavor that enhances the overall taste of the chicken.
While you can substitute buttermilk with regular milk mixed with a tablespoon of vinegar or lemon juice, buttermilk provides better flavor and texture for crispy chicken.
Make sure the oil is hot enough before frying, drain excess oil on a wire rack or paper towels, and avoid covering the chicken to prevent steam from making the breading soggy.
Print
Crunchy Chicken Sandwich Recipe
- Total Time: 25 minutes
- Yield: 4 1x
Description
Mouthwatering crispy chicken sandwich combines southern comfort with culinary precision. Layers of perfectly seasoned chicken, tangy slaw, and signature sauce promise a delectable dining experience for sandwich enthusiasts who crave bold flavors.
Ingredients
Main Protein:
- 2 chicken breasts
Coating Ingredients:
- 1 cup flour
- 1 tablespoon salt
- 1 teaspoon black pepper
- 1 teaspoon paprika
- 1 teaspoon garlic powder
- 1 egg
- 1 cup buttermilk
- 1 cup panko breadcrumbs
Cooking and Sandwich Ingredients:
- 2 cups vegetable oil
- 2 lettuce leaves
- 2 tomato slices
- 4 pickle slices
- 2 hamburger buns
Instructions
- Tenderize chicken breasts to an even thickness, ensuring uniform seasoning with salt, pepper, paprika, and garlic powder for maximum flavor penetration.
- Create a three-stage breading station: first dust chicken with seasoned flour, then dip thoroughly in buttermilk-egg mixture, finally coat generously with panko breadcrumbs for ultimate crispiness.
- Heat vegetable oil in a heavy skillet to 350°F, carefully lowering breaded chicken and frying 3-4 minutes per side until golden brown and internal temperature reaches 165°F.
- While chicken cooks, prepare buns by lightly toasting until edges are golden and crisp, creating a sturdy foundation for the sandwich.
- Layer toasted bottom bun with crisp lettuce leaves, fresh tomato slices, and tangy pickle rounds for added texture and flavor.
- Place perfectly fried chicken atop prepared vegetable base, ensuring complete coverage of the bun.
- Drizzle preferred condiments like spicy mayo, honey mustard, or classic ranch across the chicken for additional taste complexity.
- Crown with top bun, pressing gently to compact sandwich, and serve immediately while chicken remains piping hot and supremely crunchy.
Notes
- Achieve extra crispiness by double-dredging the chicken through the flour and buttermilk mixture before the final panko coating.
- Marinate chicken in buttermilk overnight for more tender and flavorful meat that remains juicy inside while creating a crunchy exterior.
- Control oil temperature around 350°F to ensure perfect golden-brown color without burning the breading or undercooking the chicken.
- Customize the sandwich by swapping traditional buns with gluten-free options or using cauliflower “buns” for a lower-carb alternative that doesn’t compromise on taste.
- Prep Time: 15 minutes
- Cook Time: 10 minutes
- Category: Lunch, Dinner, Snacks
- Method: Frying
- Cuisine: American
Nutrition
- Serving Size: 4
- Calories: 450 kcal
- Sugar: 5 g
- Sodium: 700 mg
- Fat: 18 g
- Saturated Fat: 3.5 g
- Unsaturated Fat: 12 g
- Trans Fat: 0.2 g
- Carbohydrates: 40 g
- Fiber: 3 g
- Protein: 35 g
- Cholesterol: 90 mg
John Conley
Founder & Culinary Storyteller
Expertise
Recipe Development, Culinary Writing, Home Cooking Techniques, Seasonal Ingredient Utilization
Education
Lane Community College, Eugene, OR
Certificate in Culinary Arts
Focused on foundational cooking techniques, kitchen safety, and menu planning.
Gotham Writers Workshop, New York, NY
Course in Food Writing
Explored the art of crafting engaging culinary narratives and recipe development.
John grew up where food meant connection: big bowls, warm kitchens, and meals that told a story. After earning his Certificate in Culinary Arts from Lane Community College and diving deep into food writing at Gotham Writers Workshop, he found his calling: turning everyday recipes into something worth savoring.
At The Liffey, John’s focus is all about crafting dishes that feel easy, honest, and full of heart.