Easy Golden Fried Cheese Bites Recipe: A Crispy Snack Delight
Whipping up crispy fried cheese bites delivers pure comfort right to your plate.
Crunchy exterior meets gooey interior in this irresistible snack.
cheese lovers will absolutely adore these golden-brown morsels of deliciousness.
Quick and simple ingredients come together in minutes for a crowd-pleasing treat.
No complicated techniques or fancy equipment needed – just basic kitchen staples.
Small gatherings or solo movie nights instantly become more delightful with these addictive bites.
You’ll want to keep this recipe in your back pocket for impromptu entertaining.
Dive into this cheesy adventure and watch everyone ask for seconds.
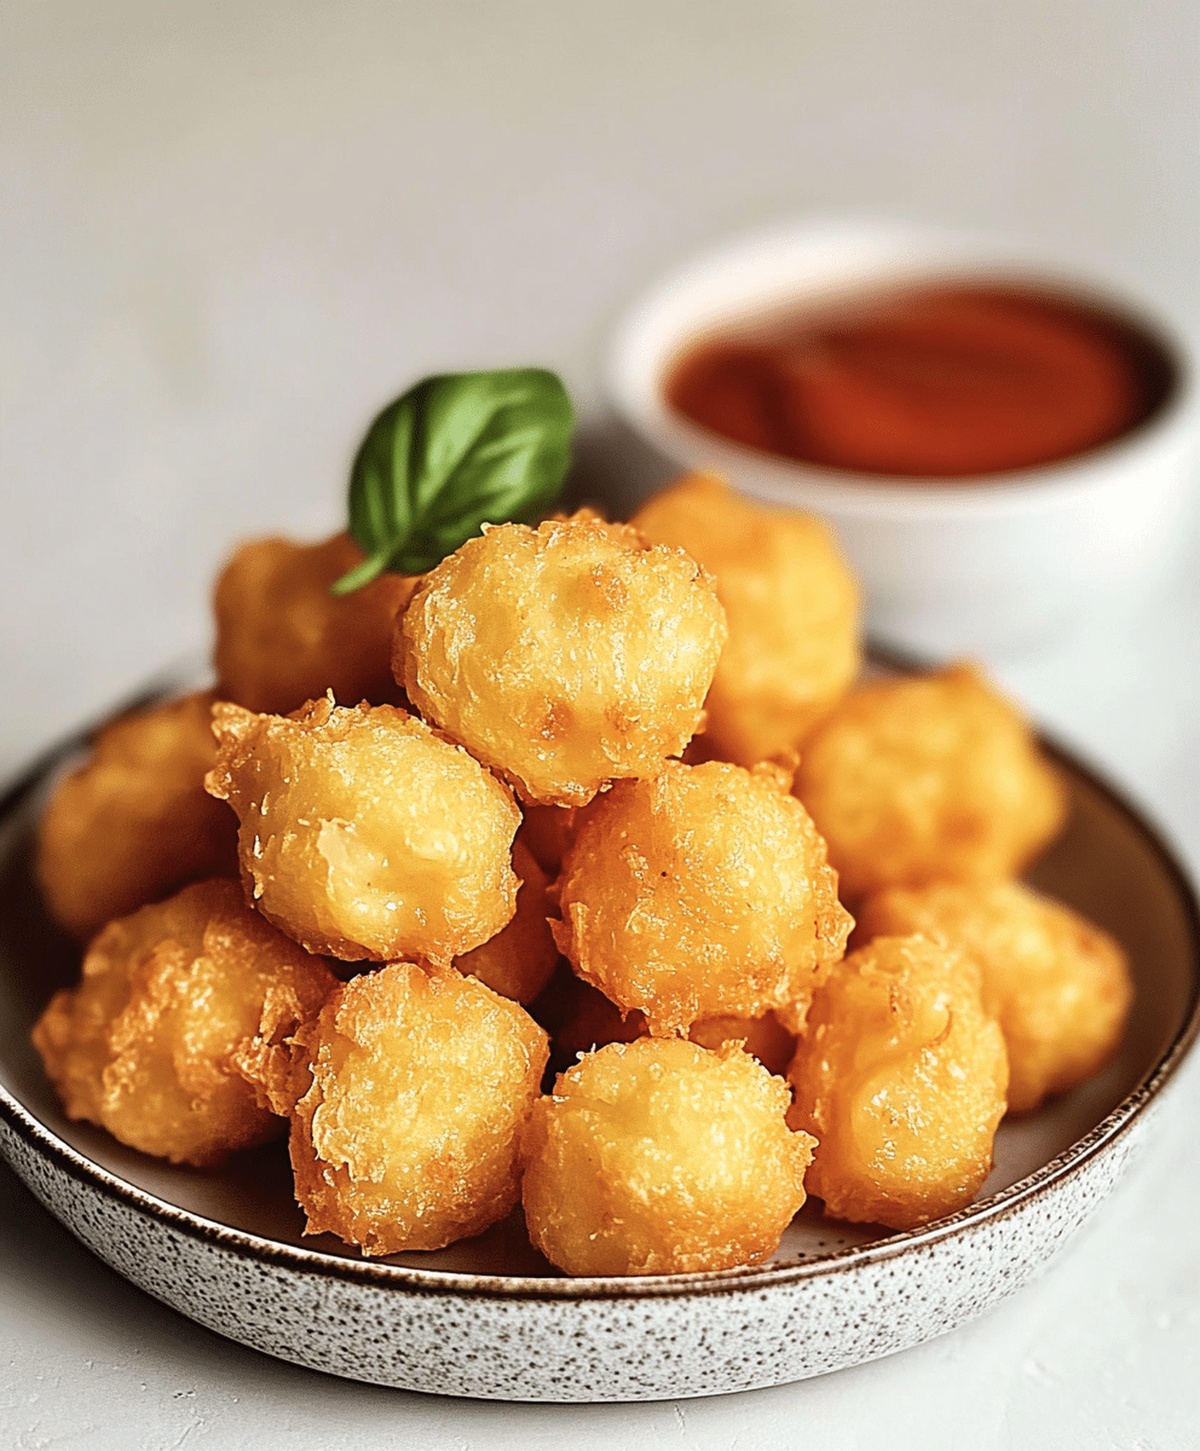
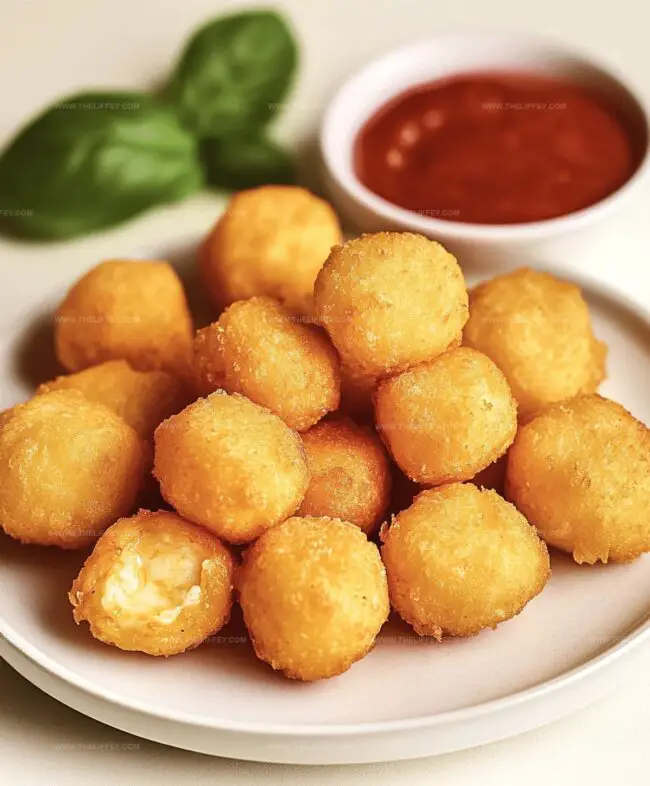
Crispy Fried Cheese Bites to Enjoy
What Goes Into Fried Cheese Bites
Core Ingredients:Breading Ingredients:Seasoning Ingredients:Cooking Ingredient:How to Cook Fried Cheese Bites

Step 1: Prepare Cheese Cubes
Slice your favorite block of cheese into bite-sized chunks. Aim for uniform pieces that will cook evenly and look appetizing on the plate.
Step 2: Create Breading Lineup
Set up three separate bowls for a delicious coating adventure:Step 3: Craft the Perfect Coating
Roll each cheese cube through the breading stations with precision:Pro tip: Do a double dip in eggs and breadcrumbs for extra crunch.
Step 4: Heat Cooking Oil
Pour vegetable or canola oil into a deep pan.
Bring the temperature to 350 degrees Fahrenheit (175 degrees Celsius) using a cooking thermometer for accuracy.
Step 5: Fry to Golden Perfection
Carefully lower cheese cubes into hot oil.
Fry in small batches for 1-2 minutes until they transform into gorgeous golden-brown delights. Watch closely to prevent burning.
Step 6: Drain and Serve
Transfer fried cheese bites onto paper towels to remove excess oil. Plate immediately while hot and crispy.
Serve alongside marinara sauce, ranch, or your favorite dipping companion.
Helpful Insights on Fried Cheese Bites

Flavor Variations for Fried Cheese Bites

Side Ideas to Serve with Fried Cheese Bites
Keeping Fried Cheese Bites Fresh
FAQs
The flour helps the egg wash stick better to the cheese, creating a more even and secure breading that prevents the cheese from leaking during frying.
Yes, firm cheeses like cheddar, mozzarella, or gouda work best because they hold their shape and melt nicely when fried.
Keep the oil temperature consistent at 350F and fry for a short time (1-2 minutes) to create a crispy exterior while keeping the cheese partially solid inside.
Make sure to shake off excess flour and egg before coating with breadcrumbs, and press the breadcrumbs gently onto the cheese to help them adhere better.
Print
Crispy Fried Cheese Bites Recipe
- Total Time: 35 minutes
- Yield: 4 1x
Description
Crispy parmesan cheese bites elevate simple appetizers with Mediterranean flair. Home cooks can quickly prepare these golden-brown morsels that deliver rich flavor and irresistible texture.
Ingredients
Cheese and Main Ingredients:
- 8 ounces (226 grams) mozzarella cheese
Coating Ingredients:
- 1 cup all-purpose flour
- 1 cup breadcrumbs (panko or regular)
Seasoning and Binding Ingredients:
- 2 eggs, beaten
- 1/2 teaspoon garlic powder
- 1/2 teaspoon paprika
- 1/2 teaspoon salt
- 1/2 teaspoon black pepper
Cooking Ingredient:
- Oil for frying
Instructions
- Transform cheese blocks into compact, uniform cubes ensuring consistent sizing for even cooking.
- Establish three separate containers: one with flour, another with whisked eggs, and the third blending breadcrumbs with aromatic garlic powder, vibrant paprika, seasoning salt, and ground black pepper.
- Methodically enrobe each cheese cube first in flour, creating a delicate preliminary coating, then immerse thoroughly in egg mixture, and finally encrust completely with seasoned breadcrumb mixture. Repeat coating process for enhanced crispiness.
- Prepare deep skillet, heating vegetable oil to precise 350F (175C), monitoring temperature with cooking thermometer for optimal frying conditions.
- Carefully lower cheese cubes into hot oil, working in controlled batches to prevent overcrowding and maintain consistent temperature. Fry approximately 60-90 seconds until exterior transforms into rich golden-brown color and develops crisp exterior.
- Extract cheese bites using slotted spoon, allowing excess oil to drain onto absorbent paper towels. Transfer immediately to serving platter while maintaining peak temperature and crunchiness. Accompany with preferred dipping sauce for enhanced flavor experience.
Notes
- Keep cheese cold before breading to prevent melting during frying and maintain shape.
- Double-coat breadcrumbs for extra crunch and better adherence to cheese surface.
- Use firm cheeses like cheddar, mozzarella, or gouda that hold shape when heated.
- Replace wheat flour with almond flour or cornstarch, use gluten-free breadcrumbs for celiac-friendly version.
- Prep Time: 20 minutes
- Cook Time: 15 minutes
- Category: Appetizer, Snacks
- Method: Frying
- Cuisine: American
Nutrition
- Serving Size: 4
- Calories: 345 kcal
- Sugar: 1 g
- Sodium: 900 mg
- Fat: 23 g
- Saturated Fat: 12 g
- Unsaturated Fat: 9 g
- Trans Fat: 0.5 g
- Carbohydrates: 19 g
- Fiber: 1 g
- Protein: 18 g
- Cholesterol: 110 mg
John Conley
Founder & Culinary Storyteller
Expertise
Recipe Development, Culinary Writing, Home Cooking Techniques, Seasonal Ingredient Utilization
Education
Lane Community College, Eugene, OR
Certificate in Culinary Arts
Focused on foundational cooking techniques, kitchen safety, and menu planning.
Gotham Writers Workshop, New York, NY
Course in Food Writing
Explored the art of crafting engaging culinary narratives and recipe development.
John grew up where food meant connection: big bowls, warm kitchens, and meals that told a story. After earning his Certificate in Culinary Arts from Lane Community College and diving deep into food writing at Gotham Writers Workshop, he found his calling: turning everyday recipes into something worth savoring.
At The Liffey, John’s focus is all about crafting dishes that feel easy, honest, and full of heart.