Magical Mini Candy Corn Cheesecakes Recipe for Fall Sweetness
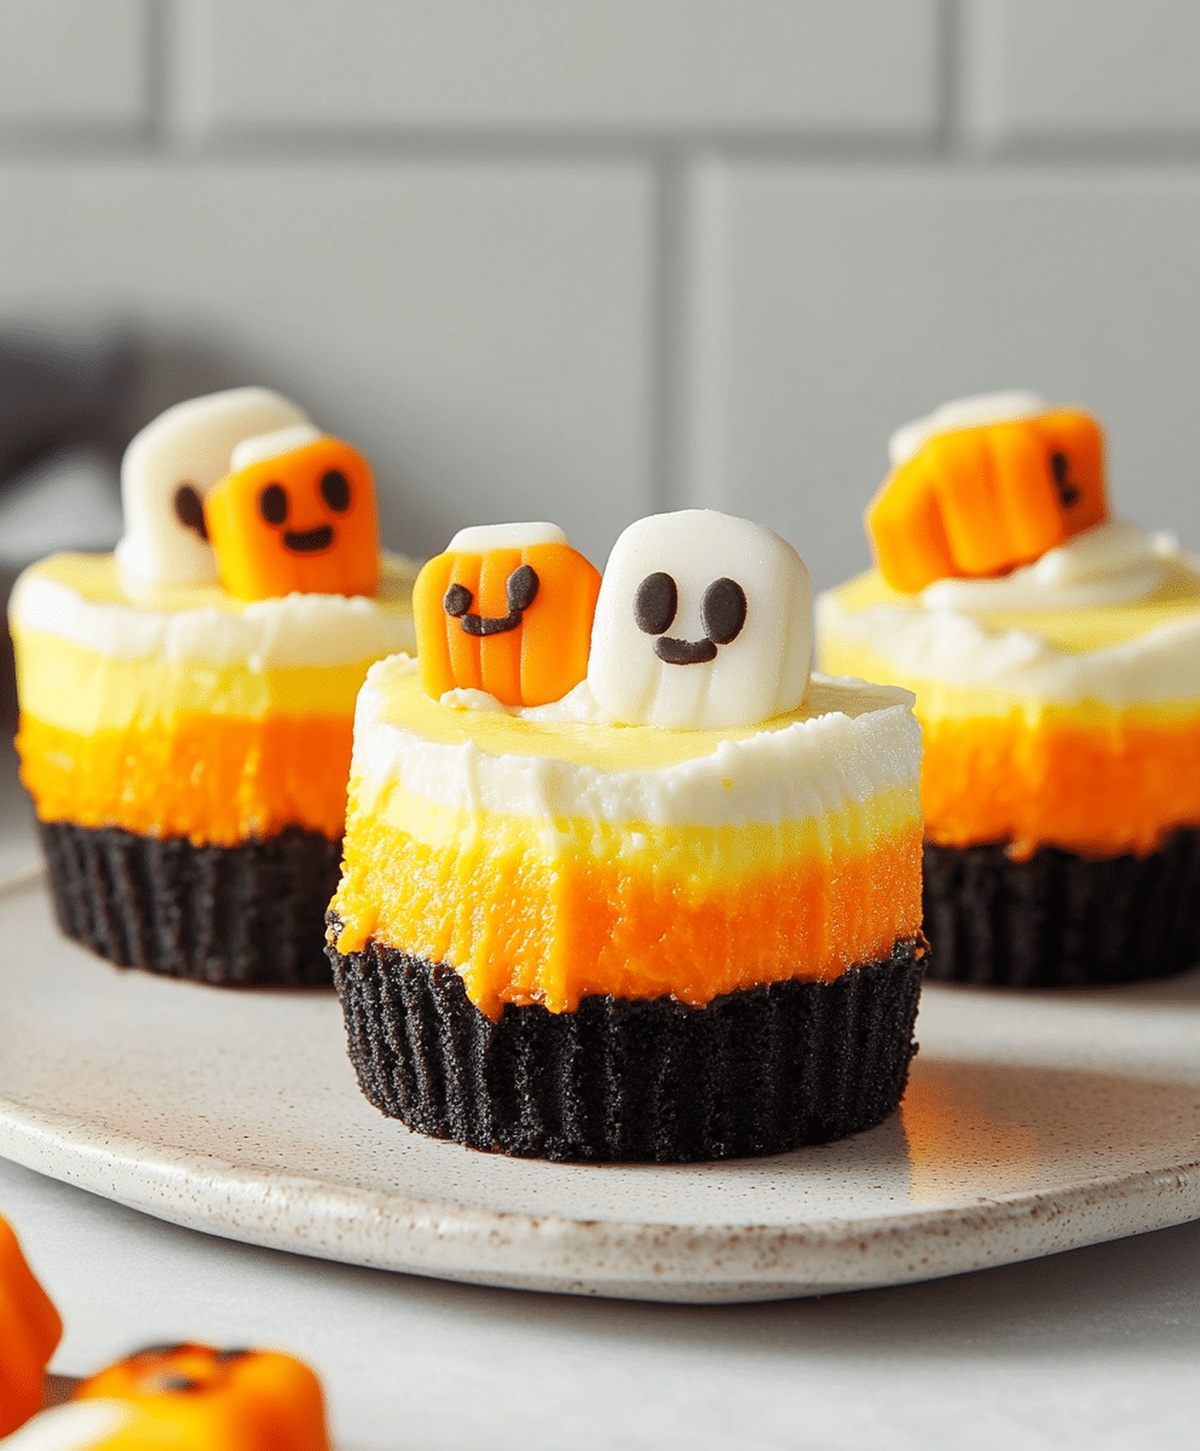
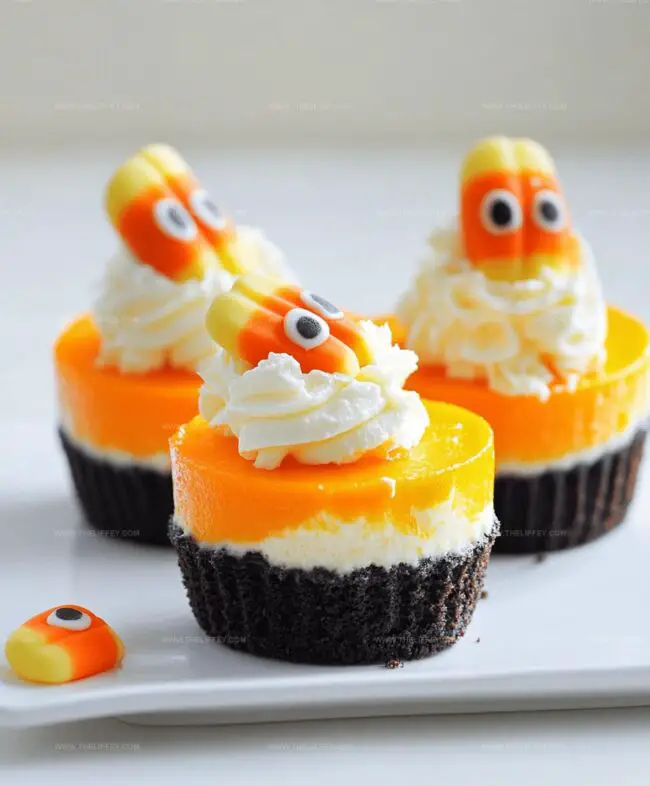
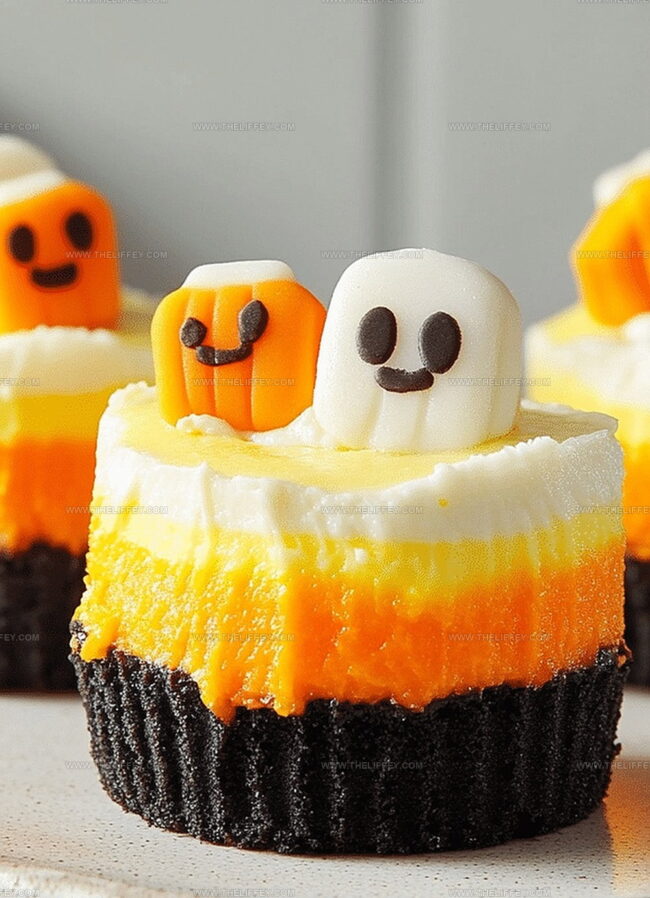
Sweet little mini candy corn cheesecakes bring festive autumn magic right to your dessert plate.
Layers of creamy white, orange, and yellow create a playful Halloween-inspired treat.
Compact individual servings make these miniature delights perfect for seasonal gatherings.
Guests will adore the charming color gradient mimicking classic candy corn.
Delicate graham cracker crusts provide a crunchy foundation for each smooth, velvety bite.
Whipped cream and extra candy corn pieces add whimsical finishing touches.
Whip up these adorable mini cheesecakes and watch everyone smile with pure delight.
Mini Candy Corn Cheesecakes: Bite-Sized Fun

Ingredients for Mini Candy Corn Cheesecakes
Crust Base:Cheesecake Filling:Decorative and Coloring Ingredients:How to Assemble Tiny Cheesecake Treats
Step 1: Prepare Baking Station
Preheat the oven to 325°F. Place paper liners inside a muffin tin, creating a perfect base for your delightful mini cheesecakes.
Step 2: Create Crunchy Crust
Crush graham crackers into fine crumbs and mix with melted butter. Press this delicious mixture firmly into the bottom of each paper liner, forming a solid foundation for your cheesecakes.
Step 3: Whip Creamy Cheesecake Base
In a large mixing bowl, blend cream cheese until smooth and creamy. Gradually add sugar and vanilla, mixing until fully incorporated.
Gently introduce eggs one at a time, ensuring each is completely mixed before adding the next.
Step 4: Color Your Cheesecake Layers
Divide the cheesecake batter into three separate bowls.
Use food coloring to transform one bowl into a vibrant yellow and another into a warm orange, keeping the third bowl in its natural creamy white state.
Step 5: Layer Colorful Batters
Carefully spoon the yellow batter as the first layer in each liner.
Gently add the orange batter on top of the yellow layer. Finish with the plain white batter, creating a beautiful candy corn-inspired color gradient.
Step 6: Bake to Perfection
Place the muffin tin in the preheated oven. Bake for 20-25 minutes until the cheesecakes are set and slightly firm to the touch.
The centers should have a gentle jiggle but not be liquid.
Step 7: Chill and Set
Remove from the oven and allow the mini cheesecakes to cool completely at room temperature.
Transfer to the refrigerator and let them chill for at least 2 hours, allowing them to firm up and develop their rich, creamy texture.
Step 8: Decorate and Serve
Top each mini cheesecake with a dollop of fluffy whipped cream.
Garnish with a few candy corn pieces for that classic Halloween-inspired look. Serve chilled and watch everyone’s eyes light up with delight!
Tip for Perfect Mini Cheesecake Texture
Fun Twists on Classic Candy Corn Theme
Serving Display Ideas for Mini Treats
Storage Tips for Mini Cheesecakes
FAQs
Use a water bath when baking, avoid overmixing the batter, and let the cheesecakes cool gradually at room temperature to prevent sudden temperature changes.
Yes, you can prepare these mini cheesecakes up to 3 days in advance. Keep them refrigerated and add the whipped cream and candy corn just before serving.
You can use gel food coloring for more vibrant colors, or substitute with natural food colorings like turmeric for yellow and paprika for orange.
Print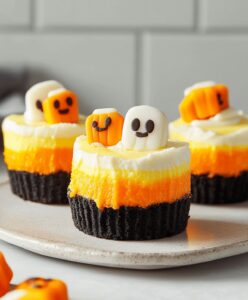
Creative Mini Candy Corn Cheesecakes Recipe
- Total Time: 50 minutes
- Yield: 12 1x
Description
Festive mini candy corn cheesecakes celebrate Halloween’s sweetest tradition with creamy layers of orange and white. Guests will adore these bite-sized desserts that bring seasonal cheer to any autumn gathering.
Ingredients
Main Ingredients:
- 16 ounces (454 grams) cream cheese
- 2 large eggs
- 1/2 cup (100 grams) sugar
- 1 teaspoon vanilla extract
Crust Ingredients:
- 1 cup (120 grams) graham cracker crumbs
- 4 tablespoons (57 grams) butter
Decoration Ingredients:
- Yellow food coloring
- Orange food coloring
- Whipped cream (optional)
- Candy corn (for garnish)
Instructions
- Prepare the oven at 325F and arrange paper liners in a muffin tin.
- Mix graham cracker crumbs with melted butter, firmly pressing the mixture into the base of each liner.
- Whip cream cheese, sugar, and vanilla until completely smooth, gradually incorporating eggs one at a time.
- Separate the cheesecake mixture into three distinct portions, tinting one section with vibrant yellow food coloring and another with rich orange hue.
- Carefully construct layers within each liner, starting with the yellow batter as the foundation, followed by the orange layer, and concluding with the pristine white batter.
- Transfer the muffin tin to the preheated oven, baking for 20-25 minutes until the cheesecakes demonstrate a subtle firmness and minimal jiggle.
- Allow the mini cheesecakes to cool completely at room temperature, then transfer to the refrigerator for a minimum of 2 hours to set and develop optimal flavor.
- Prior to serving, embellish each mini cheesecake with a delicate swirl of whipped cream and a playful sprinkle of candy corn as a festive garnish.
Notes
- Customize the crust by experimenting with different cookie bases like Oreos or gingersnaps for unique flavor profiles.
- Prevent cracks by avoiding overmixing the cheesecake batter and using room temperature ingredients to ensure smooth consistency.
- Achieve vibrant candy corn colors by using gel food coloring, which provides more intense hues without altering the batter’s texture.
- Store leftover mini cheesecakes in an airtight container in the refrigerator for up to 3-4 days to maintain their fresh taste and texture.
- Prep Time: 25 minutes
- Cook Time: 25 minutes
- Category: Desserts, Snacks
- Method: Baking
- Cuisine: American
Nutrition
- Serving Size: 12
- Calories: 260 kcal
- Sugar: 18 g
- Sodium: 150 mg
- Fat: 20 g
- Saturated Fat: 12 g
- Unsaturated Fat: 6 g
- Trans Fat: 0.5 g
- Carbohydrates: 15 g
- Fiber: 0.5 g
- Protein: 4 g
- Cholesterol: 70 mg
John Conley
Founder & Culinary Storyteller
Expertise
Recipe Development, Culinary Writing, Home Cooking Techniques, Seasonal Ingredient Utilization
Education
Lane Community College, Eugene, OR
Certificate in Culinary Arts
Focused on foundational cooking techniques, kitchen safety, and menu planning.
Gotham Writers Workshop, New York, NY
Course in Food Writing
Explored the art of crafting engaging culinary narratives and recipe development.
John grew up where food meant connection: big bowls, warm kitchens, and meals that told a story. After earning his Certificate in Culinary Arts from Lane Community College and diving deep into food writing at Gotham Writers Workshop, he found his calling: turning everyday recipes into something worth savoring.
At The Liffey, John’s focus is all about crafting dishes that feel easy, honest, and full of heart.