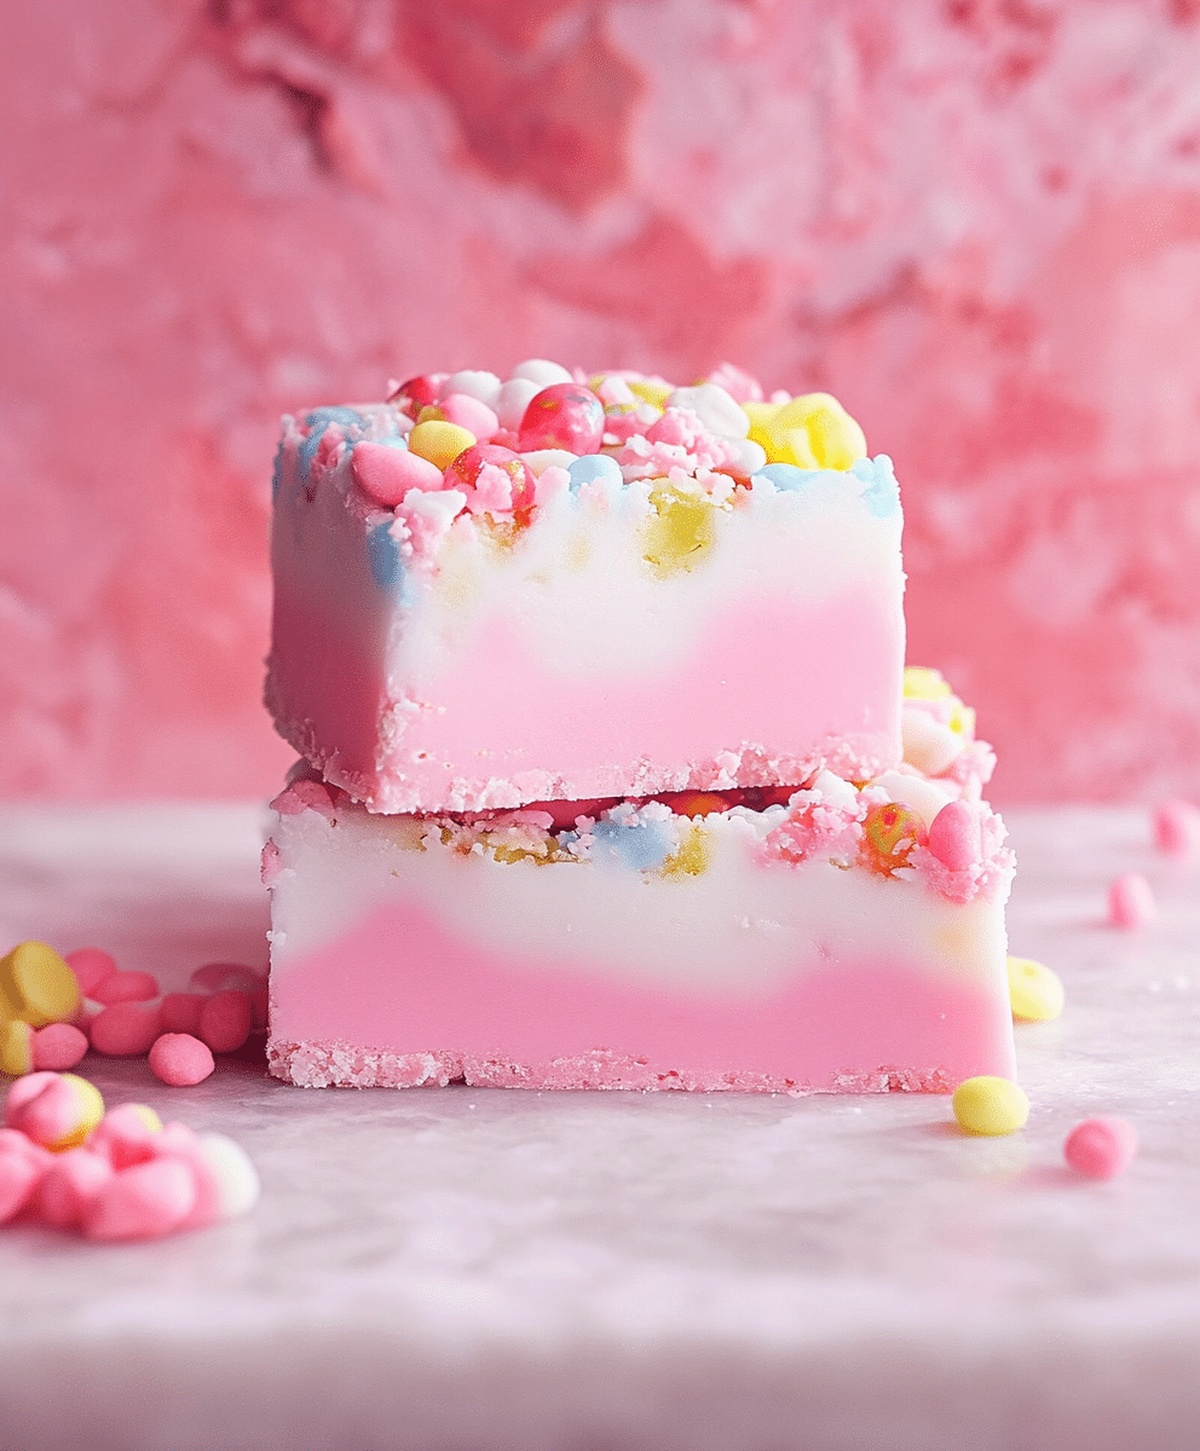
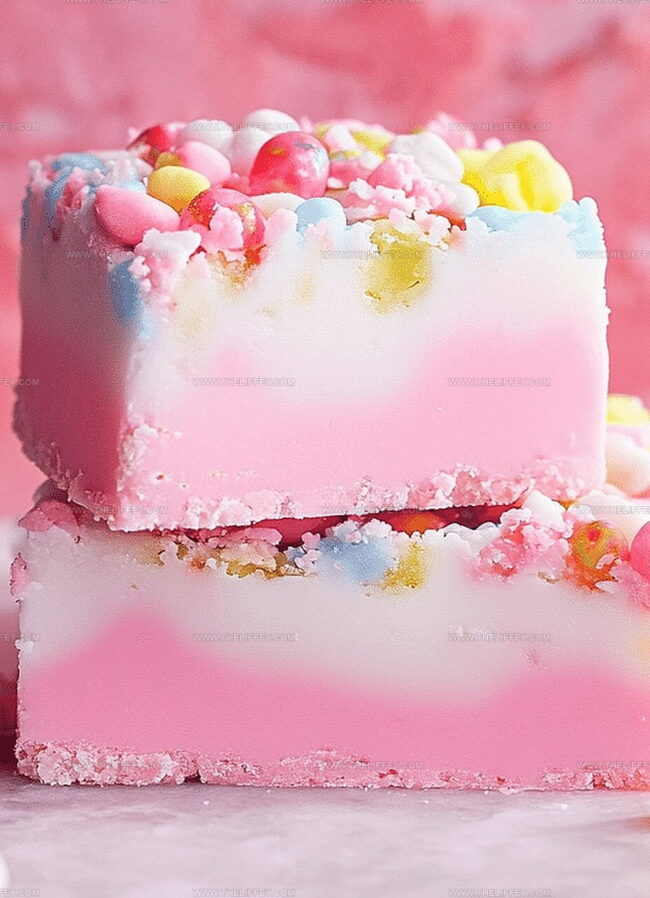
Dreamy Homemade Bubblegum Cloud Fudge Recipe for Sweet Smiles
Sweet dreams come alive with this homemade bubblegum cloud fudge that defies ordinary dessert expectations.
Colorful swirls dance across a creamy canvas, promising pure childhood nostalgia.
Soft pastel hues peek through each delectable slice, inviting playful memories.
Magical textures melt effortlessly, creating a whimsical treat that sparks instant joy.
Creamy comfort meets vibrant imagination in this simple yet spectacular confection.
Unexpected flavor combinations guarantee smiles from first bite to last.
You’ll want to whip up this dreamy delight and savor every magical moment.
Why Homemade Bubblegum Cloud Fudge Stands Out

Must-Have Ingredients For Bubblegum Cloud Fudge
Base Ingredients:Flavor Enhancers:Texture Boosters:Decorative Topping:Optional Preparation Item:How To Whip Up Homemade Bubblegum Cloud Fudge
Step 1: Prep the Baking Canvas
Line an 8×8-inch baking dish with parchment paper, letting the edges hang over the sides. This clever trick makes lifting out the fudge a breeze later.
Step 2: Create Chocolate Magic
Grab a medium saucepan and combine:Melt these ingredients over low heat, stirring constantly until they transform into a silky smooth mixture.
Step 3: Infuse Bubblegum Bliss
Pull the pan off the heat and stir in bubblegum extract.
Add a splash of food coloring to give your fudge that classic bubblegum look – think soft pink or bright blue.
Step 4: Fold in Fluffy Clouds
Gently incorporate marshmallow fluff into the mixture.
This is where the magic happens – your fudge will become light, airy, and absolutely irresistible.
Step 5: Pour and Decorate
Transfer the fudge mixture into your prepared pan, spreading it evenly.
For an extra touch of fun, sprinkle some colorful jimmies or rainbow sprinkles on top.
Step 6: Chill and Set
Slide the pan into the refrigerator and let it rest for at least 3 hours.
Patience is key – this allows the fudge to firm up perfectly.
Step 7: Slice and Serve
Once the fudge is set, lift it out using the parchment paper overhang.
Slice into squares and get ready to enjoy a melt-in-your-mouth treat that’s pure childhood nostalgia.
Tricks For A Flawless Bubblegum Cloud Fudge
Creative Spins On Bubblegum Cloud Fudge
What To Serve With Bubblegum Cloud Fudge
How To Store Homemade Bubblegum Cloud Fudge
FAQs
Bubblegum extract is a concentrated flavoring that gives a classic bubblegum taste. You can find it in specialty baking stores, online retailers like Amazon, or in the baking section of well-stocked grocery stores.
No, marshmallow fluff is crucial for creating the cloud-like texture. It helps make the fudge light and fluffy, so skipping it will change the recipe’s consistency and result.
This fudge is quite sweet due to white chocolate chips and sweetened condensed milk. The bubblegum flavor adds an extra layer of sweetness, making it more intense than classic chocolate fudge.
Print
Creative Homemade Bubblegum Cloud Fudge Recipe
- Total Time: 3 hours 15 minutes
- Yield: 12 1x
Description
Creamy homemade bubblegum cloud fudge delivers a whimsical dessert experience from childhood memories. Sweet pastel colors and nostalgic flavor profiles invite people to savor this playful confectionery delight.
Ingredients
Main Ingredients:
- 2 cups white chocolate chips
- 1 can (14 ounces/396 grams) sweetened condensed milk
- 1/4 cup marshmallow fluff
Flavoring and Coloring:
- 1 teaspoon bubblegum extract
- Pink or blue food coloring (optional)
Topping:
- 1/2 cup sprinkles (optional)
Instructions
- Prepare a parchment-lined 8×8-inch baking dish, ensuring overhanging edges for easy fudge extraction.
- Combine white chocolate chips and sweetened condensed milk in a medium saucepan, melting over low heat while continuously stirring until achieving a silky, uniform consistency.
- Remove the melted chocolate mixture from heat and incorporate bubblegum extract, stirring thoroughly to distribute the flavor evenly.
- Introduce food coloring drops to create a vibrant, characteristic bubblegum-inspired hue, mixing until color is consistent throughout the mixture.
- Gently fold marshmallow fluff into the chocolate base, creating a light, airy texture that gives the fudge its cloud-like quality.
- Transfer the fudge mixture into the prepared pan, using a spatula to spread it evenly and create a smooth surface.
- Optionally, sprinkle decorative toppings across the surface for added visual appeal and texture.
- Refrigerate the fudge for a minimum of 3 hours, or until completely set and firm to the touch.
- Once chilled, lift the fudge from the pan using the parchment paper overhang and place on a cutting surface.
- Slice into neat, uniform squares using a sharp knife, wiping the blade between cuts for clean edges.
- Serve chilled and enjoy the whimsical, sweet treat immediately or store in an airtight container in the refrigerator.
Notes
- Customize the color intensity by adding food coloring gradually, ensuring a vibrant bubblegum pink without altering the fudge’s texture.
- Swap bubblegum extract with other flavor extracts like vanilla or strawberry for diverse taste variations.
- Use dairy-free white chocolate chips and coconut condensed milk to create a vegan-friendly version of this sweet treat.
- Store fudge in an airtight container in the refrigerator for up to one week, separating layers with parchment paper to prevent sticking.
- Prep Time: 15 minutes
- Cook Time: 3 hours
- Category: Desserts, Snacks
- Method: Melting
- Cuisine: American
Nutrition
- Serving Size: 12
- Calories: 198
- Sugar: 28 g
- Sodium: 33 mg
- Fat: 9 g
- Saturated Fat: 6 g
- Unsaturated Fat: 3 g
- Trans Fat: 0.1 g
- Carbohydrates: 28 g
- Fiber: 0.2 g
- Protein: 2 g
- Cholesterol: 10 mg
John Conley
Founder & Culinary Storyteller
Expertise
Recipe Development, Culinary Writing, Home Cooking Techniques, Seasonal Ingredient Utilization
Education
Lane Community College, Eugene, OR
Certificate in Culinary Arts
Focused on foundational cooking techniques, kitchen safety, and menu planning.
Gotham Writers Workshop, New York, NY
Course in Food Writing
Explored the art of crafting engaging culinary narratives and recipe development.
John grew up where food meant connection: big bowls, warm kitchens, and meals that told a story. After earning his Certificate in Culinary Arts from Lane Community College and diving deep into food writing at Gotham Writers Workshop, he found his calling: turning everyday recipes into something worth savoring.
At The Liffey, John’s focus is all about crafting dishes that feel easy, honest, and full of heart.