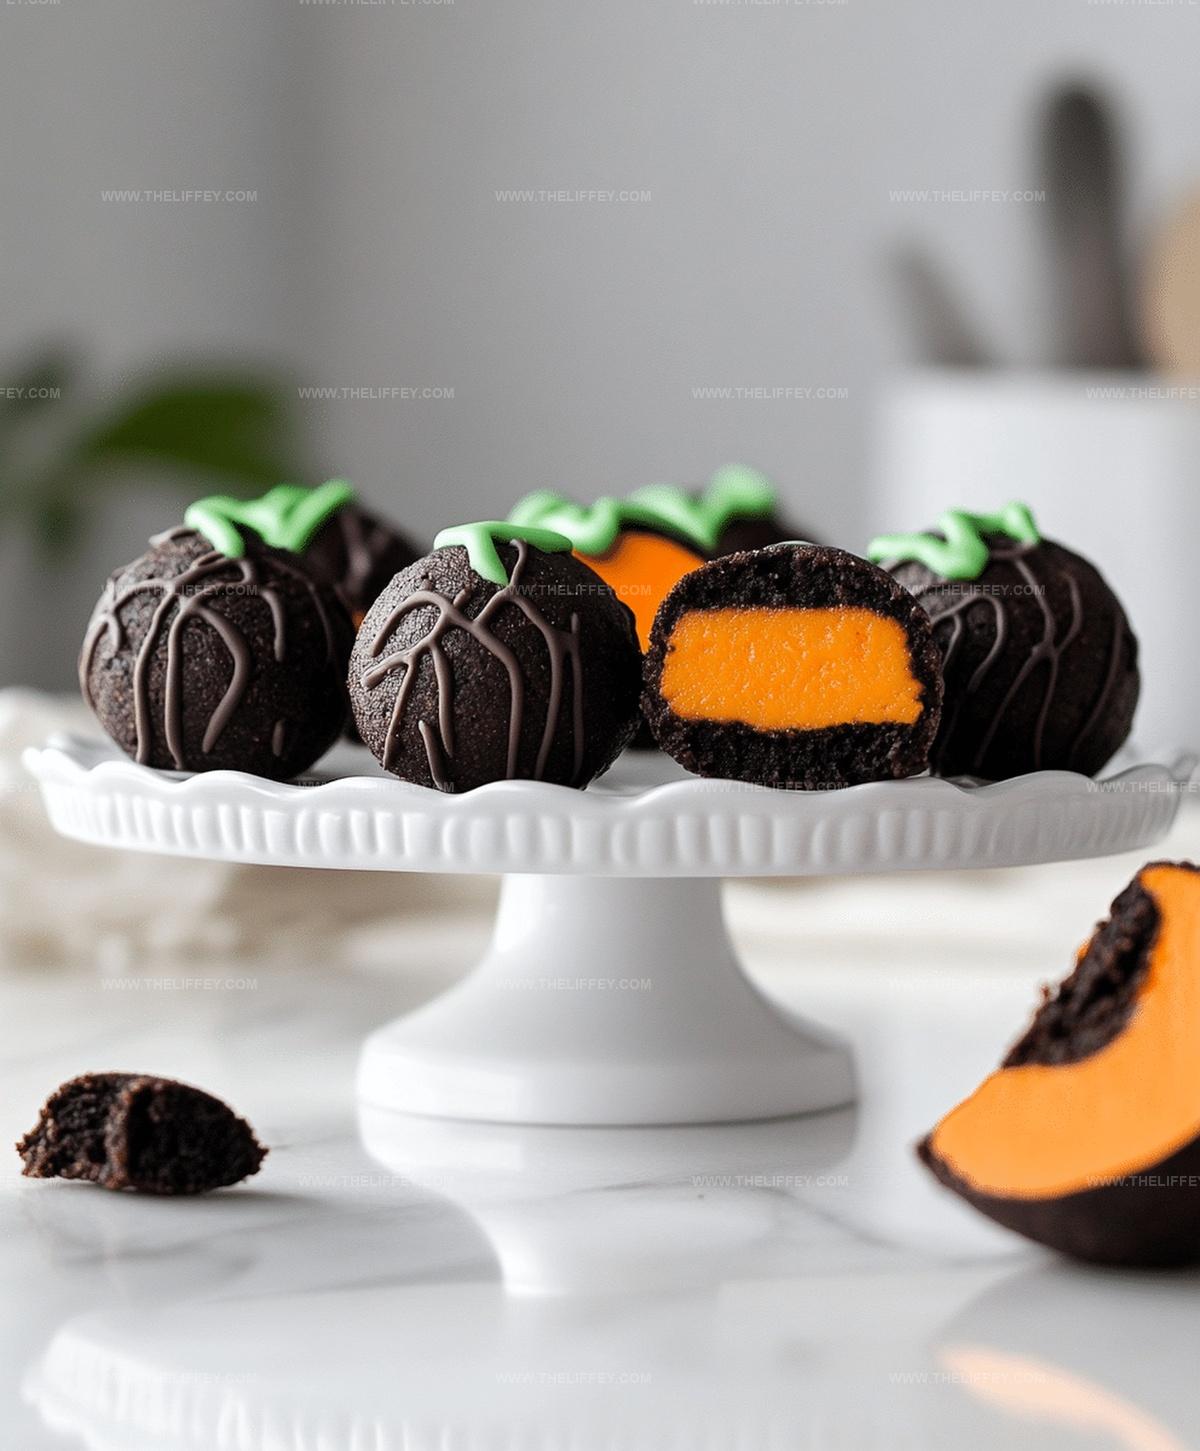
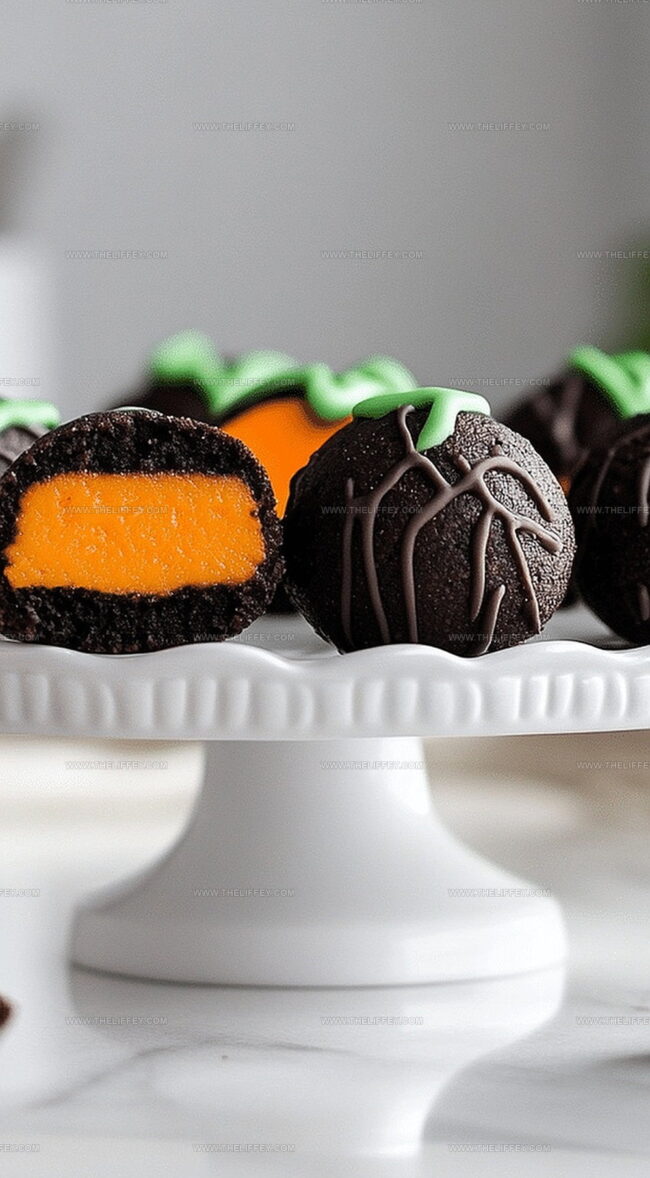
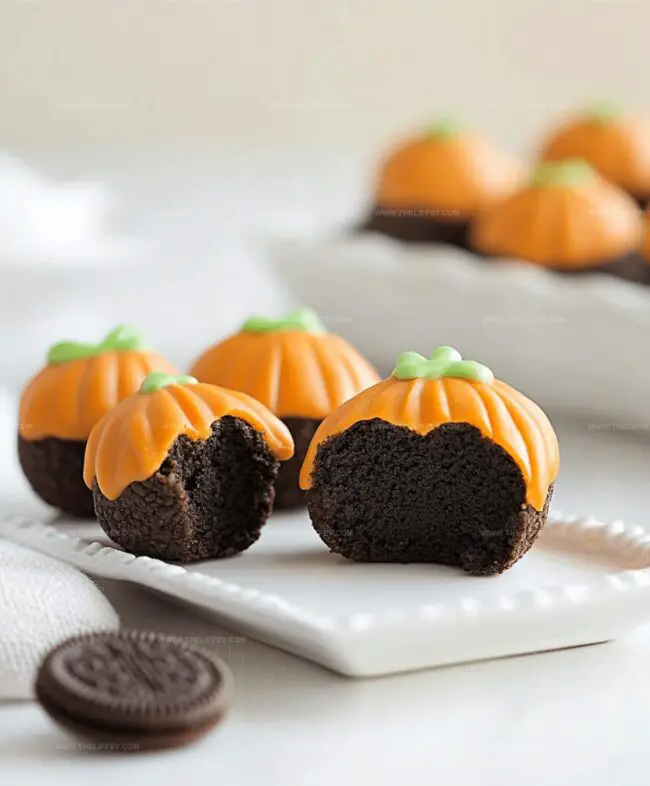
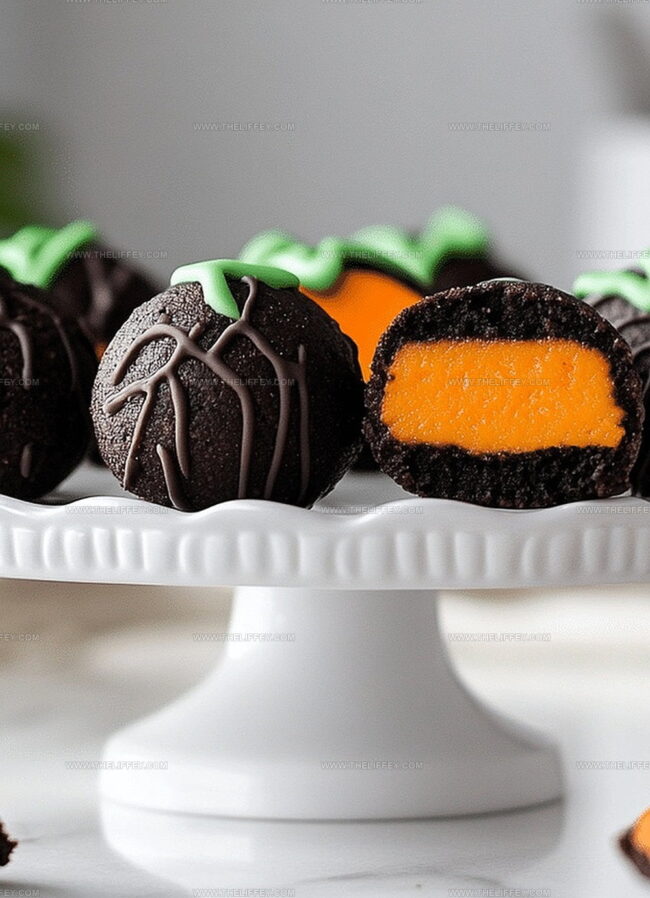
Spooky-Sweet Pumpkin Oreo Balls Recipe Perfect for Fall Treats
Crafting delightful pumpkin oreo balls brings pure autumn magic right to your kitchen counter.
Creamy textures blend perfectly with seasonal spices that dance across your palate.
Cookie crumbs and smooth cream cheese create an irresistible treat everyone adores.
Sweet autumn flavors whisper memories of cozy evenings and crisp falling leaves.
Minimal ingredients mean maximum enjoyment for casual bakers and dessert enthusiasts.
Simple steps guarantee delectable results that’ll make you the star of any gathering.
Fall’s most delectable bite-sized delight awaits your culinary adventure.
Pumpkin Oreo Balls That Delight
Ingredients For Pumpkin Oreo Balls
Base Ingredients:Coating Ingredients:Decoration Ingredients:How To Make Pumpkin Oreo Balls
Step 1: Pulverize Oreo Cookies
Use a food processor to transform Oreo cookies into ultra-fine crumbs. Pulse until the cookies become a sandy, uniform texture that will blend smoothly into the mixture.
Step 2: Create Creamy Pumpkin Mixture
Combine the ingredients in a mixing bowl:Stir everything together until the mixture looks completely uniform and has a rich, consistent color and texture.
Step 3: Shape Delightful Balls
Use your hands to roll the mixture into bite-sized spheres, each approximately 1 inch in diameter.
Gently place the formed balls onto a baking sheet lined with parchment paper.
Step 4: Chill and Firm
Transfer the baking sheet to the refrigerator.
Allow the Oreo balls to cool and set for 30 minutes, which will help them maintain their shape during the next steps.
Step 5: Prepare Chocolate Coating
Melt white chocolate or candy melts using either a double boiler or microwave.
Stir carefully to ensure a smooth, glossy finish without any lumps.
Step 6: Dunk and Cover
Carefully dip each chilled Oreo ball into the melted chocolate, using a fork to help drain excess coating.
Return the chocolate-covered balls to the lined baking sheet.
Step 7: Add Festive Flair
Sprinkle fall-themed decorations over the chocolate-coated balls.
Alternatively, drizzle additional melted chocolate in artistic patterns for extra visual appeal.
Step 8: Final Setting
Let the Pumpkin Oreo Balls sit at room temperature until the chocolate coating hardens completely.
Store in the refrigerator until ready to serve.
Tips To Perfect Pumpkin Oreo Balls
Variations To Try With Pumpkin Oreo Balls
Serving Suggestions For Pumpkin Oreo Balls
Storage Advice For Pumpkin Oreo Balls
FAQs
No, they’re super easy! With just a few ingredients and simple steps like crushing Oreos and mixing with cream cheese, anyone can create these delicious treats in under 30 minutes.
Absolutely not! This recipe is perfect for beginners. You just need basic mixing skills and a food processor to crush the cookies. No complicated techniques required.
Yes! You can prepare Pumpkin Oreo Balls up to 3 days in advance. Just store them in an airtight container in the refrigerator, and they’ll stay fresh and delicious.
No worries! You can make your own by mixing ground cinnamon, nutmeg, ginger, and cloves.
Print
Creamy Pumpkin Oreo Balls Recipe
- Total Time: 50 minutes
- Yield: 24 1x
Description
Creamy pumpkin oreo balls blend seasonal spices with cookie crunch for an irresistible autumn treat. Sweet spheres roll in white chocolate and cinnamon, offering a delightful bite that celebrates fall’s most beloved flavors.
Ingredients
Main Ingredients:
- 36 Oreo cookies (crushed)
- 4 ounces (113 grams) cream cheese (softened)
- 1/2 cup (120 milliliters) pumpkin puree
Spices and Flavorings:
- 1 teaspoon pumpkin spice
Coating and Decoration:
- 16 ounces (454 grams) white chocolate or white candy melts
- Fall-themed sprinkles or decorations (optional)
Instructions
- Pulverize Oreo cookies into ultrafine crumbs using a food processor, ensuring no large chunks remain.
- Combine crushed Oreos with cream cheese, pumpkin puree, and pumpkin spice in a mixing bowl, blending thoroughly until a uniform mixture forms.
- Shape the mixture into compact, uniform 1-inch spheres using your palms, placing each ball onto a parchment-lined baking sheet.
- Refrigerate the formed balls for approximately 30 minutes at 40°F to firm up their structure and enhance flavor melding.
- Gently melt white chocolate or candy melts using a double boiler or microwave, stirring periodically to maintain smooth consistency.
- Carefully submerge each chilled Oreo ball into the melted chocolate, ensuring complete coverage, then delicately return to the baking sheet.
- While chocolate is still wet, embellish with autumnal-themed sprinkles or create decorative chocolate drizzles across the surface.
- Allow the Pumpkin Oreo Balls to set completely at room temperature for 15-20 minutes until chocolate hardens and becomes glossy.
Notes
- Use a full-fat cream cheese for the richest, most creamy texture in your Oreo balls.
- Ensure the pumpkin puree is well-drained to prevent excess moisture that could make the mixture too soft.
- Chill the mixture for 15-20 minutes before rolling to make forming balls easier and prevent sticking to your hands.
- For gluten-free option, swap regular Oreos with gluten-free chocolate sandwich cookies to maintain the same delicious flavor profile.
- Prep Time: 20 minutes
- Cook Time: 30 minutes
- Category: Snacks, Desserts
- Method: Chilling
- Cuisine: American
Nutrition
- Serving Size: 24
- Calories: 133
- Sugar: 12 g
- Sodium: 65 mg
- Fat: 7 g
- Saturated Fat: 4 g
- Unsaturated Fat: 2 g
- Trans Fat: 0 g
- Carbohydrates: 17 g
- Fiber: 1 g
- Protein: 1 g
- Cholesterol: 10 mg
John Conley
Founder & Culinary Storyteller
Expertise
Recipe Development, Culinary Writing, Home Cooking Techniques, Seasonal Ingredient Utilization
Education
Lane Community College, Eugene, OR
Certificate in Culinary Arts
Focused on foundational cooking techniques, kitchen safety, and menu planning.
Gotham Writers Workshop, New York, NY
Course in Food Writing
Explored the art of crafting engaging culinary narratives and recipe development.
John grew up where food meant connection: big bowls, warm kitchens, and meals that told a story. After earning his Certificate in Culinary Arts from Lane Community College and diving deep into food writing at Gotham Writers Workshop, he found his calling: turning everyday recipes into something worth savoring.
At The Liffey, John’s focus is all about crafting dishes that feel easy, honest, and full of heart.