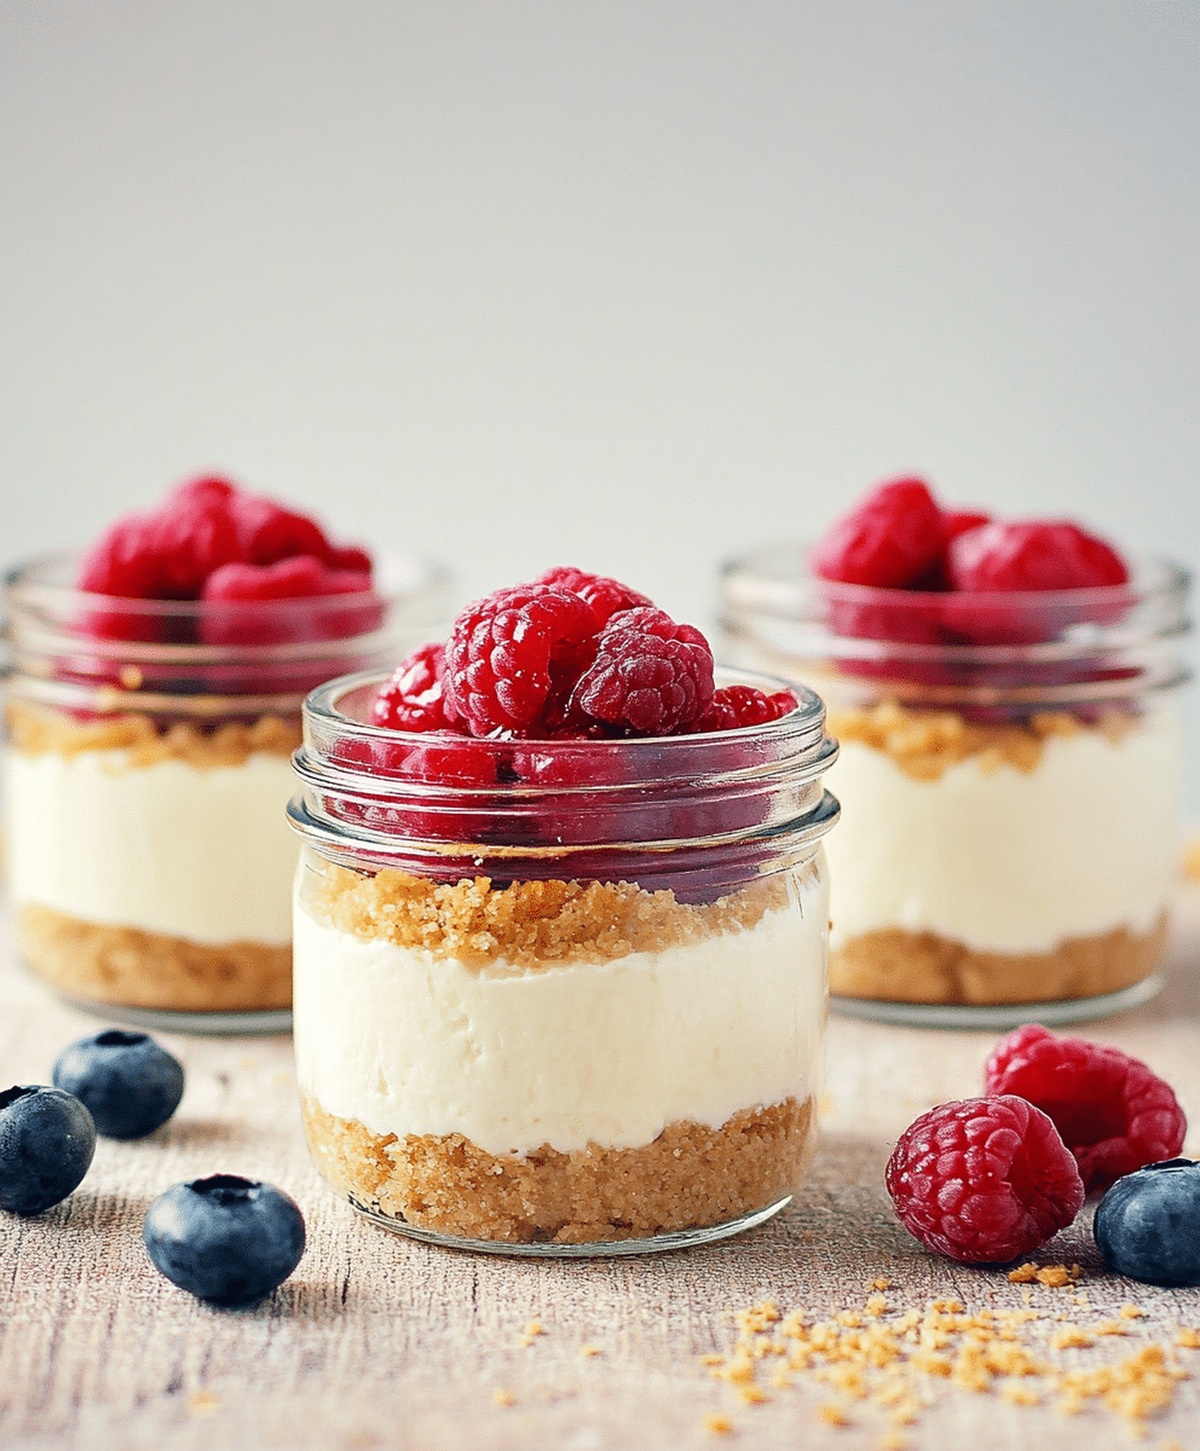
Dreamy No-Bake Cheesecake Jars Recipe: Sweet Joy In Every Spoon
Dreamy no-bake cheesecake jars have become my ultimate dessert obsession lately.
Creamy layers of silky sweetness nestle perfectly in charming glass containers.
Minimal effort meets maximum satisfaction with this simple recipe.
Summer heat cannot defeat these cool, luscious treats that melt in your mouth.
Minimal kitchen skills work magic for this crowd-pleasing dessert.
Sweet graham cracker bases topped with rich, velvety cream cheese promise pure indulgence.
You will absolutely fall in love with these elegant, portable delights that look as incredible as they taste.
No-Bake Cheesecake Jars Delight
Ingredients for No-Bake Cheesecake Jars
Base:Cheesecake Filling:Optional Toppings:How to Make No-Bake Cheesecake Jars
Step 1: Craft A Crumbly Base
Grab your graham crackers and crush them into fine, sandy crumbs using a food processor or placing them in a sealed bag and rolling with a rolling pin. Drizzle melted butter over the crumbs and mix until they stick together perfectly.
Gently press this delightful mixture into the bottom of clean glass jars, creating a solid, delicious foundation for your cheesecake adventure.
Step 2: Whip Up Creamy Cheesecake Filling
In a spacious mixing bowl, blend cream cheese until silky smooth.
Add sugar and vanilla extract, beating until the mixture becomes light and fluffy. Carefully fold in whipped cream, creating a cloud-like, velvety texture that will make your taste buds dance with joy.
Step 3: Layer The Dreamy Filling
Lovingly spoon the creamy cheesecake mixture over the graham cracker base in each jar. Use a spatula to spread it evenly, ensuring each jar gets an equal amount of pure deliciousness.
Make sure to leave a little space at the top for potential toppings.
Step 4: Chill And Garnish
Slide the jars into the refrigerator and let them cool and set for at least 2 hours.
When ready to serve, go wild with toppings like fresh berries, chocolate shavings, caramel drizzle, or a sprinkle of crushed nuts. Your no-bake cheesecake jars are ready to steal the show at any gathering!
Tricks for No-Bake Cheesecake Jars
Flavorful Twists on No-Bake Cheesecake Jars
Serving Ideas for No-Bake Cheesecake Jars
How to Keep No-Bake Cheesecake Jars Fresh
FAQs
Yes, you can easily substitute graham crackers with digestive biscuits, vanilla wafers, or even Oreo cookies for a different flavor profile.
Absolutely! These no-bake cheesecake jars can be prepared up to 3 days in advance and stored in the refrigerator, making them perfect for meal prep or entertaining.
Ensure the cream cheese is at room temperature and beat it thoroughly before adding other ingredients. Use an electric mixer and beat until smooth to avoid any lumps.
Print
Creamy No-Bake Cheesecake Jars Recipe
- Total Time: 2 hours 20 minutes
- Yield: 4 1x
Description
Classic no-bake cheesecake jars offer a delightful dessert with minimal effort. Creamy layers of graham cracker crust and silky cream cheese filling provide a perfect sweet treat you’ll savor to the last spoonful.
Ingredients
Main Ingredients:
- 8 ounces (226 grams) cream cheese
- 1/2 cup (100 grams) sugar
- 1 cup (240 milliliters) heavy cream
- 6 graham crackers
- 4 tablespoons (56 grams) butter (melted)
Flavor Enhancers:
- 1 teaspoon vanilla extract
Toppings:
- Fresh fruit or toppings of choice (optional)
Instructions
- Pulverize graham crackers into fine crumbs, blending thoroughly with melted butter until the mixture resembles wet sand.
- Carefully distribute the crumbly foundation evenly across the base of each glass jar, pressing firmly to create a compact layer.
- Using an electric mixer, whip cream cheese until velvety, incorporating sugar and vanilla extract for balanced sweetness and aromatic depth.
- Gently fold whipped cream into the cream cheese mixture, creating a light and airy texture that maintains structural integrity.
- Delicately transfer the creamy filling into prepared jars, ensuring smooth coverage over the graham cracker base with minimal air pockets.
- Refrigerate the assembled dessert jars for a minimum of 2 hours, allowing the filling to set and flavors to meld.
- Optional: Embellish with fresh berries, chocolate shavings, caramel drizzle, or additional whipped cream just before serving to enhance visual appeal and taste complexity.
Notes
- Customize your graham cracker base by experimenting with different cookies like Oreos or chocolate wafers for a unique twist.
- Use room temperature cream cheese to ensure a smooth, lump-free filling that blends perfectly with whipped cream.
- Make these jars gluten-free by substituting graham crackers with gluten-free cookie crumbs or ground nuts like almonds.
- Prepare these cheesecake jars up to 3 days in advance, storing them covered in the refrigerator for a convenient make-ahead dessert.
- Prep Time: 20 minutes
- Cook Time: 2 hours
- Category: Desserts
- Method: Chilling
- Cuisine: American
Nutrition
- Serving Size: 4
- Calories: 350 kcal
- Sugar: 20 g
- Sodium: 150 mg
- Fat: 25 g
- Saturated Fat: 15 g
- Unsaturated Fat: 8 g
- Trans Fat: 0.5 g
- Carbohydrates: 30 g
- Fiber: 1 g
- Protein: 6 g
- Cholesterol: 70 mg
John Conley
Founder & Culinary Storyteller
Expertise
Recipe Development, Culinary Writing, Home Cooking Techniques, Seasonal Ingredient Utilization
Education
Lane Community College, Eugene, OR
Certificate in Culinary Arts
Focused on foundational cooking techniques, kitchen safety, and menu planning.
Gotham Writers Workshop, New York, NY
Course in Food Writing
Explored the art of crafting engaging culinary narratives and recipe development.
John grew up where food meant connection: big bowls, warm kitchens, and meals that told a story. After earning his Certificate in Culinary Arts from Lane Community College and diving deep into food writing at Gotham Writers Workshop, he found his calling: turning everyday recipes into something worth savoring.
At The Liffey, John’s focus is all about crafting dishes that feel easy, honest, and full of heart.