The Dreamiest Homemade Ice Cream Cake Recipe for Sweet Lovers
Crafting a delightful ice cream cake brings pure joy to any celebration.
Layers of creamy goodness promise a decadent dessert that melts hearts.
Sweet dreams come true with this magical combination of cake and frozen treat.
Guests will swoon over the incredible blend of textures and flavors.
Cool and indulgent, this dessert feels like a special secret weapon for memorable moments.
Mixing traditional cake with smooth ice cream creates something truly spectacular.
You’ll want to bookmark this recipe and become the ultimate party hero.
Ice Cream Cake for Any Celebration
Ingredients for Ice Cream Cake
Cake Base:Ice Cream Layer:Toppings and Finishing:How to Assemble Ice Cream Cake
Step 1: Bake the Cake Base
Preheat your oven and prepare a round cake pan. Mix together flour, sugar, eggs, and butter to create a delightful cake batter.
Pour the batter into the pan and bake until golden brown and a toothpick comes out clean. Let the cake cool completely on a wire rack, allowing it to reach room temperature.
Step 2: Prepare the Ice Cream Layer
Remove the ice cream from the freezer and let it soften slightly for easy spreading. Select your favorite ice cream flavor – vanilla, chocolate, or strawberry work wonderfully.
Carefully spread the softened ice cream in an even, smooth layer over the completely cooled cake base.
Step 3: Freeze the Cake
Place the cake with the ice cream layer into the freezer.
Allow it to set and become firm for at least 2 hours. This helps the ice cream layer stabilize and create a perfect texture for your dessert.
Step 4: Decorate and Finish
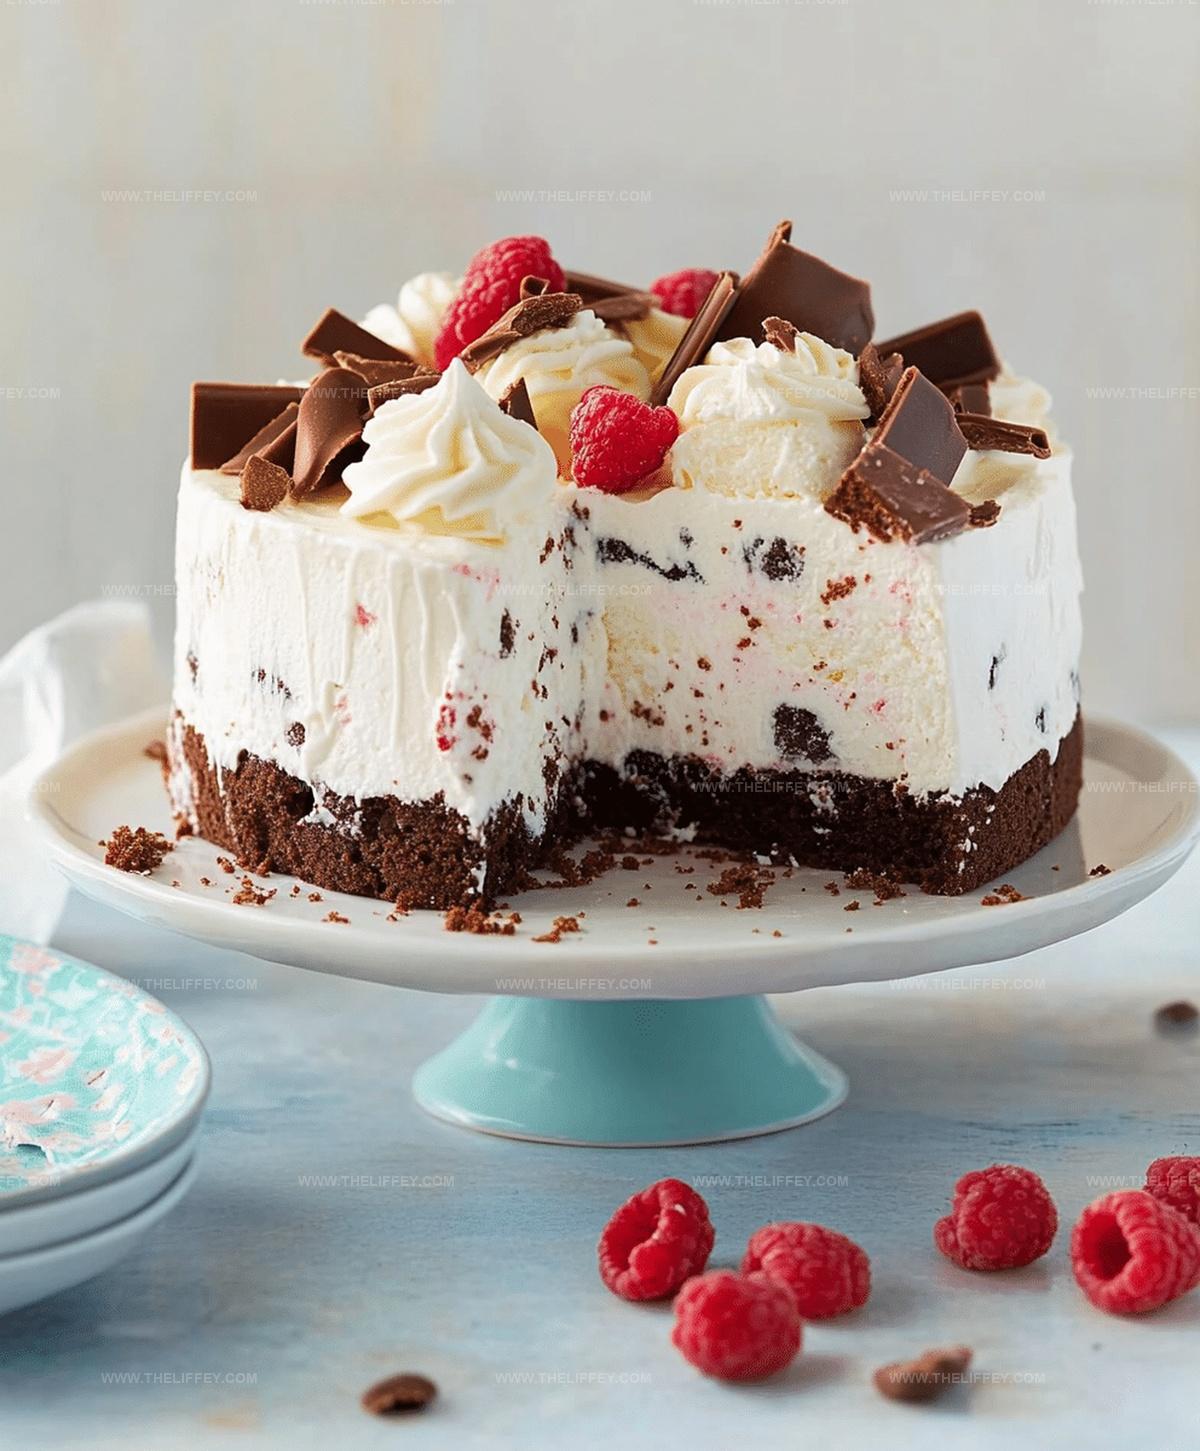
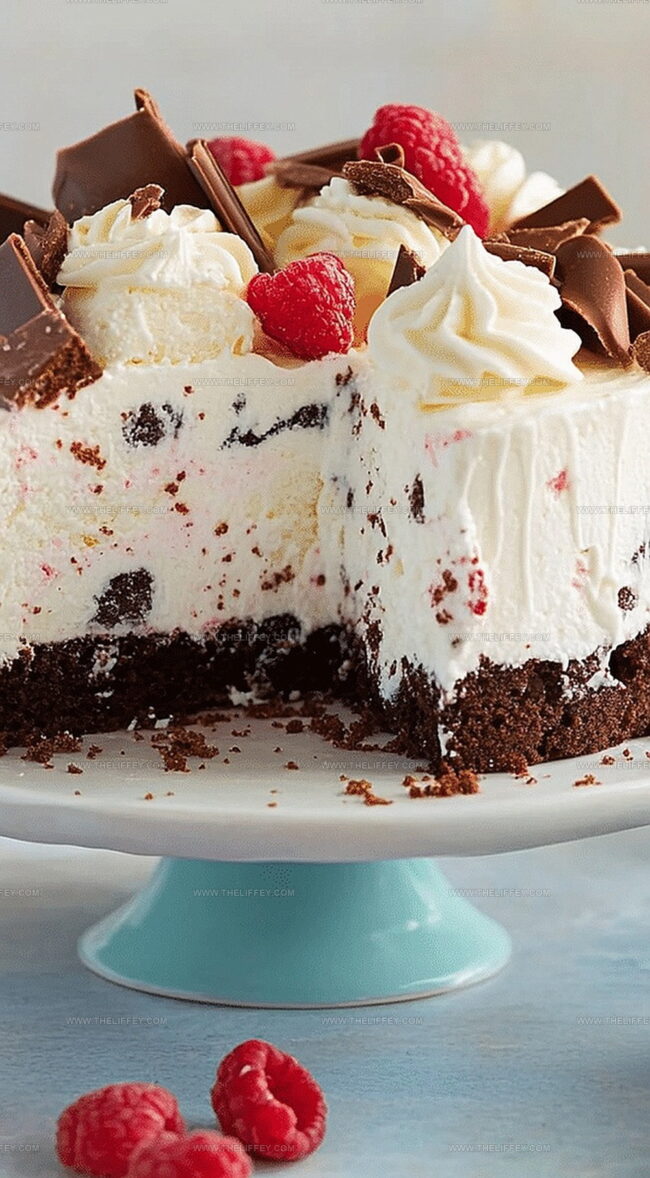
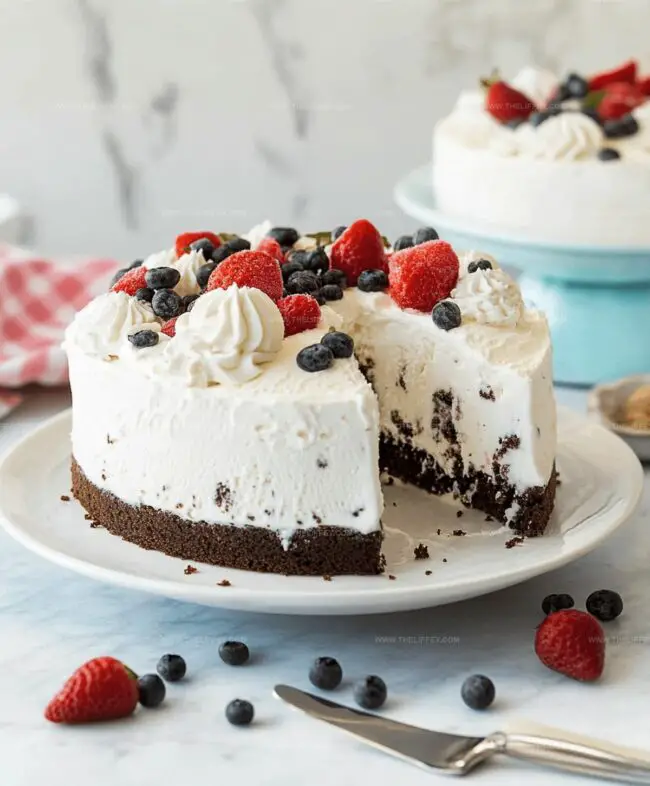
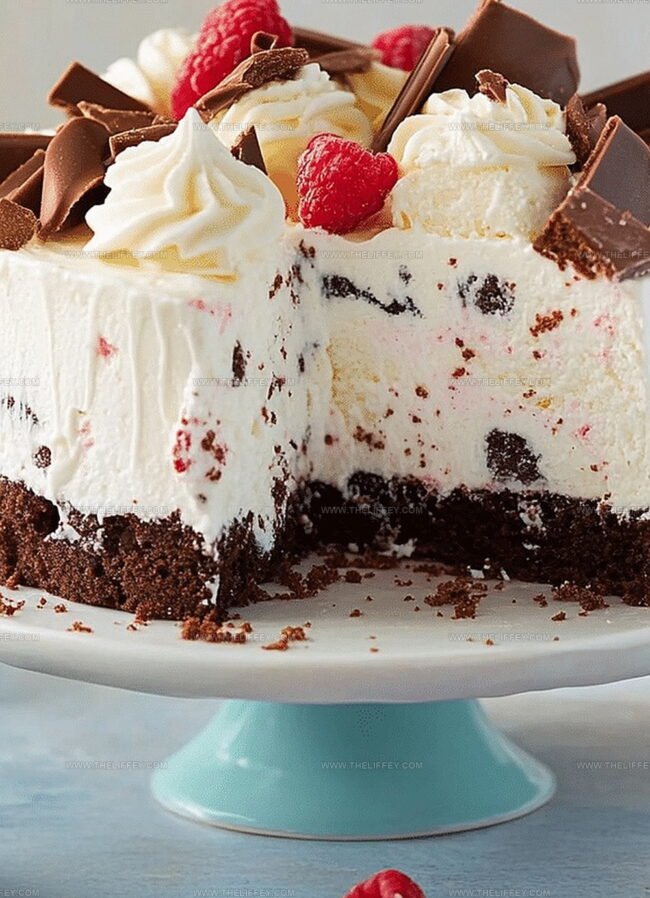
Remove the cake from the freezer. Top with fluffy whipped cream, creating decorative swirls or a smooth coating.
Sprinkle with fun toppings like:Step 5: Serve and Enjoy
Take the cake out of the freezer about 5-10 minutes before serving to make slicing easier. Cut into beautiful wedges and serve immediately.
Enjoy your homemade ice cream cake with friends and family!
Tips for Ice Cream Cake Success
Flavor Twists for Ice Cream Cake
Serving Ice Cream Cake
Keeping Ice Cream Cake Fresh
FAQs
You’ll need a cake pan, mixer, spatula, and freezer. Ensure your freezer has enough space to hold the cake while it sets.
Absolutely! A pre-baked cake from the bakery or grocery store works perfectly fine. Just make sure it’s completely cooled before adding ice cream.
Work quickly and let the ice cream soften just slightly. Use a chilled spatula and work in a cool kitchen to minimize melting.
Classic flavors like vanilla, chocolate, and strawberry are great. You can also mix and match two complementary flavors for a more interesting cake.
Print
Creamy Homemade Ice Cream Cake Recipe
- Total Time: 3 hours 20 minutes
- Yield: 8 1x
Description
Classic ice cream cake combines layers of rich cake and creamy frozen dessert for a crowd-pleasing treat. Chocolate and vanilla create a perfect harmony that delights guests at summer gatherings and special celebrations.
Ingredients
Primary Ingredients:
- 1 cake (store-bought or homemade)
- 1–2 quarts (0.95–1.9 liters) of ice cream (any flavor)
Topping Ingredients:
- Whipped cream
Decorative Ingredients:
- Sprinkles
- Chocolate syrup
Instructions
- Preheat the oven and craft a delectable cake base, allowing it to cool thoroughly to room temperature.
- Remove ice cream from the freezer and let it soften for 5-10 minutes, creating a spreadable consistency.
- Carefully distribute the softened ice cream across the cake surface in a uniform layer, ensuring complete and even coverage.
- Place the assembled dessert into the freezer for 2-3 hours, allowing the ice cream to solidify and bond with the cake foundation.
- Prior to serving, adorn the frozen creation with billowy whipped cream, selecting decorative garnishes like chocolate shavings, sprinkles, or fresh berries.
- Extract the cake from the freezer approximately 10 minutes before slicing to facilitate easier cutting and serving.
- Slice into clean, precise portions and savor the harmonious blend of cake and creamy frozen delight.
Notes
- Choose a cake base that complements the ice cream flavor for a harmonious taste experience.
- Allow the cake to cool completely to prevent melting and ensure a clean, crisp layering.
- Soften ice cream just enough to spread easily without becoming too runny, about 5-10 minutes at room temperature.
- Work quickly when spreading ice cream to maintain its structure and prevent excessive melting.
- Use a hot knife for clean, smooth slices when cutting the frozen cake.
- Experiment with different cake and ice cream combinations for unique flavor profiles.
- Store leftover cake in an airtight container in the freezer to maintain its texture and prevent freezer burn.
- Prep Time: 20 minutes
- Cook Time: 3 hours
- Category: Desserts
- Method: Baking
- Cuisine: American
Nutrition
- Serving Size: 8
- Calories: 250 kcal
- Sugar: 20 g
- Sodium: 150 mg
- Fat: 12 g
- Saturated Fat: 7 g
- Unsaturated Fat: 4 g
- Trans Fat: 0.5 g
- Carbohydrates: 30 g
- Fiber: 1 g
- Protein: 3 g
- Cholesterol: 40 mg
John Conley
Founder & Culinary Storyteller
Expertise
Recipe Development, Culinary Writing, Home Cooking Techniques, Seasonal Ingredient Utilization
Education
Lane Community College, Eugene, OR
Certificate in Culinary Arts
Focused on foundational cooking techniques, kitchen safety, and menu planning.
Gotham Writers Workshop, New York, NY
Course in Food Writing
Explored the art of crafting engaging culinary narratives and recipe development.
John grew up where food meant connection: big bowls, warm kitchens, and meals that told a story. After earning his Certificate in Culinary Arts from Lane Community College and diving deep into food writing at Gotham Writers Workshop, he found his calling: turning everyday recipes into something worth savoring.
At The Liffey, John’s focus is all about crafting dishes that feel easy, honest, and full of heart.