Dreamy Cherry Chocolate Ice Cream Cake Recipe: Summer’s Joy
Sweet summer memories flood back when I whip up this delectable cherry chocolate ice cream cake that transforms ordinary desserts into extraordinary experiences.
Cool layers promise pure indulgence with minimal effort.
Creamy chocolate blends seamlessly with ripe cherries, creating a symphony of rich flavors.
Each slice delivers a decadent combination that feels both nostalgic and sophisticated.
Homemade treats always win hearts, especially when they look this impressive.
Minimal kitchen skills are needed to craft this showstopping dessert.
Prepare to impress everyone at the table with this irresistible treat that screams celebration.
Cherry Chocolate Ice Cream Cake That Impresses
Ingredients to Build This Decadent Dessert
Cake Base:Dairy and Frozen Elements:Sauce and Toppings:How to Layer and Freeze the Ice Cream Cake
Step 1: Whip Up the Chocolate Cake Base
Preheat your oven and grab a boxed chocolate cake mix. Follow the package directions to create a delightful chocolate cake in a springform pan.
Once baked, let the cake cool completely, giving it time to set and firm up perfectly.
Step 2: Spread Creamy Cherry Ice Cream Layer
Take softened cherry ice cream and generously spread it over the cooled chocolate cake.
Use a spatula to smooth the surface, creating an even and inviting layer. Pop the cake into the freezer for at least two hours to help the ice cream set firmly.
Step 3: Drizzle Decadent Fudge Sauce
Warm up rich chocolate fudge sauce until it’s silky and pourable. Carefully pour the sauce over the frozen ice cream layer, ensuring an even coverage.
Return the cake to the freezer for another hour to let the fudge sauce solidify.
Step 4: Create a Stunning Topping
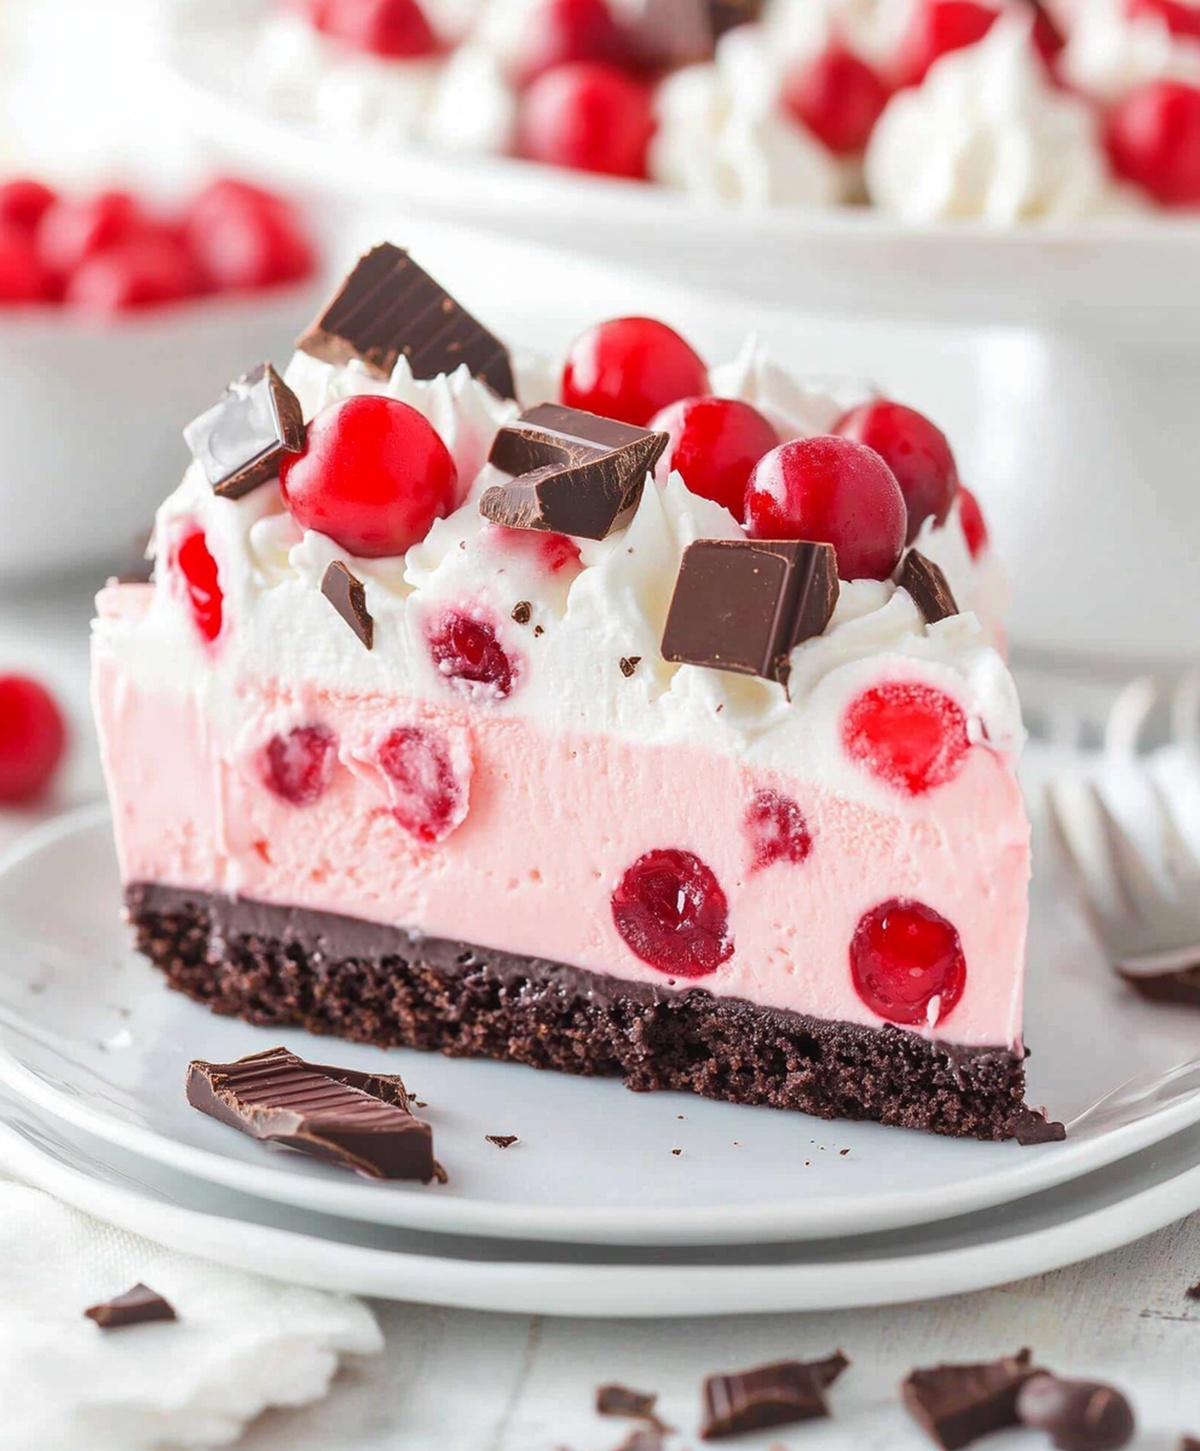
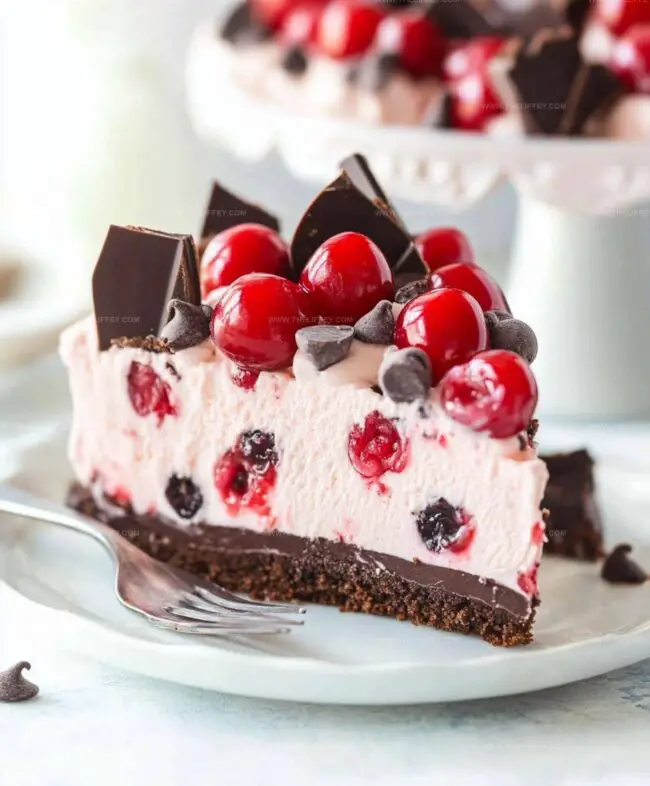
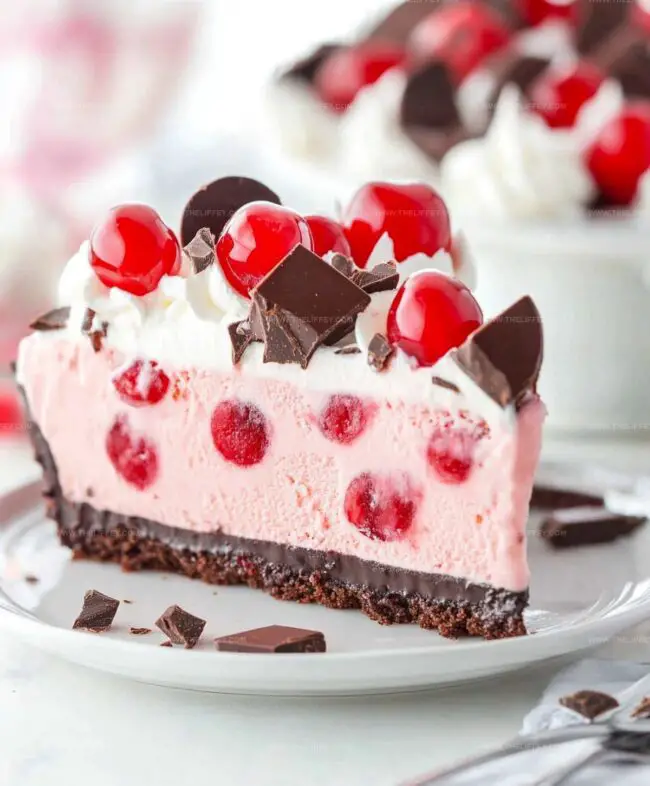
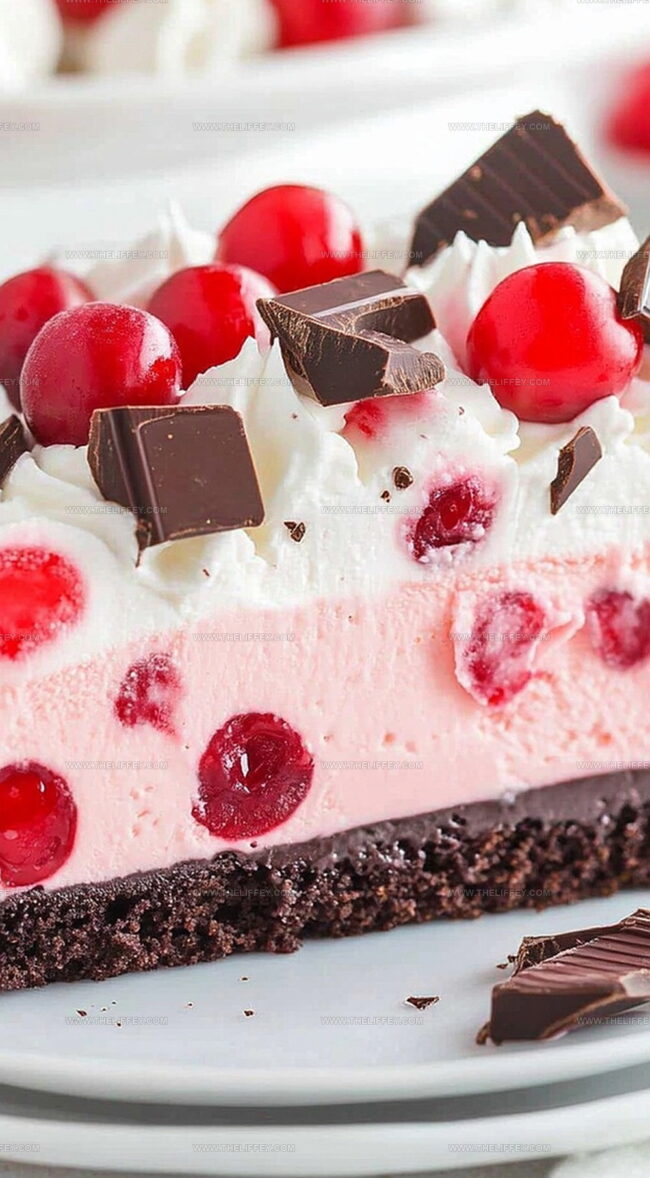
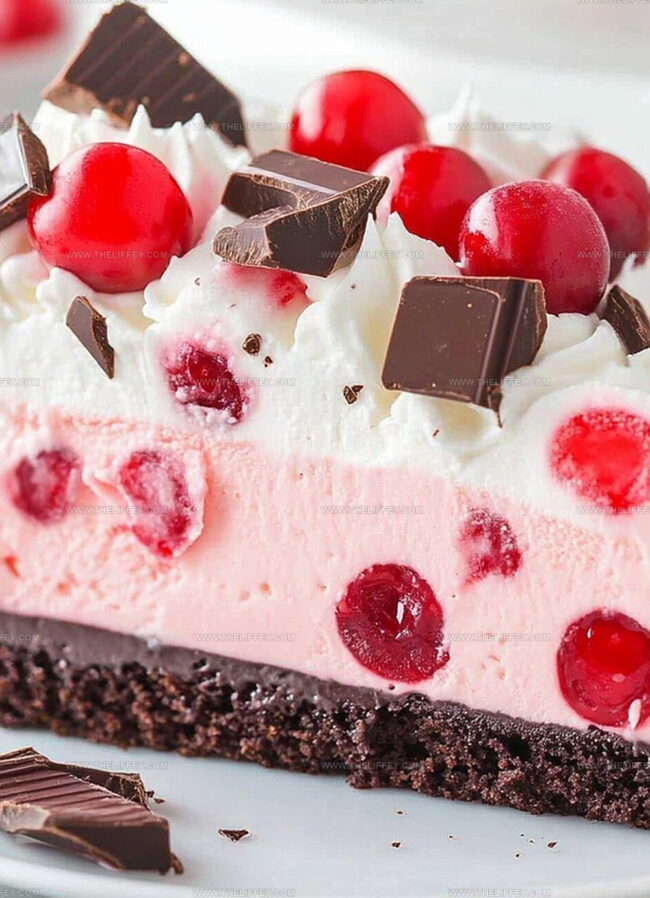
Prepare a fluffy layer of whipped cream and artfully spread it across the top of the cake.
Garnish with:Step 5: Chill and Serve
Keep the cake frozen until you’re ready to indulge. When serving, use a sharp knife to slice through the layers, revealing the beautiful combination of chocolate, cherry, and cream.
Enjoy this show-stopping dessert that’s sure to impress!
Tips for a Smooth Texture and Perfect Flavor
Flavor Twists to Customize Your Cake
Serving Ideas for Celebrations and Gatherings
How to Store Ice Cream Cake for Best Quality
FAQs
Yes, a homemade chocolate cake works perfectly. Just ensure it’s completely cooled before adding the ice cream layer.
Work quickly and keep the ice cream softened but not completely melted. Use an offset spatula and work in a cool kitchen environment.
You can substitute with vanilla ice cream and mix in chopped cherries or cherry preserves for a similar flavor profile.
Absolutely! You can prepare this cake up to 3-4 days ahead and keep it covered in the freezer until ready to serve.
Print
Creamy Cherry Chocolate Ice Cream Cake Recipe
- Total Time: 1 hour 20 minutes
- Yield: 12 1x
Description
Sinful cherry chocolate ice cream cake blends Italian dessert traditions with cool summer indulgence. Rich layers of chocolate cake, cherry compote, and creamy gelato create a luscious experience you’ll savor to the last bite.
Ingredients
Main Cake Ingredients:
- 1 box chocolate cake mix
- Ingredients listed on cake mix box (typically eggs, oil, water)
Frozen Ingredients:
- 1.5 quarts (1.4 liters) cherry ice cream, softened
Topping and Garnish Ingredients:
- 1 cup (240 milliliters) hot fudge sauce, slightly warmed
- 1 cup (240 milliliters) whipped topping or whipped cream
- Maraschino cherries
- Chocolate shavings
Instructions
- Prepare the chocolate cake in a 9-inch springform pan following package directions, ensuring even baking at 350°F. Allow the cake to cool completely at room temperature.
- Gently spread softened cherry ice cream across the cake’s surface, creating a smooth, even layer using an offset spatula. Place in the freezer for 2-3 hours until ice cream is completely set.
- Warm the fudge sauce until slightly runny, then carefully pour over the frozen ice cream layer. Use a spatula to distribute the sauce evenly, covering the entire surface.
- Return the cake to the freezer for an additional 1 hour to solidify the fudge sauce layer.
- Remove from freezer and generously top with freshly whipped cream, arranging whole and halved maraschino cherries around the edges.
- Sprinkle delicate chocolate shavings over the cream, creating an elegant decorative finish.
- Store in the freezer until ready to serve. Let the cake sit at room temperature for 5-10 minutes before slicing to ensure clean, precise cuts.
Notes
- Ensure the chocolate cake is completely cool before adding ice cream to prevent melting and maintain distinct layers.
- Use high-quality cherry ice cream at a soft-serve consistency for easy spreading without tearing the cake base.
- Let the fudge sauce cool slightly before pouring to prevent immediate melting of the ice cream layer.
- For a gluten-free version, substitute the chocolate cake mix with a gluten-free alternative or almond flour-based cake.
- Prep Time: 20 minutes
- Cook Time: 1 hour
- Category: Desserts
- Method: Baking
- Cuisine: American
Nutrition
- Serving Size: 12
- Calories: 370 kcal
- Sugar: 38 g
- Sodium: 280 mg
- Fat: 16 g
- Saturated Fat: 9 g
- Unsaturated Fat: 5 g
- Trans Fat: 0.5 g
- Carbohydrates: 50 g
- Fiber: 2 g
- Protein: 4 g
- Cholesterol: 45 mg
John Conley
Founder & Culinary Storyteller
Expertise
Recipe Development, Culinary Writing, Home Cooking Techniques, Seasonal Ingredient Utilization
Education
Lane Community College, Eugene, OR
Certificate in Culinary Arts
Focused on foundational cooking techniques, kitchen safety, and menu planning.
Gotham Writers Workshop, New York, NY
Course in Food Writing
Explored the art of crafting engaging culinary narratives and recipe development.
John grew up where food meant connection: big bowls, warm kitchens, and meals that told a story. After earning his Certificate in Culinary Arts from Lane Community College and diving deep into food writing at Gotham Writers Workshop, he found his calling: turning everyday recipes into something worth savoring.
At The Liffey, John’s focus is all about crafting dishes that feel easy, honest, and full of heart.