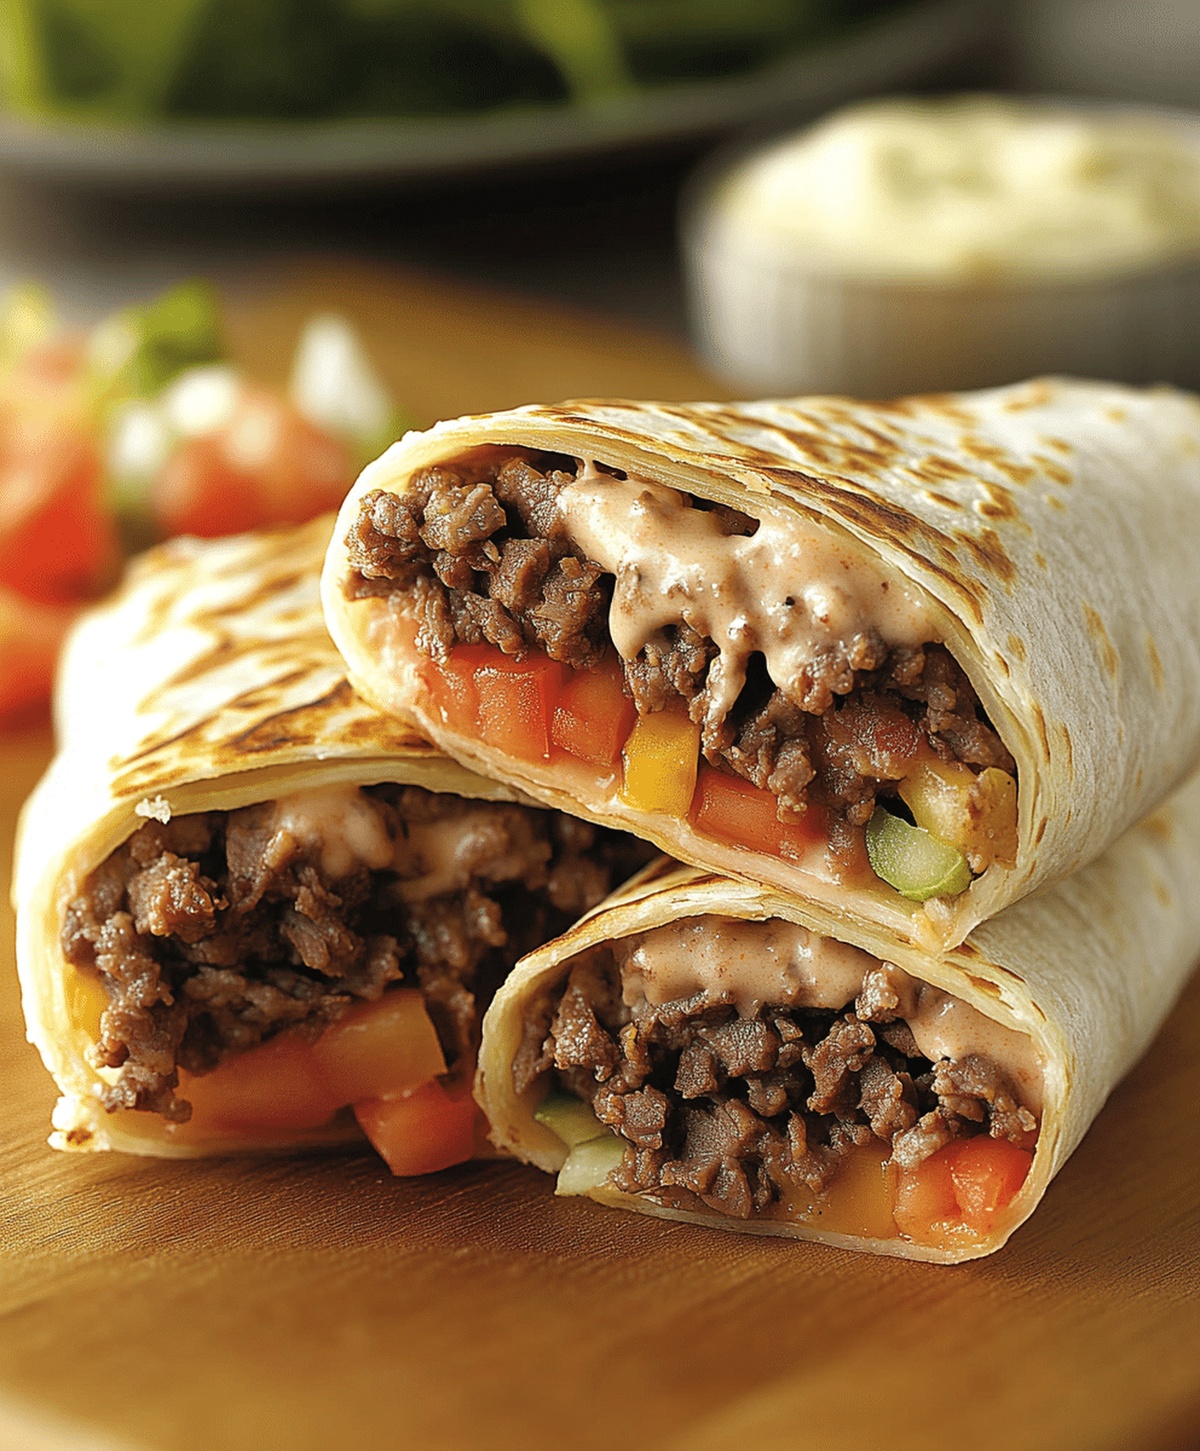
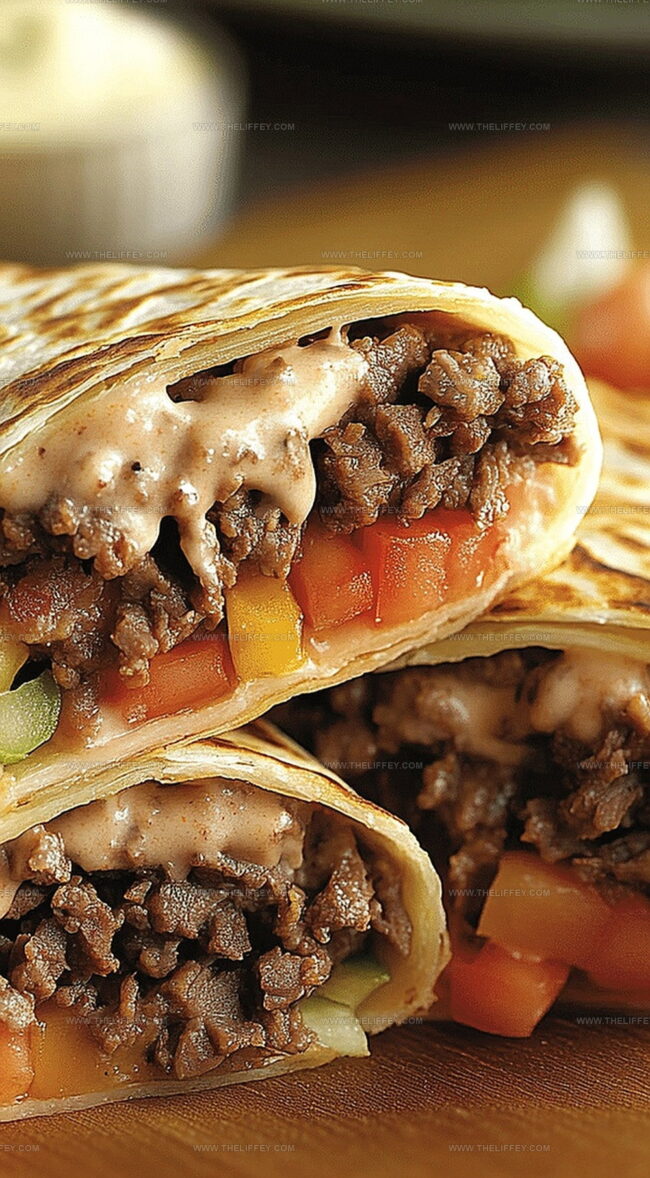
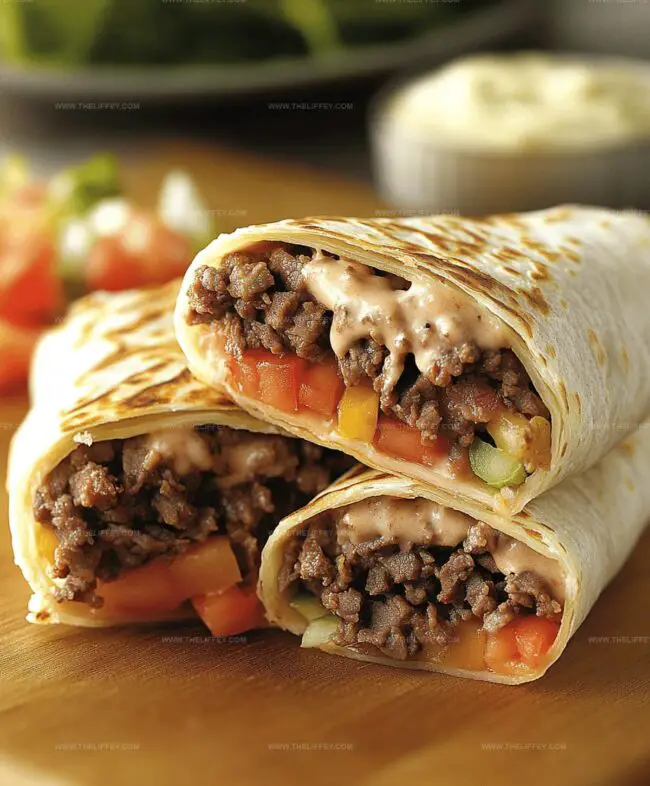
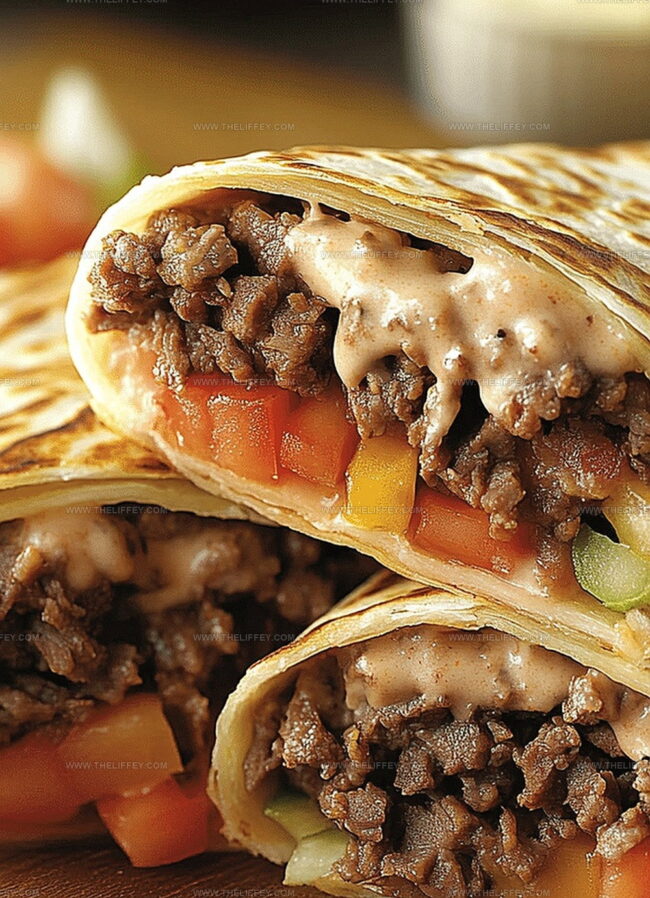
Zesty Cheesy Beef Fiesta Wraps Recipe: A Sizzling Dinner Gem
Craving a mouthwatering cheesy beef fiesta wraps that’ll make your taste buds dance with excitement?
Mexican-inspired flavors burst through every delicious bite of this crowd-pleasing meal.
Comfort food meets zesty spices in a handheld package that satisfies serious hunger pangs.
Layers of seasoned ground beef mingle with melted cheese and fresh toppings for maximum deliciousness.
Weeknight dinners just got a serious upgrade with this simple yet spectacular recipe.
Quick to assemble and impossible to resist, these wraps bring restaurant-quality excitement straight to your kitchen.
Come hungry and get ready to experience a flavor explosion that’ll have everyone asking for seconds!
Cheesy Beef Fiesta Wraps Overview
Cheesy Beef Fiesta Wraps Ingredients
Protein:Vegetables:Seasoning and Flavor Enhancers:Wrap Component:Optional Toppings:Preparation Steps for Cheesy Beef Fiesta Wraps
Step 1: Brown the Beef
In a large skillet, cook ground beef over medium heat until it transforms into a rich, golden brown color.
Carefully drain away any extra fat to keep your wrap light and delicious.
Step 2: Spice Up the Meat
Sprinkle taco seasoning over the beef and add a small amount of water.
Let the mixture simmer, allowing the flavors to meld together and create a zesty meat filling.
Step 3: Sizzle the Vegetables
Prepare a colorful mix of vegetables with a quick saute:Cook until the vegetables become tender and slightly caramelized, releasing their sweet and savory flavors.
Step 4: Assemble the Wrap
Create your fiesta wrap by layering the ingredients in the center of a warm tortilla:Step 5: Roll and Secure
Fold in the sides of the tortilla, then roll tightly to create a perfect, compact wrap that holds all the delicious ingredients inside.
Step 6: Serve and Enjoy
Plate your cheesy beef fiesta wrap and add optional toppings:Serve immediately while warm and enjoy the burst of flavors in every bite.
Tips for Cheesy Beef Fiesta Wraps
Variations for Cheesy Beef Fiesta Wraps
Serving Suggestions for Cheesy Beef Fiesta Wraps
Storage Advice for Cheesy Beef Fiesta Wraps
FAQs
Add diced jalapeños or hot sauce to the beef mixture for extra heat. You can also sprinkle red pepper flakes or use a spicy taco seasoning blend.
Absolutely! Ground turkey, chicken, or even plant-based crumbles work great as substitutes for ground beef in this recipe.
Fold the sides in first, then roll tightly. If needed, you can secure the wrap with a toothpick or wrap it in foil to keep it compact.
Try using large lettuce leaves as a wrapper or serve the filling over cauliflower rice for a lower-carb option.
Print
Cheesy Beef Fiesta Wraps Recipe
- Total Time: 35 minutes
- Yield: 4 1x
Description
Sizzling Mexican-inspired cheesy beef fiesta wraps blend bold spices with melted cheese in a quick weeknight dinner. Flavor-packed tortillas wrapped around seasoned ground beef create a satisfying meal you’ll crave again and again.
Ingredients
Protein:
- 1 pound ground beef
- 2 tablespoons (30 milliliters) taco seasoning
Vegetables:
- 1 bell pepper, chopped
- 1 onion, chopped
Cheese and Wrap Ingredients:
- 1 cup (240 grams) shredded cheddar cheese
- 4 flour tortillas
Optional Toppings:
- 1/2 cup (120 milliliters) salsa
- 1/4 cup (60 grams) sour cream
Instructions
- Brown ground beef in a skillet over medium-high heat, thoroughly draining any accumulated fat to prevent sogginess.
- Sprinkle taco seasoning over meat, adding minimal water to create a rich, flavorful mixture that coats the beef evenly.
- In the same skillet, caramelize bell peppers and onions until they develop a slight golden edge and become translucent.
- Warm tortillas briefly to enhance flexibility and prevent cracking during assembly.
- Distribute seasoned beef across tortilla centers, ensuring even coverage near the bottom third of the wrap.
- Generously scatter shredded cheese over hot beef to allow slight melting and improved binding.
- Layer sauteed vegetables atop the cheese, creating a colorful and textured filling.
- Fold tortilla sides inward, then roll from bottom to top in a tight, compact motion to secure ingredients.
- Slice wraps diagonally for easier handling and more appealing presentation.
- Serve immediately with fresh salsa and cool sour cream as complementary accompaniments.
Notes
- Select lean ground beef to reduce excess fat and keep the wrap lighter and healthier.
- Customize the heat level by choosing mild or spicy taco seasoning based on personal preference.
- Quickly drain beef using a colander to prevent greasy wraps and maintain a cleaner texture.
- Experiment with different cheese varieties like pepper jack or Mexican blend for added flavor complexity.
- Prep Time: 15 minutes
- Cook Time: 20 minutes
- Category: Lunch, Dinner, Snacks
- Method: Sautéing
- Cuisine: Mexican
Nutrition
- Serving Size: 4
- Calories: 450 kcal
- Sugar: 4 g
- Sodium: 600 mg
- Fat: 25 g
- Saturated Fat: 10 g
- Unsaturated Fat: 12 g
- Trans Fat: 0.5 g
- Carbohydrates: 35 g
- Fiber: 4 g
- Protein: 28 g
- Cholesterol: 75 mg
Amanda Bennett
Recipe Curator & Culinary Educator
Expertise
Baking and Pastry Arts, Recipe Testing and Development, Culinary Instruction, Food Styling and Photography
Education
Asheville-Buncombe Technical Community College, Asheville, NC
Diploma in Culinary Arts
Emphasized practical cooking skills, nutrition, and kitchen management.
Cambridge School of Culinary Arts, Cambridge, MA
Certificate in Professional Pastry Arts
Specialized in baking techniques, dessert presentation, and flavor profiling
Amanda’s roots run deep in the Southern hills, where every meal started fresh from the garden and every dessert came with a story. She trained at Asheville-Buncombe Technical Community College and sharpened her pastry skills at the Cambridge School of Culinary Arts, blending classic technique with everyday charm.
At The Liffey, Amanda’s passion is making baking and home cooking feel natural and joyful. She’s all about single recipes that are simple enough for a busy afternoon, but special enough to make someone’s day a little sweeter.