
The Perfect Cheeseburger Sliders With Hawaiian Rolls Recipe
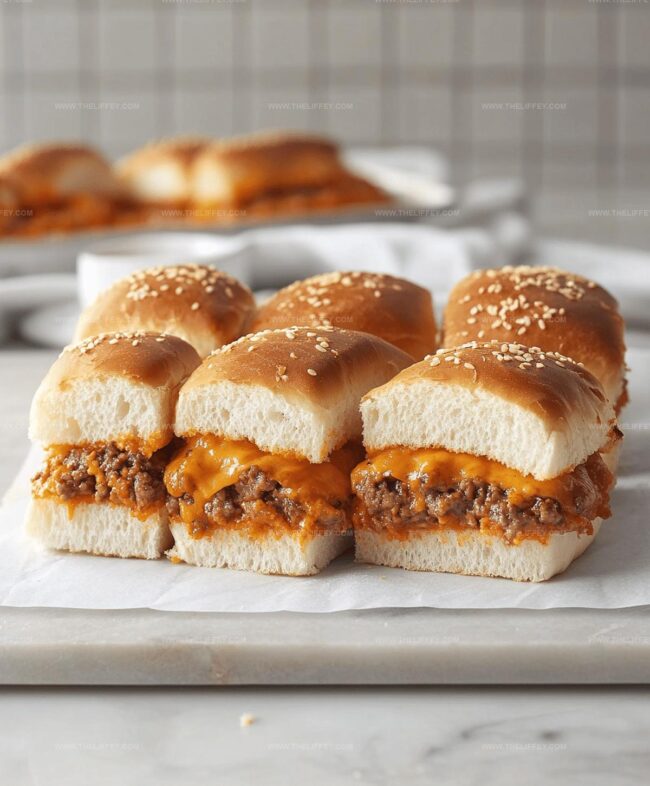
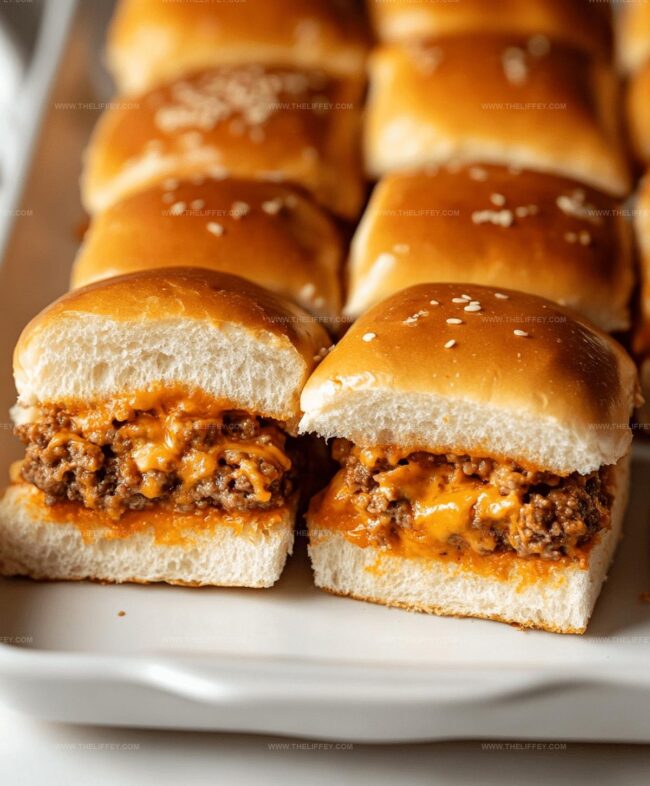
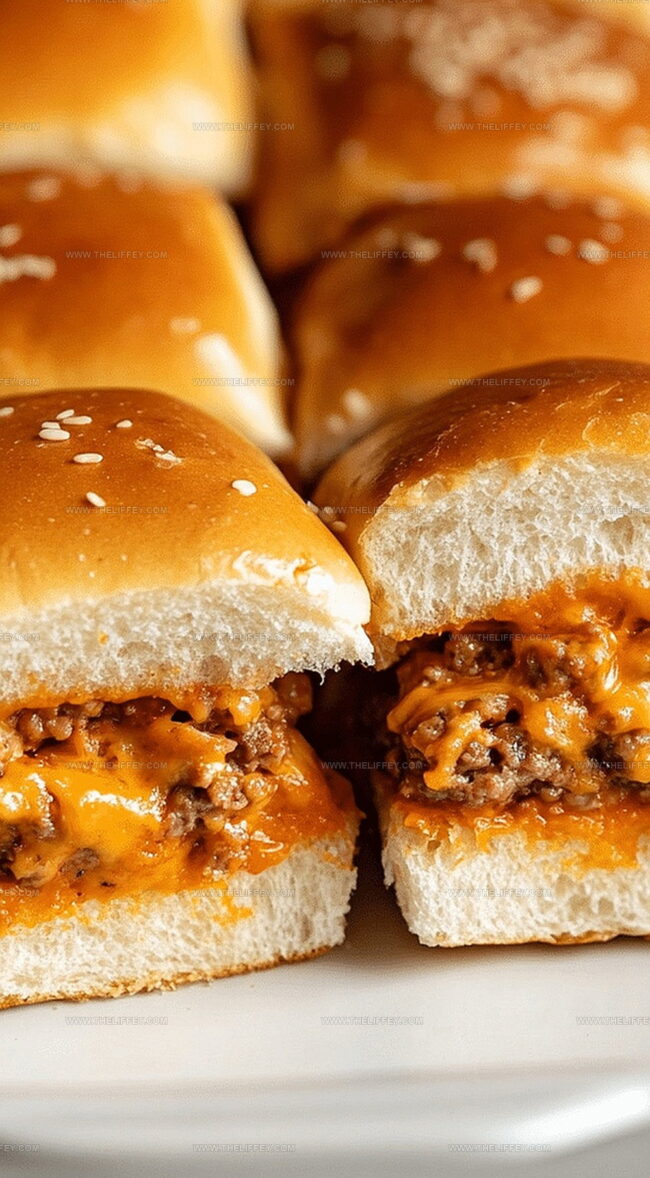
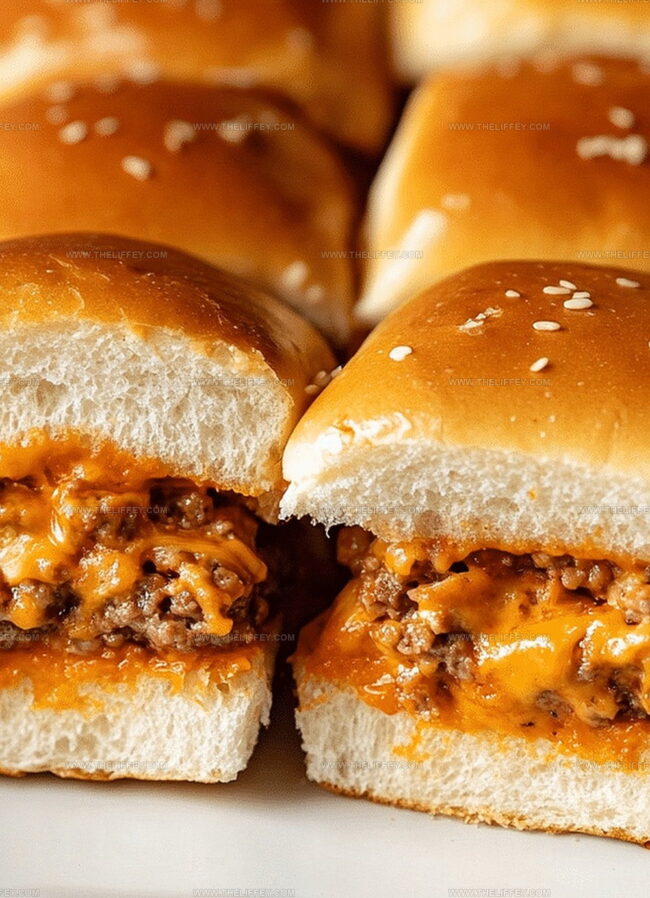
Tiny cheeseburger sliders with Hawaiian rolls pack a serious punch of flavor that will make your taste buds dance.
Mini burgers nestled on soft, sweet bread create the perfect handheld meal for any gathering.
Bite-sized portions mean everyone gets a chance to enjoy these delectable little sandwiches.
Soft Hawaiian rolls provide a unique sweetness that complements the savory beef and melted cheese.
Juicy meat patties topped with melted cheese create an irresistible combination that feels both comforting and exciting.
Simple ingredients come together quickly, making these sliders a go-to option when you want something delicious without spending hours in the kitchen.
Serve these crowd-pleasing sliders and watch how fast they disappear from the plate.
Why Cheeseburger Sliders With Hawaiian Rolls Are So Good
Ingredients for Cheeseburger Sliders Hawaiian Rolls
Main Ingredients:Seasonings and Flavor Enhancers:Topping and Binding Ingredients:How to Make Cheeseburger Sliders With Hawaiian Rolls
Step 1: Warm Up The Oven
Fire up your oven to a cozy 350 degrees Fahrenheit, preparing it for slider magic.
Step 2: Brown The Beef And Onions
In a skillet, cook ground beef and onions together over medium heat.
Keep stirring until the beef turns a rich brown color and is completely cooked through.
Drain away any extra grease.
Step 3: Season The Beef Mixture
Sprinkle in these seasonings:Mix everything thoroughly to ensure even flavor distribution.
Step 4: Prepare The Hawaiian Rolls
Gently slice the Hawaiian rolls horizontally, creating perfect top and bottom halves.
Step 5: Build The Slider Base
Place the bottom roll halves into a greased baking dish.
If you enjoy extra flavor, spread:Step 6: Add The Beef Layer
Spread the seasoned beef mixture evenly across the bottom roll halves.
Step 7: Cheese It Up
Layer cheddar cheese slices over the beef mixture.
Step 8: Top And Finish
Replace the top roll halves.
Brush the bun tops with melted butter and sprinkle sesame seeds if desired.
Step 9: First Baking Round
Cover the sliders with foil and bake for 15 minutes.
Step 10: Final Baking Touch
Remove the foil and continue baking for an additional 5 minutes until the cheese melts and buns turn golden.
Step 11: Serve And Savor
Remove from oven and serve these delectable sliders while warm.
Enjoy your creation!
Tips for Hawaiian Roll Cheeseburger Sliders
Flavor Variations for Hawaiian Roll Cheeseburger Sliders
What to Serve With Cheeseburger Hawaiian Roll Sliders
Store Cheeseburger Sliders With Hawaiian Rolls Properly
FAQs
Yes, you can substitute ground beef with ground turkey, chicken, or plant-based meat alternatives for a different flavor profile.
Add diced jalapeños to the beef mixture, use spicy cheese, or sprinkle red pepper flakes on top before baking to increase heat.
While Hawaiian rolls provide a sweet and soft base, you can use other mini rolls or slider buns as a substitute if needed.
Yes, you can assemble the sliders ahead of time and refrigerate them, covered, for up to 24 hours before baking. Just add a few extra minutes to the baking time.
Print
Cheeseburger Sliders With Hawaiian Rolls Recipe
- Total Time: 40 minutes
- Yield: 12 1x
Description
Delectable cheeseburger sliders with Hawaiian rolls showcase mini burger perfection from backyard grilling to party appetizers. Ground beef nestled in sweet rolls delivers irresistible flavor that satisfies small plate cravings you’ll want to share with friends.
Ingredients
Meat:
- 1 pound (450 grams) ground beef
Bread:
- 12 Hawaiian rolls
Seasonings and Toppings:
- 1 teaspoon garlic powder
- 1 teaspoon salt
- 1/2 teaspoon black pepper
- 6 slices cheddar cheese (halved)
- 1 small onion (finely chopped)
Sauce and Extras:
- 1/4 cup mayonnaise
- 1/4 cup ketchup
- 1/4 cup melted butter
- 1 teaspoon sesame seeds
Instructions
- Warm the oven to 350F (175C) for optimal slider preparation.
- Sauté ground beef and onions in a skillet over medium heat until meat browns completely, ensuring no pink remains and draining excess fat.
- Enhance the beef mixture with garlic powder, salt, and black pepper, mixing thoroughly for balanced seasoning.
- Carefully slice Hawaiian rolls horizontally, creating distinct top and bottom halves.
- Arrange bottom roll halves in a lightly greased baking dish, creating a uniform base for the sliders.
- Optional: Apply a thin layer of mayonnaise or ketchup across the bottom buns for additional flavor.
- Distribute the seasoned beef mixture evenly across the prepared bun bases.
- Layer cheddar cheese slices directly over the beef to ensure complete coverage.
- Gently position the top roll halves back onto the cheese-covered beef.
- Brush roll tops with melted butter and optionally sprinkle with sesame seeds for enhanced texture and appearance.
- Cover the baking dish with aluminum foil and bake for 15 minutes to allow flavors to meld.
- Uncover and continue baking for an additional 5 minutes until cheese melts completely and bun tops turn golden brown.
- Remove from oven and let rest briefly before serving warm for maximum enjoyment.
Notes
- Customize the sliders by experimenting with different cheese types like pepper jack or Swiss for unique flavor profiles.
- Make them lighter by using lean ground beef or ground turkey to reduce overall fat content.
- Prepare the beef mixture ahead of time and refrigerate for quick assembly when hosting game day or parties.
- Adapt for vegetarian diets by substituting ground beef with plant-based crumbles or sautéed mushrooms for similar texture and protein.
- Prep Time: 20 minutes
- Cook Time: 20 minutes
- Category: Lunch, Dinner, Snacks
- Method: Baking
- Cuisine: American
Nutrition
- Serving Size: 12
- Calories: 242 kcal
- Sugar: 3 g
- Sodium: 372 mg
- Fat: 15 g
- Saturated Fat: 6 g
- Unsaturated Fat: 7 g
- Trans Fat: 0.3 g
- Carbohydrates: 17 g
- Fiber: 1 g
- Protein: 12 g
- Cholesterol: 40 mg
Amanda Bennett
Recipe Curator & Culinary Educator
Expertise
Baking and Pastry Arts, Recipe Testing and Development, Culinary Instruction, Food Styling and Photography
Education
Asheville-Buncombe Technical Community College, Asheville, NC
Diploma in Culinary Arts
Emphasized practical cooking skills, nutrition, and kitchen management.
Cambridge School of Culinary Arts, Cambridge, MA
Certificate in Professional Pastry Arts
Specialized in baking techniques, dessert presentation, and flavor profiling
Amanda’s roots run deep in the Southern hills, where every meal started fresh from the garden and every dessert came with a story. She trained at Asheville-Buncombe Technical Community College and sharpened her pastry skills at the Cambridge School of Culinary Arts, blending classic technique with everyday charm.
At The Liffey, Amanda’s passion is making baking and home cooking feel natural and joyful. She’s all about single recipes that are simple enough for a busy afternoon, but special enough to make someone’s day a little sweeter.