
Spooky Mummy Oreo Balls Recipe: Fun Halloween Treats
Sweet nostalgia meets playful dessert magic with these mummy Oreo balls that transform a classic cookie into a spooky treat.
Crumbled cookies blend seamlessly with cream cheese, creating irresistible bite-sized delights.
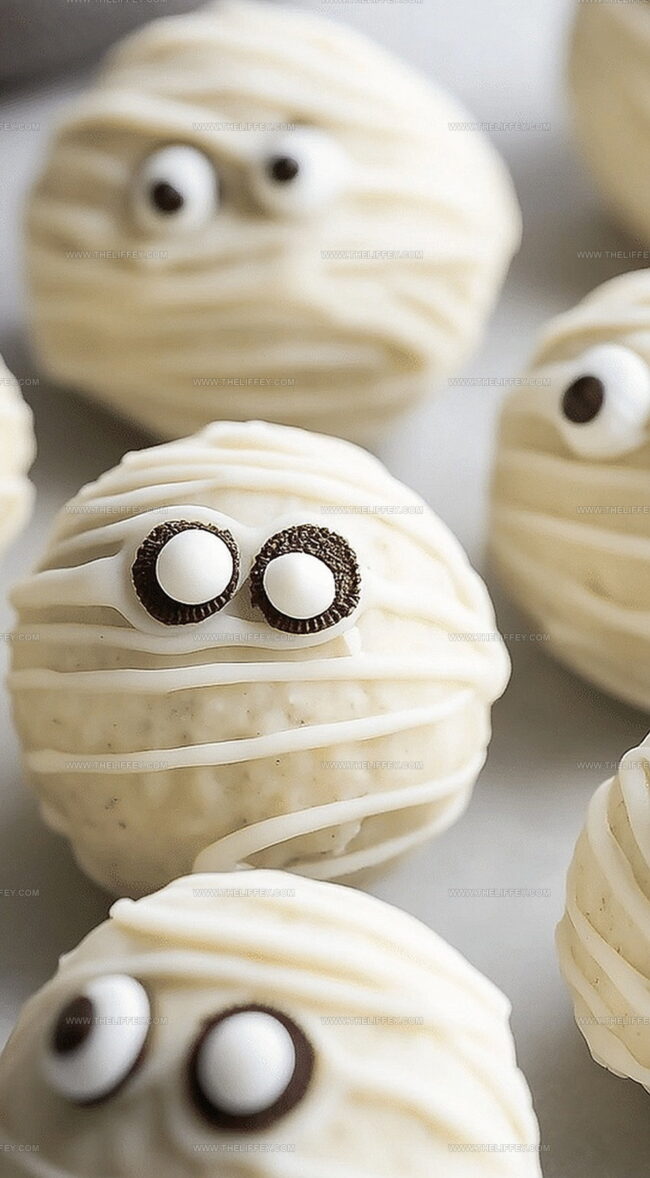
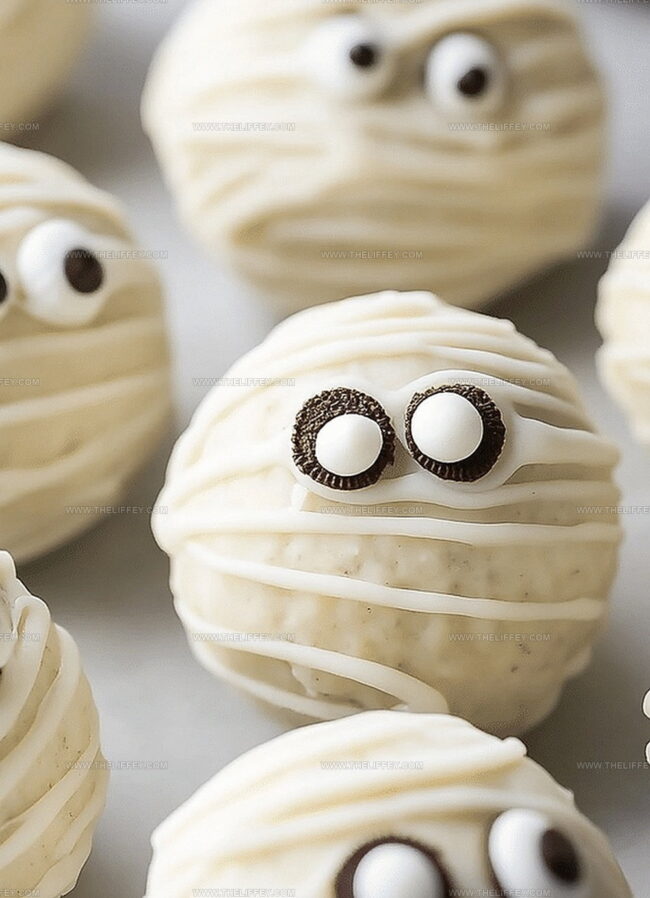
Whimsical white chocolate drizzles give these little morsels their adorable mummy-like appearance.
Kids and adults alike will fall in love with these cute confections.
Minimal ingredients and simple steps make this recipe perfect for halloween parties or spontaneous sweet cravings.
Each creamy, chocolatey ball promises a delightful adventure that you won’t want to miss.
Grab your apron and let’s turn ordinary oreos into extraordinary halloween magic!
Mummy Oreo Balls: Boo-tiful Treats
Ingredients for Mummy Oreo Balls
Base Ingredients:Coating Ingredients:Decorative Ingredients:Steps to Assemble Adorable Oreo Mummies

Step 1: Crush Oreo Cookies
Toss Oreo cookies into a food processor and pulse until they transform into fine, sandy crumbs that look like delicious dark snow.
Step 2: Blend Creamy Mixture
In a spacious mixing bowl, combine the Oreo crumbs with softened cream cheese.
Mix thoroughly until the ingredients become a uniform, dark chocolatey blend that sticks together perfectly.
Step 3: Shape Delightful Balls
Scoop out small portions of the mixture and roll them between your palms to create smooth, round balls.
Gently place each ball onto a parchment-lined baking sheet.
Step 4: Chill and Firm
Pop the baking sheet into the refrigerator and let the Oreo balls cool and firm up for about 30 minutes.
This helps them hold their shape during the chocolate dipping process.
Step 5: Melt Chocolate Coating
Using a microwave or double boiler, carefully melt white chocolate or candy melts.
Stir occasionally to ensure a smooth, silky consistency.
Step 6: Chocolate Dunk
Using a fork or dipping tool, submerge each Oreo ball into the melted white chocolate.
Tap gently to remove excess coating and return to the baking sheet.
Step 7: Add Spooky Eyes
While the chocolate is still wet, place tiny candy eyes on each ball to give them a playful, mummy-like appearance.
Step 8: Create Mummy Bandages
Drizzle additional melted white chocolate over the balls in zigzag patterns, mimicking mummy wrappings. Use a squeeze bottle or spoon for precise lines.
Step 9: Let Set and Serve
Allow the mummy Oreo balls to sit at room temperature until the chocolate completely hardens. Serve and watch everyone’s eyes light up with Halloween delight!
Insider Hack for Oreo “Eyes” That Don’t Fall
Creative Fillings and Coatings to Explore
Fun Display Ideas for Halloween Tables
Tips on Keeping Oreo Balls Fresh
FAQs
Yes, you can substitute Oreos with graham crackers, chocolate cookies, or any similar cookie that crushes well.
They can be stored in the refrigerator for up to 5-7 days in an airtight container.
You’ll need a food processor or rolling pin to crush cookies, and a baking sheet with parchment paper.
Absolutely! Kids can help roll the balls and decorate with candy eyes, making it a fun family activity.
Print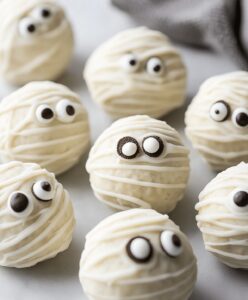
Best Mummy Oreo Balls Recipe
- Total Time: 25 minutes
- Yield: 36 1x
Description
Spooky mummy Oreo balls bring Halloween treats to life with creamy chocolate and playful design. White chocolate drizzles create ghostly bandage effects that delight guests and spark festive cheer.
Ingredients
Main Ingredients:
- 36 Oreo cookies (crushed)
- 8 ounces (226 grams) cream cheese (softened)
Coating Ingredients:
- 16 ounces (454 grams) white chocolate or white candy melts
Decorative Ingredients:
- Candy eyes
- Black gel icing or melted chocolate
Instructions
- Pulverize Oreo cookies into ultrafine crumbs using a food processor, ensuring a uniform texture.
- Combine crushed Oreos with softened cream cheese in a spacious mixing bowl, thoroughly blending until a cohesive mixture forms.
- Craft uniform spherical shapes approximately 1-inch in diameter, gently rolling the mixture between palms.
- Arrange the spheres on a parchment-lined baking tray and refrigerate for 30 minutes to solidify.
- Heat white chocolate or candy melts using a double boiler or microwave, stirring periodically to achieve a smooth, glossy consistency.
- Carefully immerse each chilled Oreo sphere into the molten chocolate, ensuring complete coverage and gentle tapping to remove excess.
- Position candy eyes strategically while the chocolate coating remains fluid, creating a whimsical mummy-like appearance.
- Using a piping bag or spoon, delicately drape additional melted white chocolate across the spheres in irregular patterns, mimicking mummy bandages.
- Allow the decorated treats to set completely at room temperature or briefly chill in the refrigerator until the coating hardens.
- Transfer to a serving platter and enjoy the playful mummy-themed confections.
Notes
- Crushing cookies finely ensures a smooth, consistent texture without lumps that might disrupt the ball’s shape.
- Softening cream cheese at room temperature helps blend more smoothly with cookie crumbs, creating a creamy, uniform mixture.
- Chilling the balls before dipping prevents them from falling apart during the chocolate coating process and helps maintain their round shape.
- Using a fork when dipping allows excess chocolate to drip off, creating a cleaner, more precise mummy-like appearance.
- Experiment with different chocolate coatings like milk or dark chocolate for varied flavor profiles if white chocolate isn’t preferred.
- Store these treats in the refrigerator for up to a week, making them perfect for advance party preparation.
- For gluten-free options, substitute regular Oreos with gluten-free cookie alternatives that have similar texture and taste.
- Prep Time: 25 minutes
- Cook Time: 0 minutes
- Category: Snacks, Desserts
- Method: Chilling
- Cuisine: American
Nutrition
- Serving Size: 36
- Calories: 147
- Sugar: 13 g
- Sodium: 45 mg
- Fat: 9 g
- Saturated Fat: 5 g
- Unsaturated Fat: 3 g
- Trans Fat: 0 g
- Carbohydrates: 17 g
- Fiber: 0.5 g
- Protein: 1.5 g
- Cholesterol: 10 mg
John Conley
Founder & Culinary Storyteller
Expertise
Recipe Development, Culinary Writing, Home Cooking Techniques, Seasonal Ingredient Utilization
Education
Lane Community College, Eugene, OR
Certificate in Culinary Arts
Focused on foundational cooking techniques, kitchen safety, and menu planning.
Gotham Writers Workshop, New York, NY
Course in Food Writing
Explored the art of crafting engaging culinary narratives and recipe development.
John grew up where food meant connection: big bowls, warm kitchens, and meals that told a story. After earning his Certificate in Culinary Arts from Lane Community College and diving deep into food writing at Gotham Writers Workshop, he found his calling: turning everyday recipes into something worth savoring.
At The Liffey, John’s focus is all about crafting dishes that feel easy, honest, and full of heart.