
The Most Joyful Funfetti Cheesecake Recipe You’ll Ever Try
Sweet celebrations call for a delightful funfetti cheesecake that sparkles with childhood memories and pure joy.
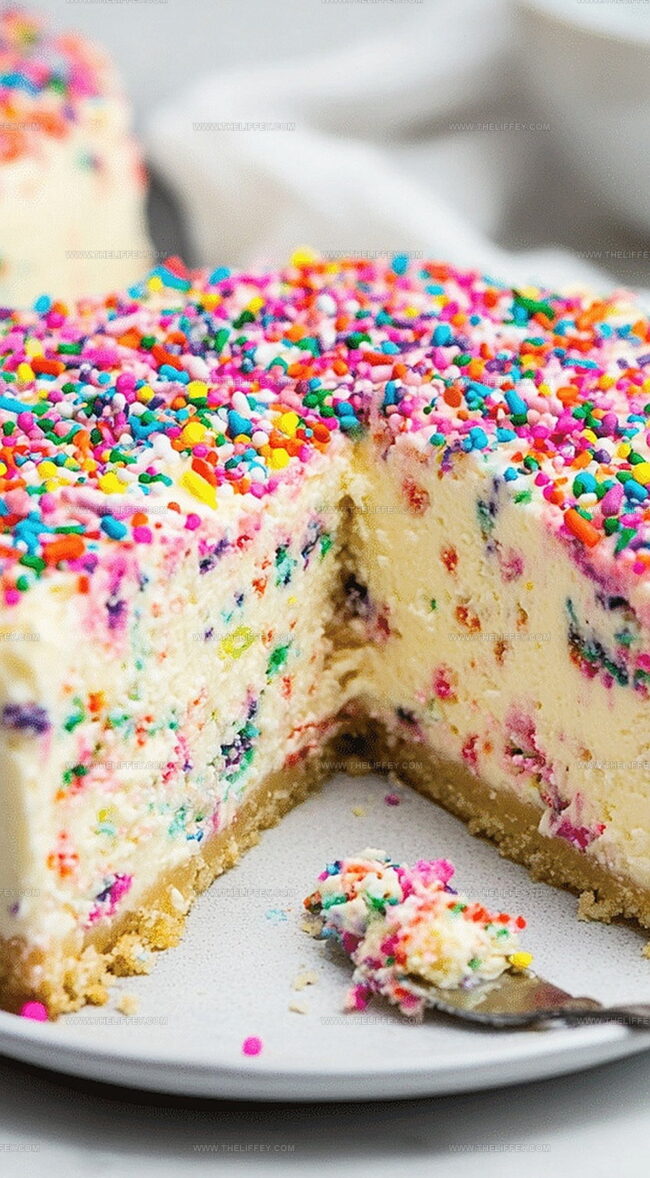
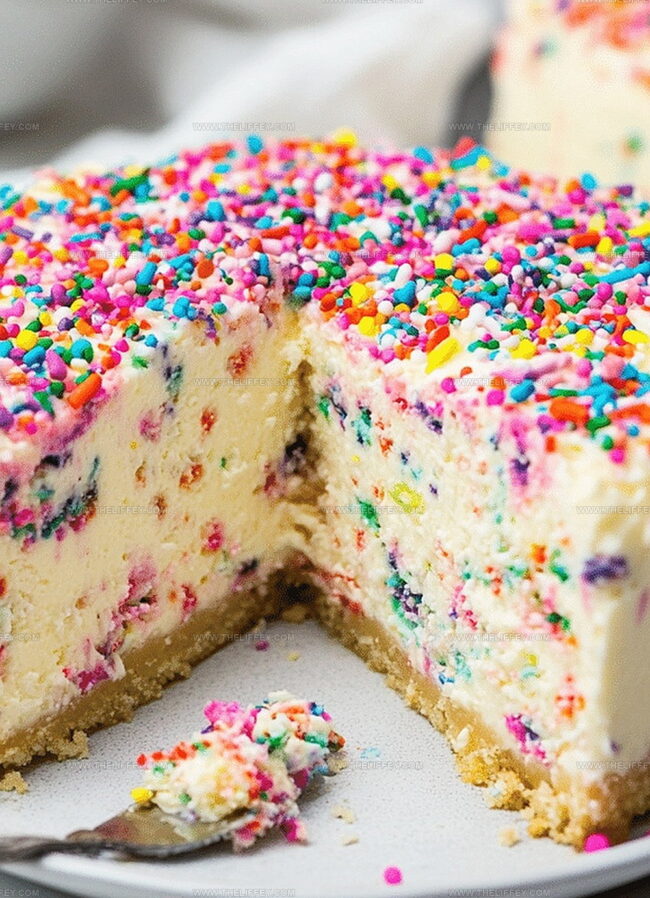
Colorful sprinkles dance across a creamy canvas, promising a dessert that makes everyone smile.
Layers of velvety cream cheese blend perfectly with playful rainbow confetti.
Nostalgic yet sophisticated, this treat captures pure happiness in every single bite.
Creamy textures meld with crunchy sprinkle surprises for an unexpected twist.
Whip up this magical dessert and watch faces light up with pure delight.
You’ll create an instant classic that turns any moment into a party.
Celebrate with Funfetti Cheesecake Delights
Essential Ingredients for Funfetti Cheesecake
Crust:Cheesecake Filling:Decorative Elements:Stepwise Funfetti Cheesecake Baking Guide
Step 1: Warm Up the Oven
Set your oven to 325°F and lightly grease a springform pan with butter or cooking spray to prevent sticking.
Step 2: Create the Crumbly Crust
Mix graham cracker crumbs with melted butter until well combined.
Press the mixture firmly into the bottom of the pan, creating an even layer that will serve as the delicious foundation for your cheesecake.
Step 3: Whip Up the Creamy Filling
In a large mixing bowl, beat cream cheese and sugar until the mixture becomes silky smooth.
Gradually add:Beat thoroughly after each addition to ensure a perfectly blended filling.
Step 4: Sprinkle in the Fun
Gently fold rainbow sprinkles into the cheesecake batter, distributing them evenly throughout the mixture to create colorful bursts of joy.
Step 5: Pour and Smooth
Transfer the sprinkle-filled batter into the prepared crust, using a spatula to create a smooth and even surface.
Step 6: Bake to Perfection
Slide the cheesecake into the preheated oven and bake for 60-70 minutes.
The cake is ready when the center is set but still slightly jiggly.
Step 7: Cool and Chill
Allow the cheesecake to cool completely at room temperature.
Once cooled, refrigerate for at least 4 hours or overnight to achieve the perfect texture.
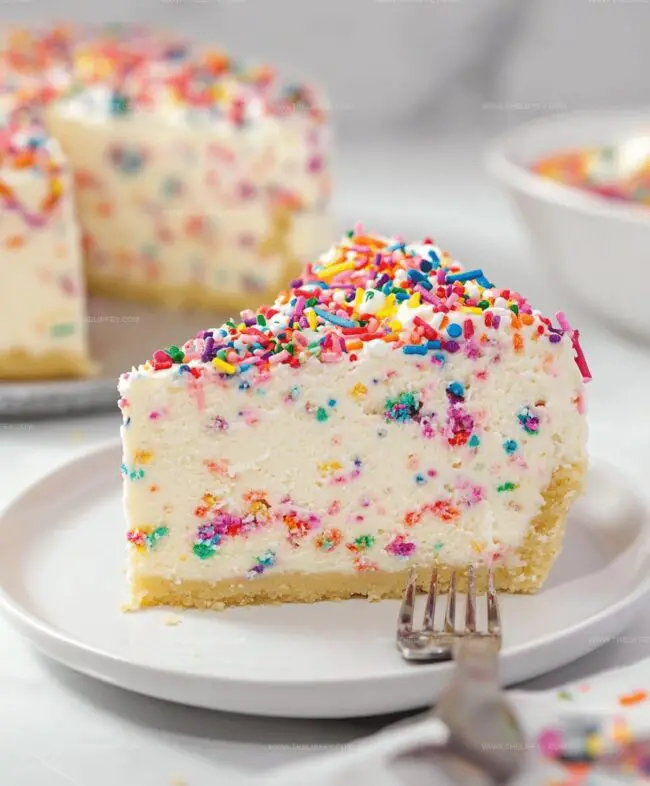
Step 8: Decorate and Serve
Before serving, sprinkle additional rainbow sprinkles on top for an extra pop of color and festive flair.
Pro Tips to Nail Funfetti Cheesecake Texture
Colorful Variations to Try with Funfetti Cheesecake
How to Serve Funfetti Cheesecake Beautifully
Best Ways to Store Funfetti Cheesecake
FAQs
Avoid overmixing the batter, bake in a water bath, and let the cheesecake cool slowly in the oven with the door slightly open to reduce temperature gradually.
Yes, you can use any color or style of sprinkles like jimmies, nonpareils, or even metallic sprinkles to customize your funfetti cheesecake.
A slight jiggle in the center is normal. The cheesecake will continue to set as it cools, so don’t worry if it seems slightly soft.
Print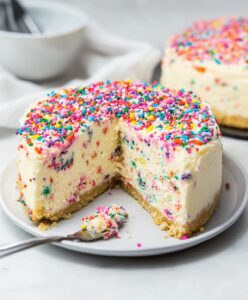
Best Funfetti Cheesecake Recipe
- Total Time: 1 hour 30 minutes
- Yield: 12 1x
Description
Classic funfetti cheesecake blends creamy richness with playful sprinkle-studded layers. Celebratory dessert promises delightful sweetness and nostalgic charm for party guests seeking memorable indulgence.
Ingredients
Main Ingredients:
- 24 ounces (680 grams) cream cheese, softened
- 3 eggs
- 1 cup (240 milliliters) sour cream
- 1 cup (200 grams) sugar
Crust Ingredients:
- 2 cups (240 grams) graham cracker crumbs
- 1/2 cup (113 grams) melted butter
Decorative Ingredients:
- 1/2 cup (80 grams) rainbow sprinkles (plus more for garnish)
- 2 teaspoons vanilla extract
Instructions
- Prepare a 325F oven and lightly coat a springform pan with cooking spray.
- Combine graham cracker crumbs with melted butter, pressing firmly into the pan’s base to create a compact, even crust.
- Using an electric mixer, whip cream cheese and sugar until completely smooth and creamy.
- Gradually incorporate sour cream and vanilla extract, mixing thoroughly after each addition.
- Add eggs individually, blending carefully to maintain a silky texture without overmixing.
- Gently fold rainbow sprinkles into the cheesecake batter, distributing them evenly throughout.
- Transfer the batter into the prepared crust, smoothing the surface with a spatula to eliminate air pockets.
- Bake for 60-70 minutes until the center is set but slightly jiggly, with edges beginning to pull away from the pan.
- Remove from oven and allow to cool completely at room temperature, which prevents cracking.
- Refrigerate the cheesecake for a minimum of 4 hours or preferably overnight to achieve optimal texture and flavor.
- Before serving, decorate the top with additional colorful sprinkles for a festive presentation.
Notes
- Customize the crust by using different cookies like Oreos or shortbread for unique flavor variations.
- Prevent cracks by avoiding overmixing the batter and using room temperature ingredients for smooth, creamy texture.
- Add extra sprinkles directly into the batter for more colorful distribution throughout the cheesecake.
- Wrap the springform pan in aluminum foil to prevent water seepage if using a water bath method for more even baking.
- Prep Time: 20 minutes
- Cook Time: 1 hour 10 minutes
- Category: Desserts
- Method: Baking
- Cuisine: American
Nutrition
- Serving Size: 12
- Calories: 374 kcal
- Sugar: 20 g
- Sodium: 208 mg
- Fat: 29 g
- Saturated Fat: 17 g
- Unsaturated Fat: 11 g
- Trans Fat: 0.5 g
- Carbohydrates: 26 g
- Fiber: 1 g
- Protein: 6 g
- Cholesterol: 84 mg
John Conley
Founder & Culinary Storyteller
Expertise
Recipe Development, Culinary Writing, Home Cooking Techniques, Seasonal Ingredient Utilization
Education
Lane Community College, Eugene, OR
Certificate in Culinary Arts
Focused on foundational cooking techniques, kitchen safety, and menu planning.
Gotham Writers Workshop, New York, NY
Course in Food Writing
Explored the art of crafting engaging culinary narratives and recipe development.
John grew up where food meant connection: big bowls, warm kitchens, and meals that told a story. After earning his Certificate in Culinary Arts from Lane Community College and diving deep into food writing at Gotham Writers Workshop, he found his calling: turning everyday recipes into something worth savoring.
At The Liffey, John’s focus is all about crafting dishes that feel easy, honest, and full of heart.