
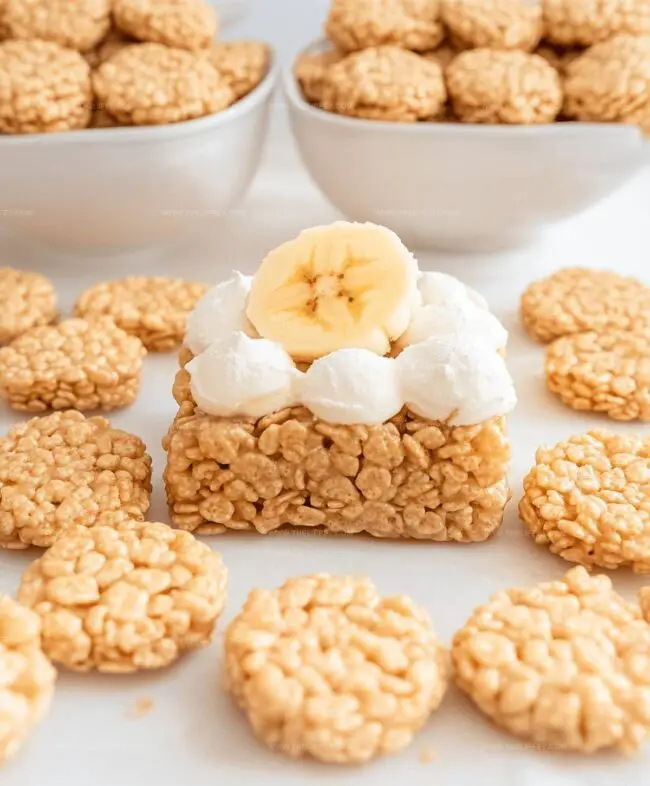
Make Dreamy Banana Pudding Rice Krispies Recipe at Home
Sweet banana pudding meets crispy rice krispies in a dessert that’ll make you swoon.
Nostalgic flavors blend perfectly with childhood memories of creamy treats.
Marshmallow magic mingles with ripe banana goodness for an irresistible snack.
Soft and crunchy textures create a delightful contrast in every single bite.
Comfort food gets a playful twist that surprises and delights.
Simple ingredients come together in minutes for a crowd-pleasing dessert.
You’ll want to whip up this innovative treat that combines classic southern charm with crispy cereal magic.
Dig into this decadent creation and let your taste buds dance with joy.
What Makes Banana Pudding Rice Krispies Special
Ingredients for Banana Pudding Rice Krispies
Base Ingredients:Flavor Enhancers:Finishing Touches:Steps to Make Banana Pudding Rice Krispies
Step 1: Warm Up the Butter
Grab a large pot and place it on the stove.
Turn the heat to low and let the butter slowly melt, creating a smooth, golden base for your delicious treat.
Step 2: Melt the Marshmallows
Pour the marshmallows into the melted butter.
Stir continuously until they transform into a creamy, stretchy mixture that looks like sweet clouds.
Step 3: Create the Flavor Fusion
Take the pot off the heat.
Quickly sprinkle in:Stir everything together until the mixture becomes a delightful, fragrant blend.
Step 4: Mix in the Crunch
Gently fold in:Make sure every morsel gets coated in the sweet, creamy mixture.
Step 5: Shape and Set
Transfer the mixture to a greased 9×13-inch pan.
Use a spatula or your hands to press it down evenly, creating a smooth, compact layer.
Step 6: Add a Chocolate Drizzle
Optional fancy touch: Melt white chocolate and drizzle it over the top of the set mixture for an extra touch of decadence.
Step 7: Slice and Serve
Once the mixture has completely set, cut into squares.
Get ready to enjoy a nostalgic, crispy, creamy dessert that’ll make taste buds dance!
Helpful Notes for Banana Pudding Rice Krispies
Twist Options for Banana Pudding Rice Krispies
Great Sides for Banana Pudding Rice Krispies
Keep Banana Pudding Rice Krispies Fresh
FAQs
No, instant pudding mix works best for consistent flavor and texture in this recipe. Homemade pudding might change the recipe’s stability and binding properties.
Stir continuously when melting marshmallows and work quickly when mixing ingredients. Use a spatula greased with cooking spray to help prevent sticking when pressing into the pan.
Rice Krispies provide the best crunch and classic texture. Other crispy cereals might work, but they could alter the final consistency and taste of the dessert.
Yes, use gluten-free Rice Krispies and gluten-free vanilla wafers to create a celiac-friendly version of this dessert.
Print
Banana Pudding Rice Krispies Recipe
- Total Time: 15 minutes
- Yield: 12 1x
Description
Creamy banana pudding rice krispies merge classic Southern dessert magic with nostalgic treat perfection. Sweet marshmallow squares combine banana flavor and pudding richness for an irresistible snack you’ll crave instantly.
Ingredients
Main Ingredients:
- 6 cups rice krispies cereal
- 1 bag (10 ounces) mini marshmallows
- 1 package (3.4 ounces) instant banana pudding mix
Binding and Flavor Ingredients:
- 4 tablespoons unsalted butter
- 1 teaspoon vanilla extract
- 1/2 cup white chocolate chips (optional)
Topping Ingredient:
- 1 cup crushed vanilla wafer cookies
Instructions
- Gently melt butter in a spacious saucepan over low heat, creating a smooth base for the mixture.
- Gradually incorporate marshmallows, stirring continuously until they transform into a silky, molten consistency.
- Immediately remove the pan from heat and swiftly integrate banana pudding powder and vanilla extract, blending thoroughly.
- Delicately fold Rice Krispies cereal and crumbled vanilla wafers into the marshmallow mixture, ensuring every morsel receives an even coating.
- Transfer the sticky concoction into a prepared 9×13-inch pan, using gentle pressure to distribute evenly and create a uniform surface.
- Allow the treat to set at room temperature for approximately 30-45 minutes until firm and cohesive.
- Optional: Drizzle melted white chocolate across the surface for an elegant finishing touch.
- Once completely cooled, slice into neat squares using a sharp knife for clean, precise cuts.
Notes
- Adjust marshmallow quantity based on desired consistency, adding more for softer treats or less for firmer bars.
- Crush vanilla wafers finely for smoother texture or leave slightly chunky for added crunch and visual interest.
- Swap regular marshmallows with mini marshmallows for faster melting and more even distribution throughout the mixture.
- Use dairy-free white chocolate and vegan marshmallows to create a plant-based version of this nostalgic dessert.
- Prep Time: 15 minutes
- Cook Time: 0 minutes
- Category: Desserts, Snacks
- Method: Melting
- Cuisine: American
Nutrition
- Serving Size: 12
- Calories: 202
- Sugar: 15 g
- Sodium: 110 mg
- Fat: 7 g
- Saturated Fat: 4 g
- Unsaturated Fat: 3 g
- Trans Fat: 0 g
- Carbohydrates: 34 g
- Fiber: 1 g
- Protein: 2 g
- Cholesterol: 12 mg
Amanda Bennett
Recipe Curator & Culinary Educator
Expertise
Baking and Pastry Arts, Recipe Testing and Development, Culinary Instruction, Food Styling and Photography
Education
Asheville-Buncombe Technical Community College, Asheville, NC
Diploma in Culinary Arts
Emphasized practical cooking skills, nutrition, and kitchen management.
Cambridge School of Culinary Arts, Cambridge, MA
Certificate in Professional Pastry Arts
Specialized in baking techniques, dessert presentation, and flavor profiling
Amanda’s roots run deep in the Southern hills, where every meal started fresh from the garden and every dessert came with a story. She trained at Asheville-Buncombe Technical Community College and sharpened her pastry skills at the Cambridge School of Culinary Arts, blending classic technique with everyday charm.
At The Liffey, Amanda’s passion is making baking and home cooking feel natural and joyful. She’s all about single recipes that are simple enough for a busy afternoon, but special enough to make someone’s day a little sweeter.